3 min to read
Passwordless authentication with Microsoft Authenticator App
Password-less Authentication with Microsoft Authenticator App
Microsoft offers a Password-less Authentication option to make users convenient. Using this feature users can logon to the Azure AD account without using a Password.
You can enable this Password-less Authentication method using the below options:
- Windows Hello for Business
- Microsoft Authenticator app
- FIDO2 security keys
Here we are going to delve into Password-less Authentication using Microsoft Authenticator app.
Prerequisites:
- Azure MFA, with push notifications allowed as a verification method
- Install the Microsoft Authenticator app on mobile (The latest version of the Microsoft Authentication App installed on IOS 8.0 or greater/Android 6.0 or greater)
Microsoft Authenticator app:
Using the Microsoft Authenticator app, users can log into any Azure AD account without using a password.
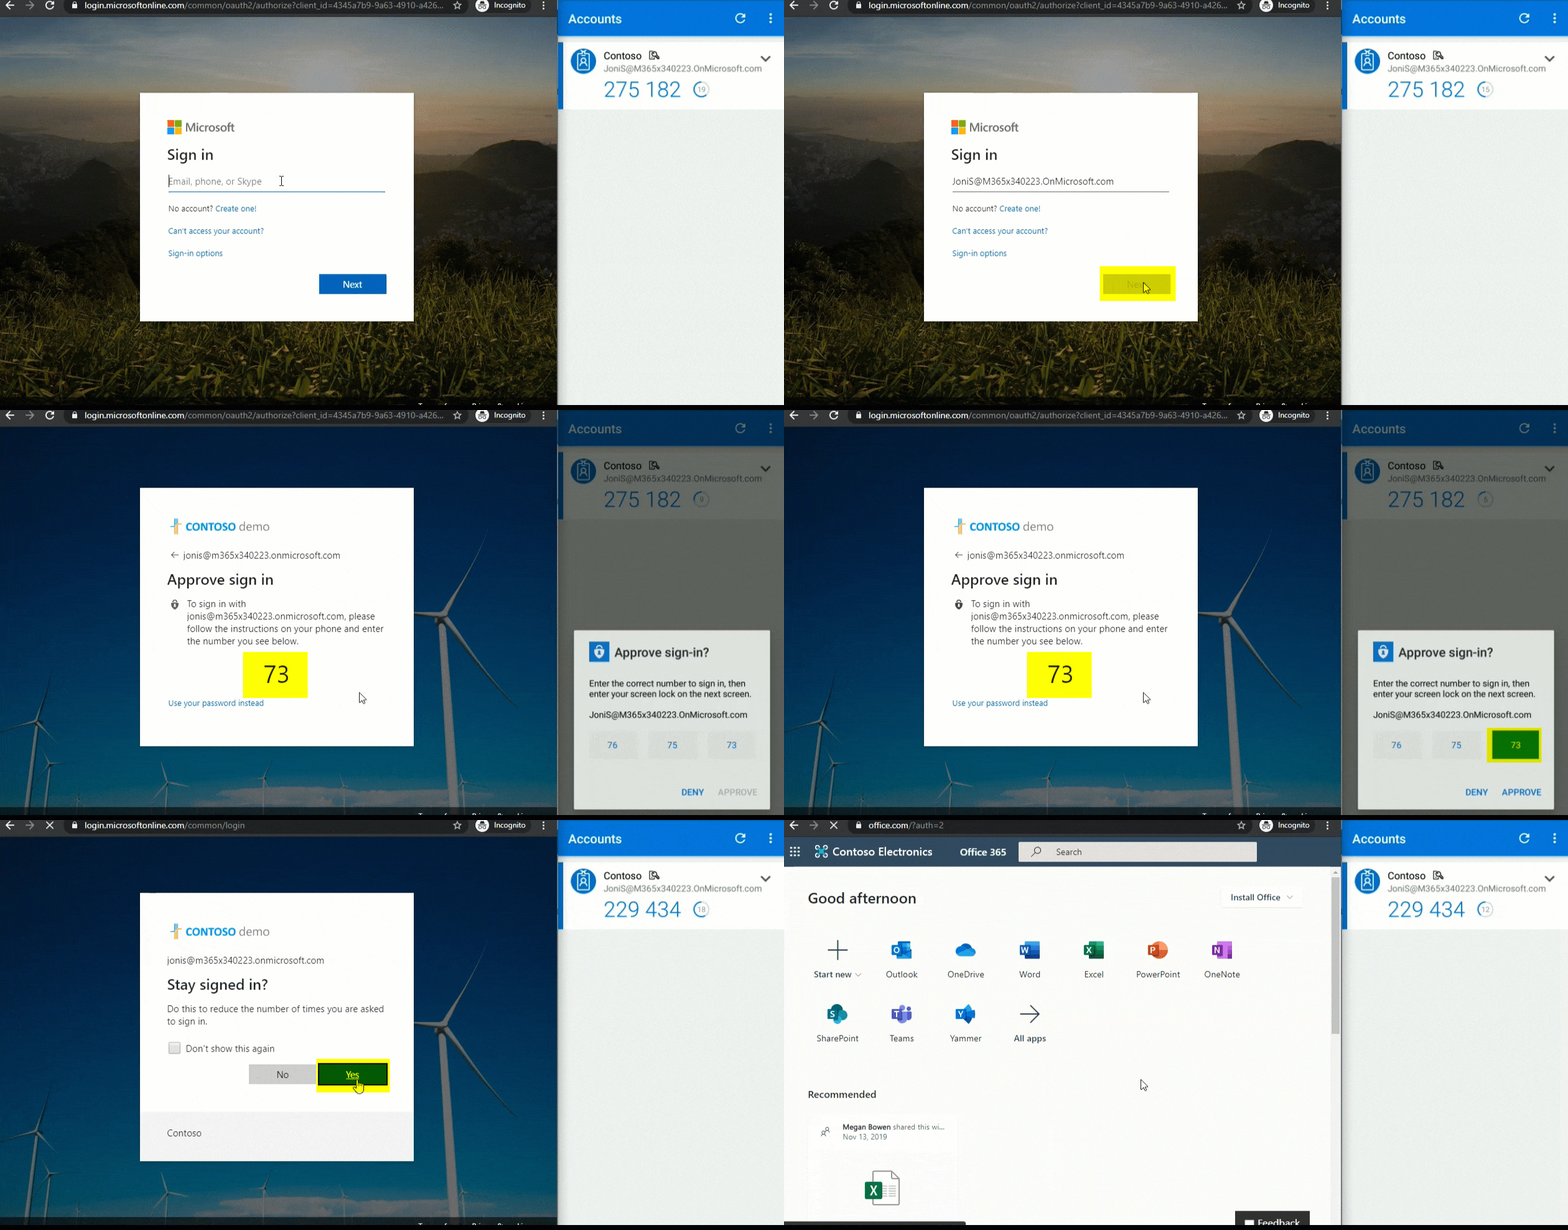
After users log in to Azure AD account with their username, rather than giving their password, they can tap the number in their app, which is displayed on their login screen (ex.89). User needs to match the exact number in their mobile app and then click approve to open the Azure AD account. This happens only the user enables a phone sign-in.
How to Enable Password-less sign-in:
Follow the below steps to enable Password-less sign-in
- Enable MFA for user
- Install Microsoft Authenticator app
- Enable Password-less sign-in authentication method
- User registration and management of the Microsoft Authenticator app
Enable MFA for user:
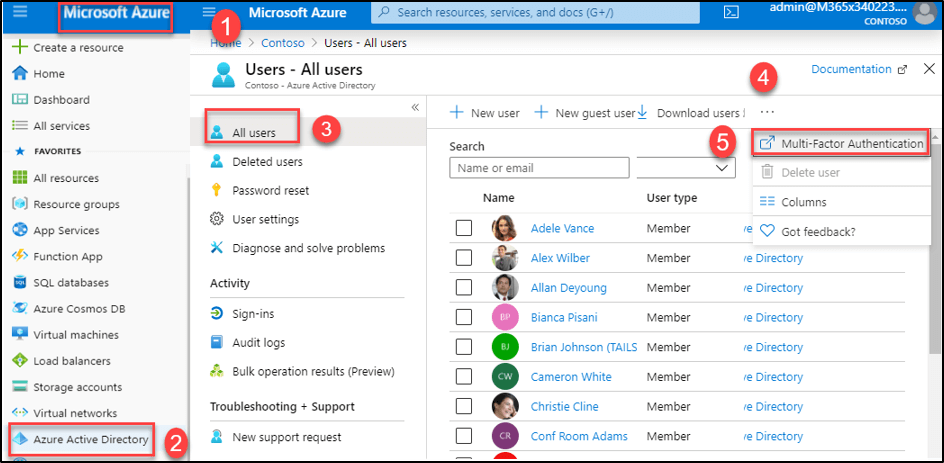
The first step is to enable an MFA for user, you can enable MFA from Microsoft Azure portal → Azure Active Directory → Users → Multi-factor Authentication
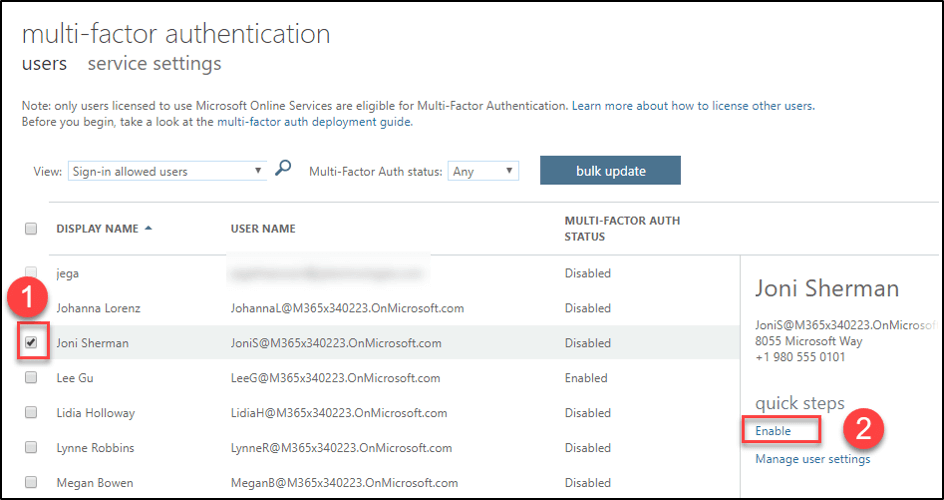
Now select a user and Enable MFA
Enable Password-less sign-in authentication method:
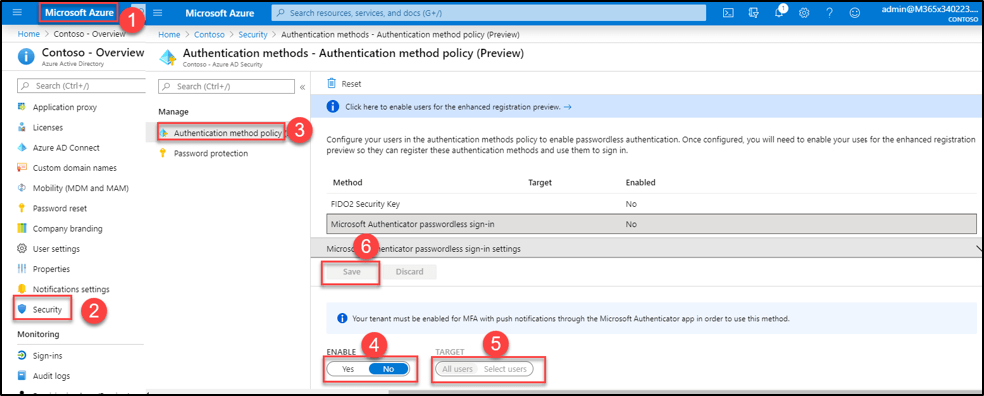
To enable Password-less phone sign-in, follow the steps given below:
- Sign-in to the Azure portal
- Go to Azure Active Directory → Security → Authentication methods → Authenticated method policy
- Click Microsoft Authenticator Password-less sign-in → Select Enable to Yes → Target—All users/selected users.
- Click Save.
User registration and management of Microsoft Authenticator app:
-
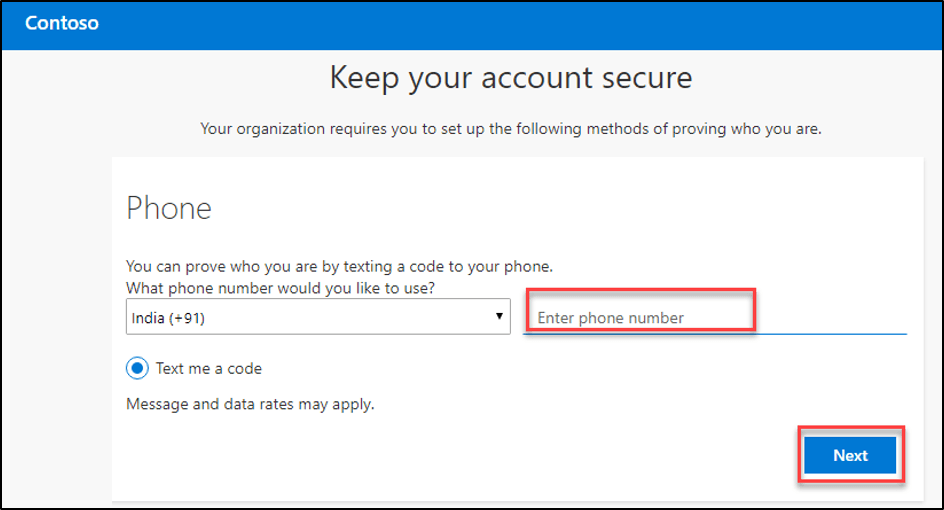
Sign-in into a User account with MFA
-
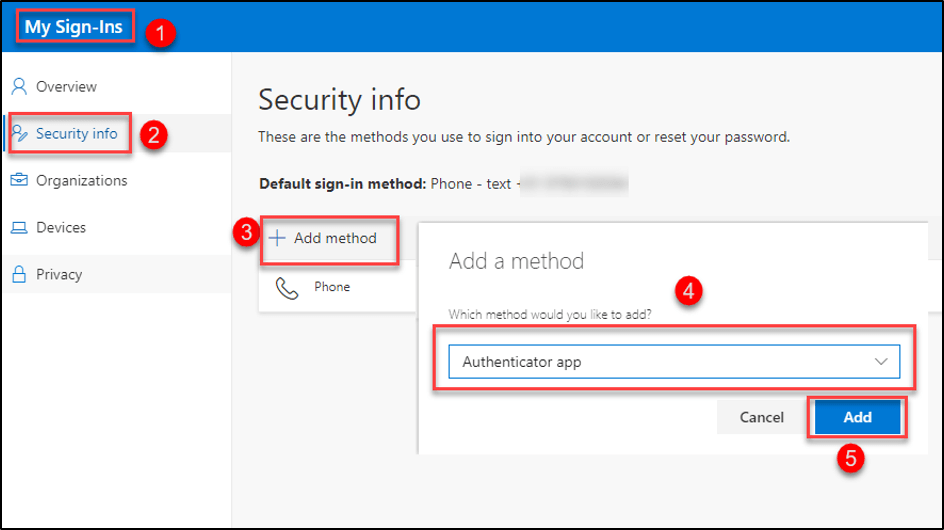
And Go to https://aka.ms/mysecurityinfo → Security info → Add method → Select Authenticator app
-
After the above walk, it shows the QR code,
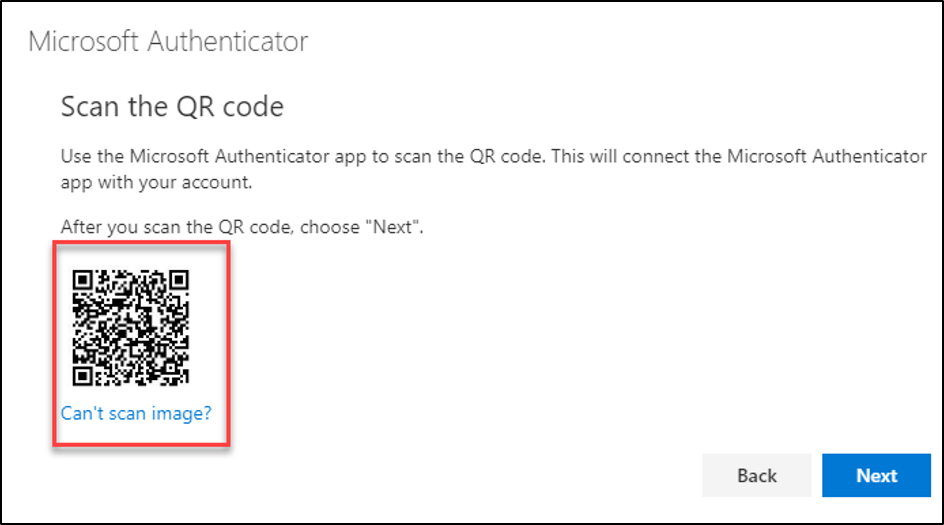
Now let’s hop into mobile app to scan this QR code by clicking ADD ACCOUNT in mobile app and click next
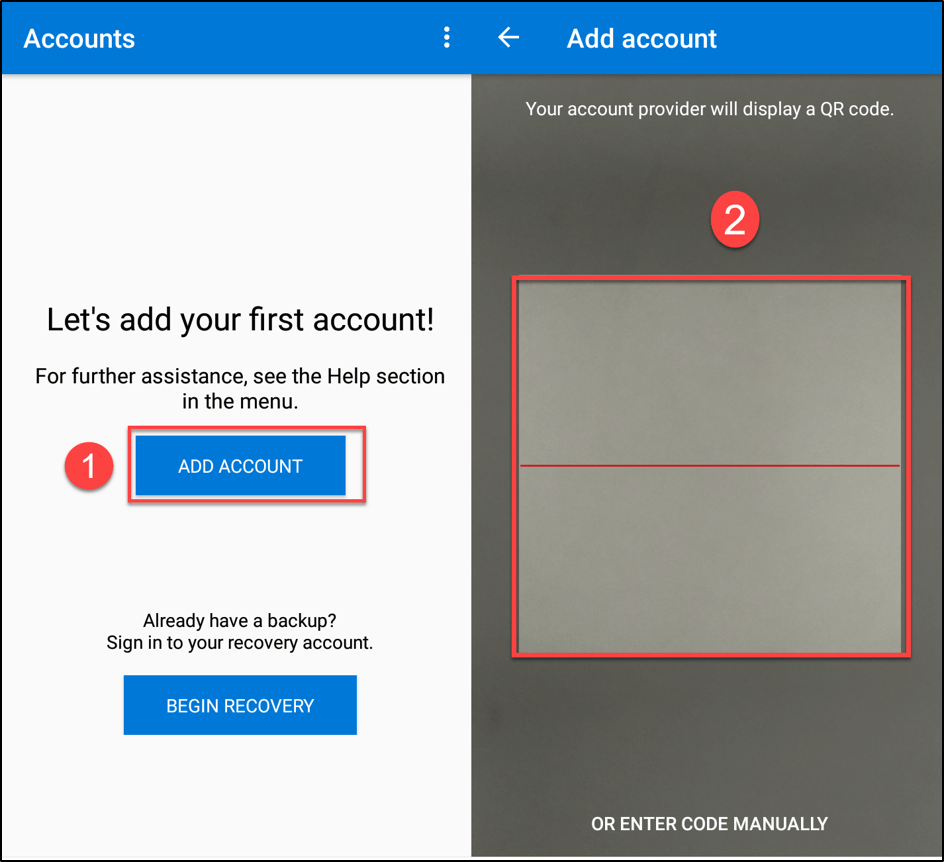
Once the scanning is completed you need to approve the request, now the account gets added in your app. -
Now select Enable phone sign-in and click continue to link the account.
- Then sign in with username and password
- It asks to type the code which is sent to your mobile.

That’s it now we enabled phone sign-in successfully.
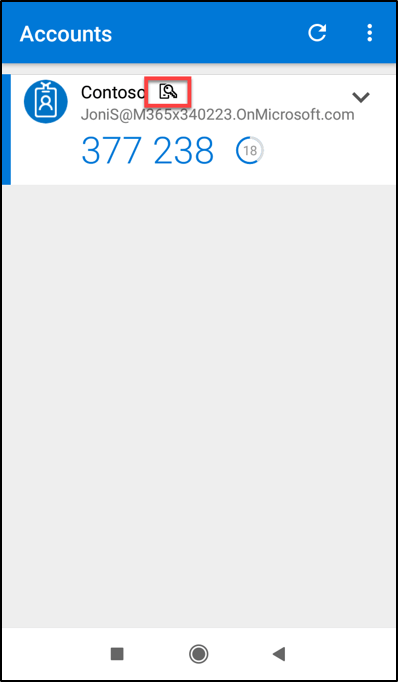
User Experience:
Now be ready to watch the user activity, how the user is getting logged into the portal without giving their password.
Now Joni Sherman is going to move into their portal
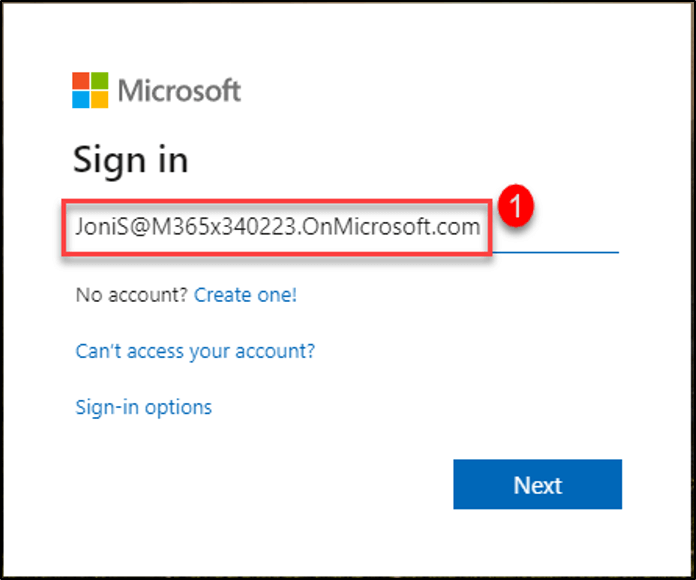
After entering the Username, it shows a number to tap in mobile app
Tap the number in the Authenticator app and then click Approve.
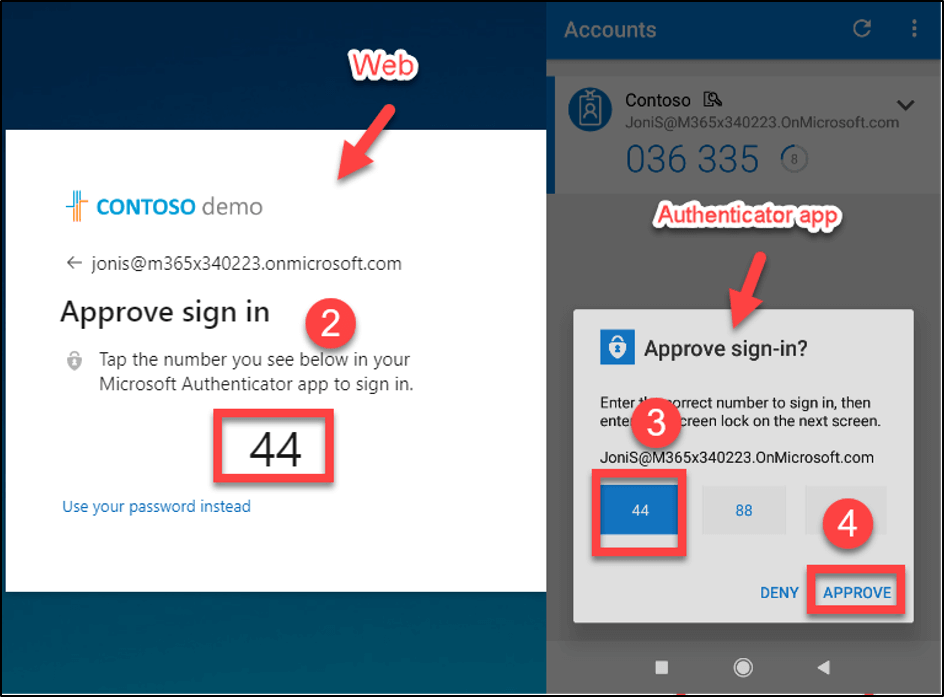
Now you logged into Azure AD successfully.
