API Connector in Azure AD B2C provides a way to call a HTTP endpoint with authentication. And then it can be used in a specific step in user flow. By this way, we can validate the user input data, verify user identity to add extra level of security to the sign-up and sign-in process.
Once API Connector is configured to use with specific user flow, whenever a user reaches the specific step, the API is invoked with user’s claim information as key-value pair in json body. API makes the required process and send the response. The API response will affect the user flow like can block the sign-up flow, update attribute information etc.
This blog explains how to limit sign-up process to specific set of domains [outlook.com, gmail.com] in Azure AD B2C.
Prerequisites
- Azure service with subscription.
- Azure Active Directory B2C.
- Function app in Azure AD.
- Azure Active Directory application.
Steps
We will be using Azure Function App to host our API which will be called during the sign-up process to check the allowed domains.
- Create Azure Function App for domain validation
- Create an API connector in Azure AD B2C
- Create User Flow with Email signup
- Configure User Flow with API Connector
To create an Azure AD B2C tenant, follow the below docs.
Tutorial Create an Azure Active Directory B2C tenant Microsoft Docs
Create Azure Function App for domain validation
Use the below sample to create an Azure Function App.
Reference link: https://github.com/Azure-Samples/active-directory-nodejs-external-identities-api-connector-azure-function-validate
Follow the steps shown on the reference link document to create an Azure Function app.
In this example, we are only going to allow domain names – outlook.com or gmail.com or onmicrosoft.com in the signup process.
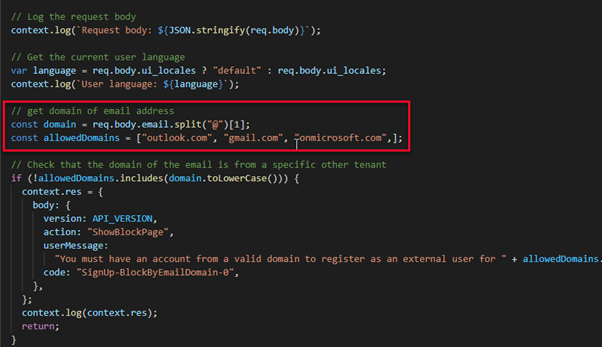
If wish to validate other user claims, write your own custom logic in index.js file in Azure Function.
Create an API connector in Azure AD B2C
Go to the Azure AD B2C resource. Under the Manage panel and select the API connector and click the New API connector.
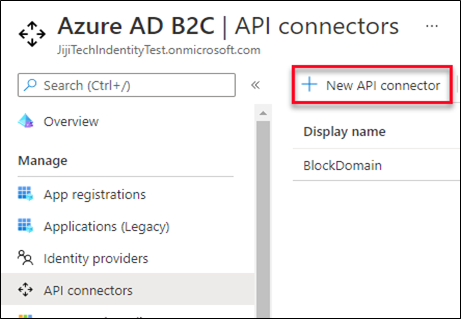
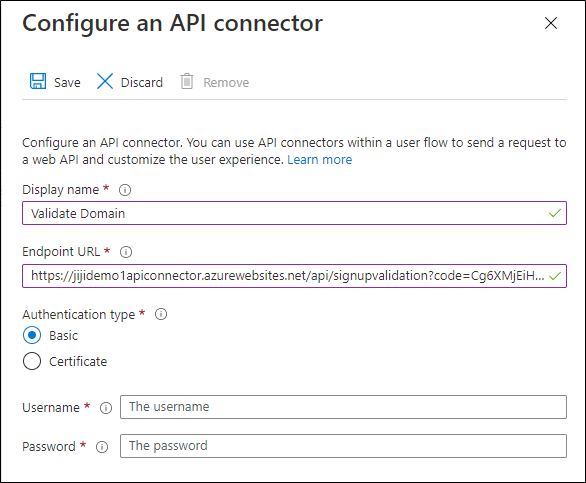
Provide an API connector name.
Endpoint URL as function URL of the Azure Function that we created in the previous step. Make sure the authentication type is set properly.
API connector configuration in the User Flow
Create an Azure app
Before creating a user flow, we need to create an Azure AD app. Go to Azure AD B2C resource, click the App Registration option under the Manage panel and click New registration link
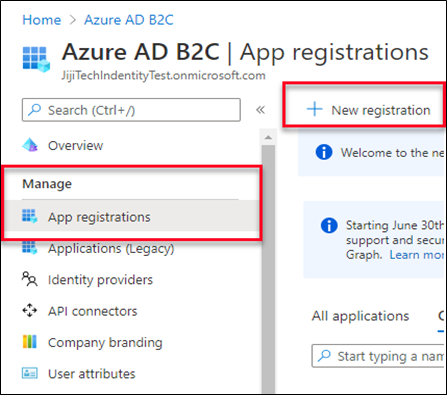
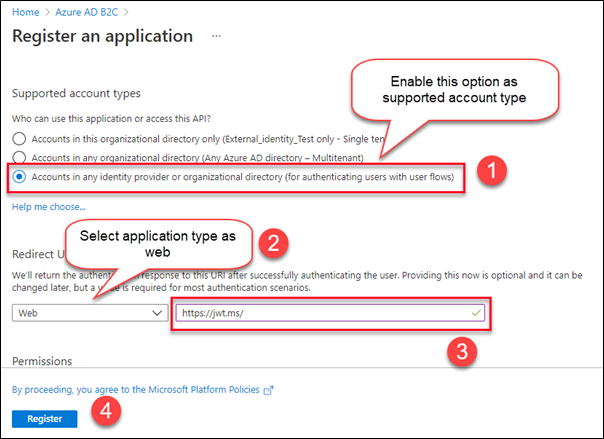
Once click the New registration, it will open the Register an application window and we need to configure the below setting in the Register an application window.
- Select the supported account type as an Account in any identity provider or organizational directory (for authenticating users in user flow).
- Select your Azure application type as web.
- Provide your redirect uri as https://jwt.ms/.
- Click “Register”
After register your application, go to created application under the Manage panel, click the Authentication option, enable Access token and ID token to get access token after sign in process.

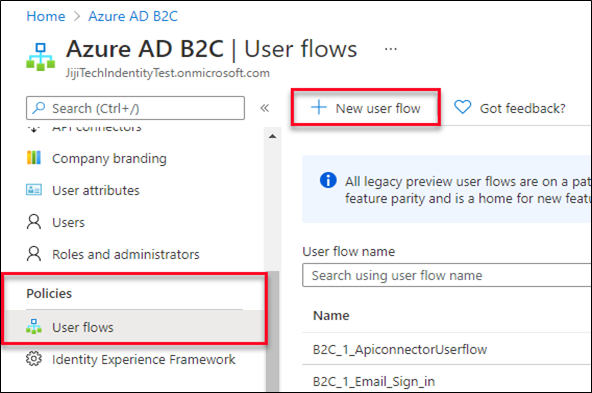
Create User flow
Go to Azure AD B2C resource, click the User flow option under the Manage panel and click the New user flow option.
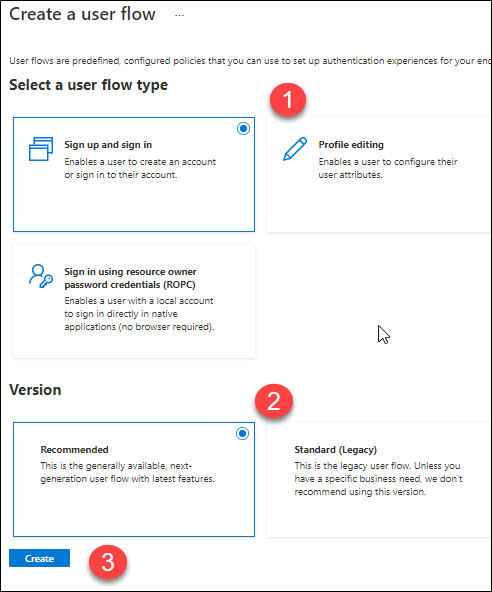
It will navigate the new page to configure the user flow type and version, in this page need to select the following setting as show in the below image.
- Select the user flow type as sign in and sign up.
- Select the user flow version as recommended.
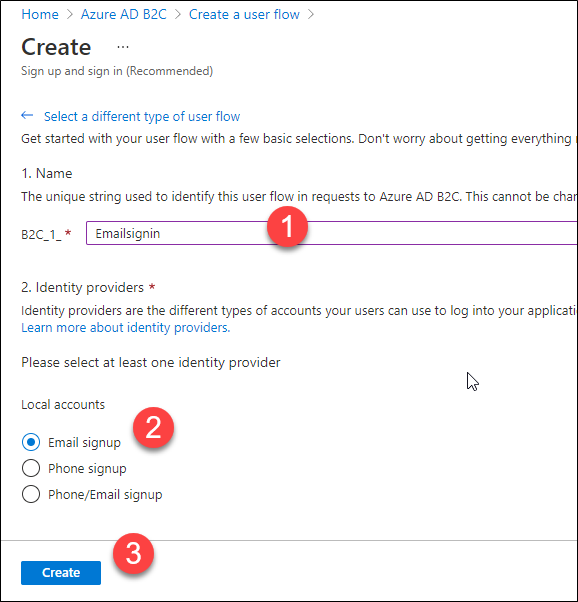
Provide the user flow setting in the next page.
- Provide your user flow name.
- Select identity provider type as email sign in.
- Enable user attributes what we want.
- Next, create your user flow.
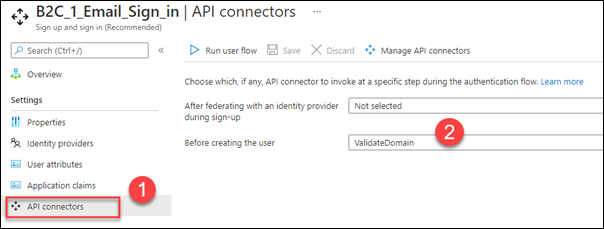
Define the API connector authentication flow
Go to API connector option under the settings panel in the user flow and select the required values. By default, we can define authentication process in two stages:
After signing in with an identity provider: The API connector validate the user information only on sign in process.
Before creating the user: The API connector validate the user information on both sign in and signup process.
In our sample, since we are going to validate the domain before the signup, use “Before creating the user” option.
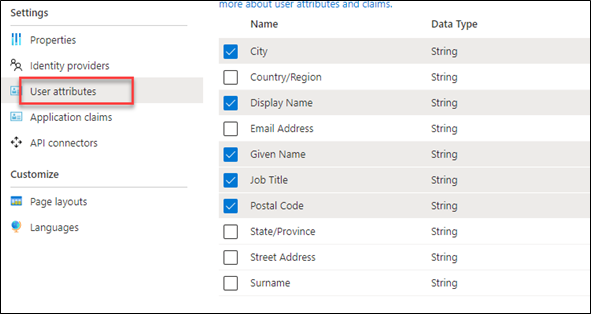
If want to get more user attributes from a user, go to the User flow Settings User attributes and enable the attributes what you want.
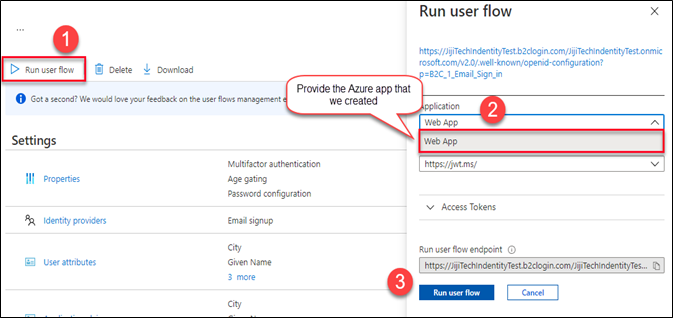
Run the user flow
Go to the user flow and click the “Run User flow ” link. It will open the run user flow popup. Provide the Azure app that we created in the previous steps. Click the user flow link or copy the run user flow endpoint for user Sign in/ Sign up process.
User Experience
User Sign-up
Click the sign up option.
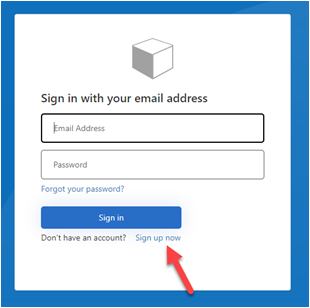
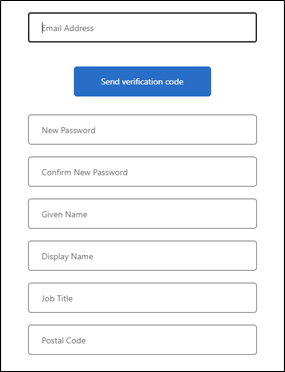
In the signup page, it will show all the user claim attributes that we selected in the user flow.
User Sign-in
After completing the sign-up process, user can be able to sign in.
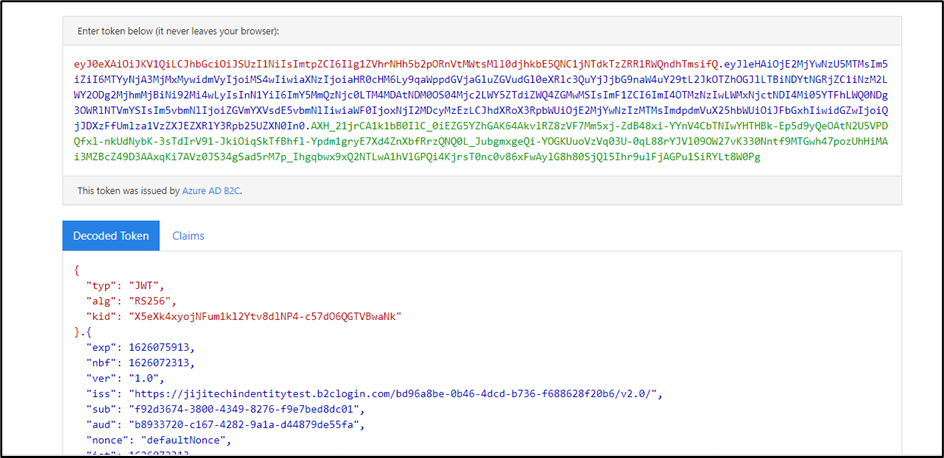
Once user complete the sign in process, user will see their access token and their claims.
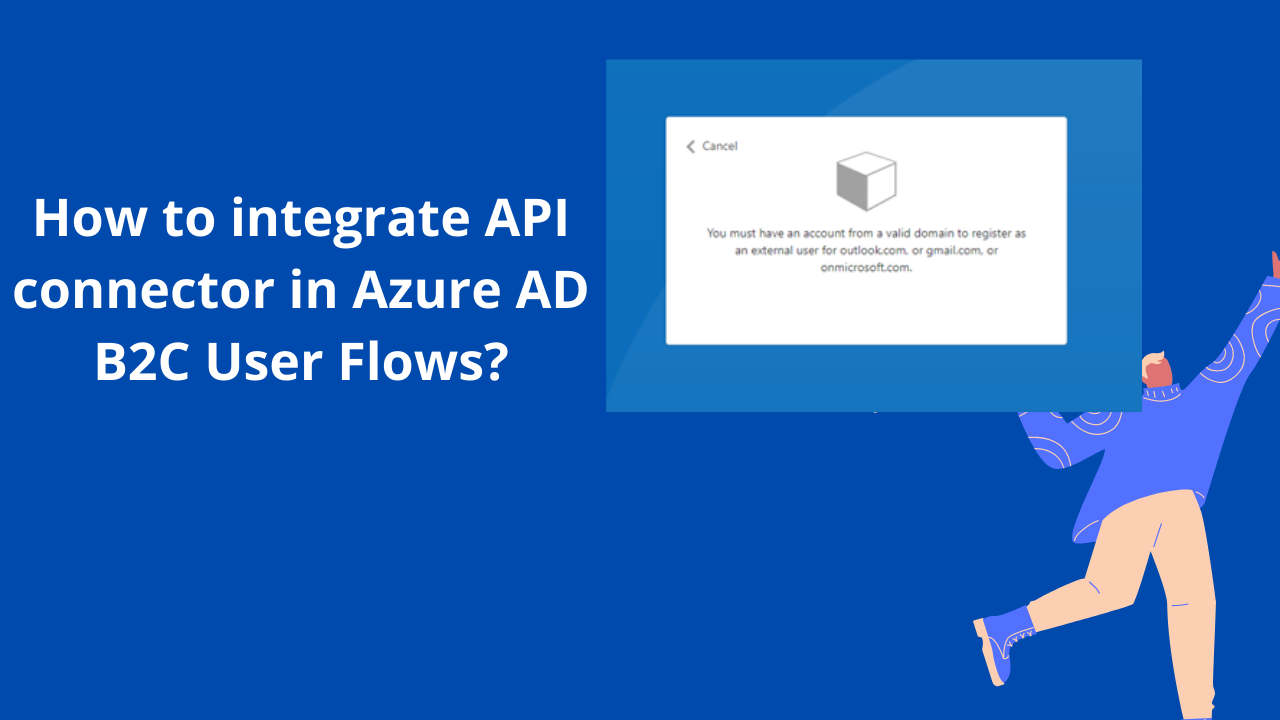
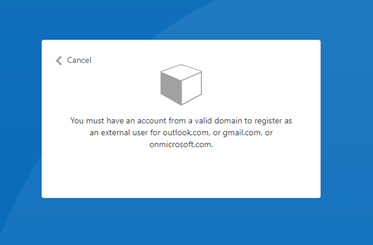
Sign-up from invalid domain
If sign-up from out of the domain. We will see that an alert information from azure function
Reference
https://docs.microsoft.com/en-us/azure/active-directory-b2c/add-api-connector?pivots=b2c-user-flow