Why backup locally? Why not Azure?
With the advent of Windows Azure the outlook of Small Business concerns
has changed from “Impossible to I’m Possible”! Yes that’s true, this is
because Windows Azure assures to take care of the configuration
responsibilities, this reduces our burden to just read the menu and
taste the Food of our choice. One of the best sellers from the Windows
Azure’s menu is Windows Azure Backup Vault. This service reduces our
onsite storage dependencies. Windows Azure Backup Vault is a part of
Windows Azure Recovery Services. You can backup your data in on-premises
Windows Servers to Azure Backup Vault. This vault acts as cloud storage
to back up the data from Windows Server in an encrypted form. The backup
data from the Azure Backup Vault can be restored to the original
registered server or in case of server crash, it can be restored to the
new server.
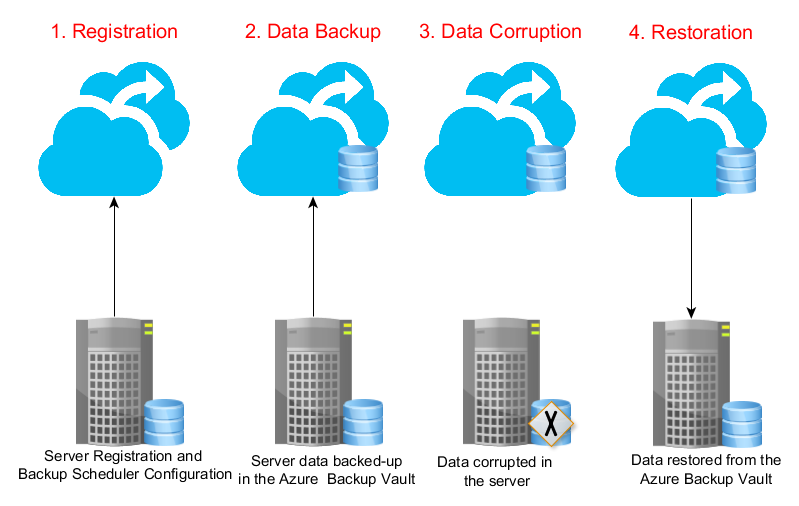
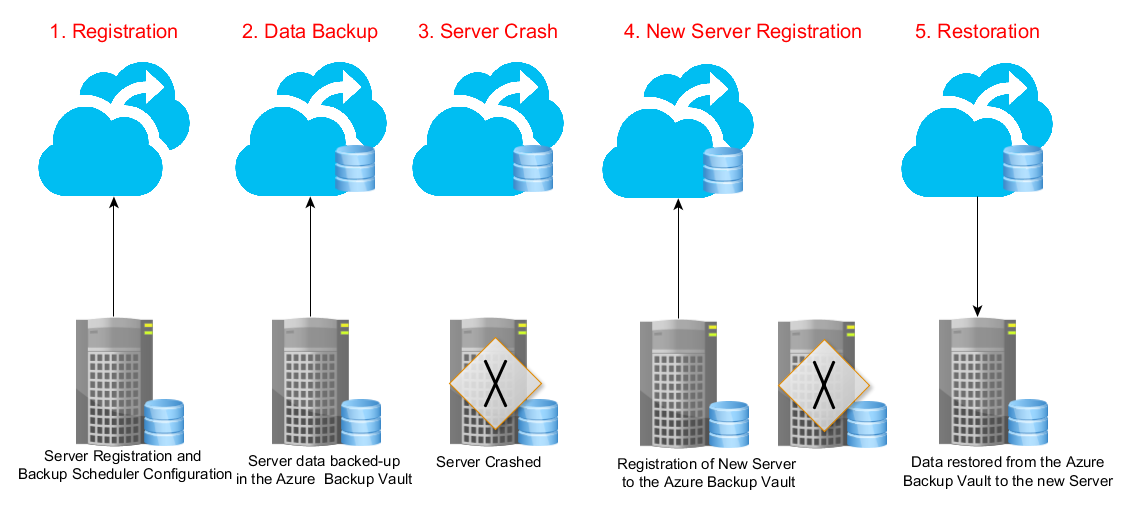
The below images shows how we can recover data in case of file
corruption or server crash.
Scenario 1: Files in the original server corrupted
Scenario 2: Original backup server crashed
Windows Server 2008 R2 SP1 or higher
Lab Environment
Server1 – Windows Server 2012 (Server whose data to be backed up to
Windows Azure Backup Vault)
Server2 – Windows Server 2012 (Server for recovering the data from
Windows Azure Backup Vault)
Steps
This article includes the following tasks,
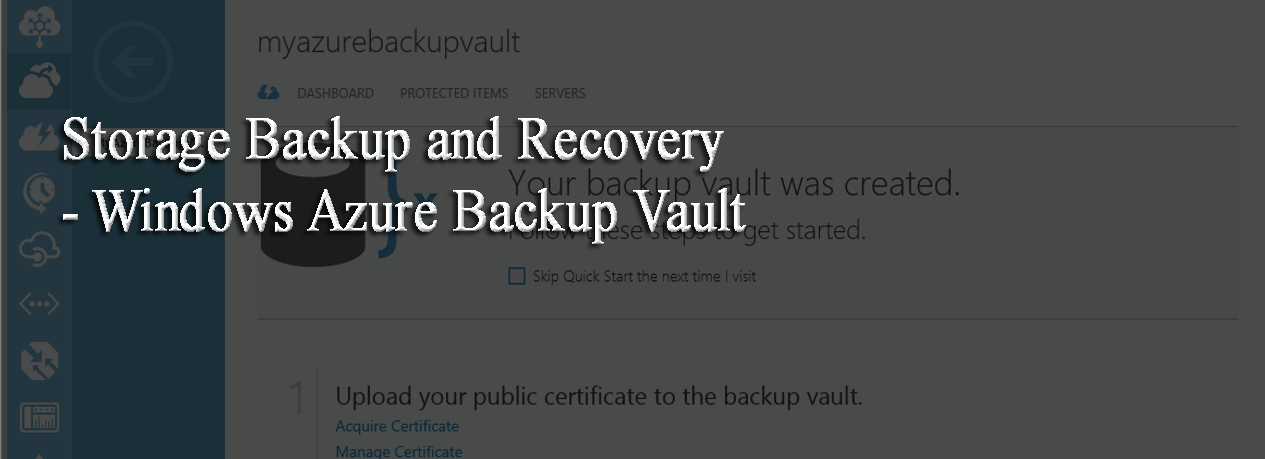
Create Windows Azure Backup Vault
- To create the backup vault login to windows
azure and from the left pane
bottom section you can select “New” option, which in turn displays a
new page for creating new items in windows azure. - Now select DATA SERVICES -> RECOVERY SERVICES -> BACKUP VAULT ->
QUICK CREATE as shown below,
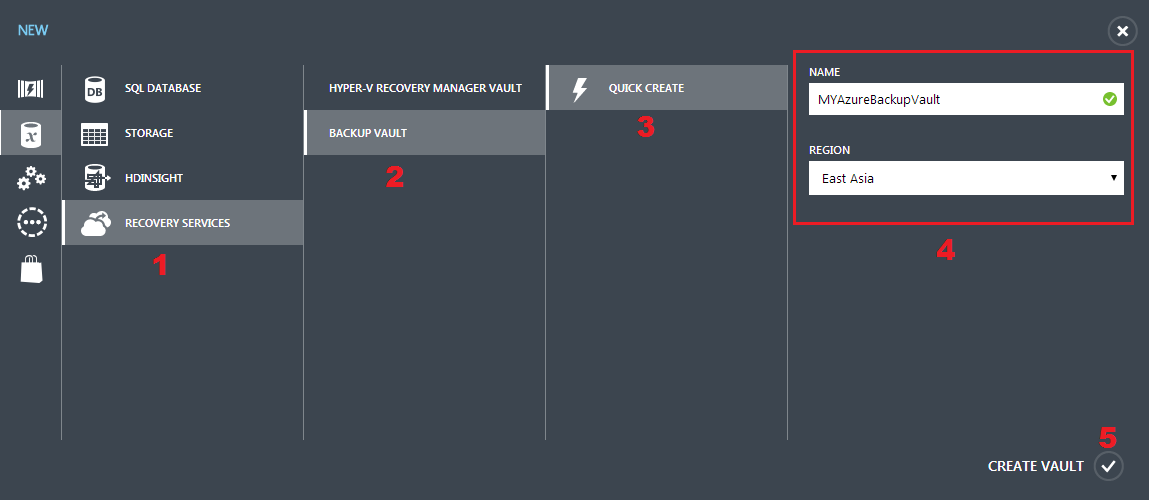
- Now the Windows Azure Backup Vault creation is completed.
Create certificate using makecert command
Windows Azure Backup Vault authenticates the servers using SSL
certificate. We need to create a client authentication certificate using
makecert. This certificate will be uploaded to the created backup vault.
And also we need to install this certificate in the servers that will
work with Windows Azure Backup Vault. Servers with this certificate can
alone be registered with the created Windows Azure Backup Vault.
We need to store this certificate in secure place for future use. In
case of the server crash, when we create a server and restore the backup
items to the new server from the Windows Azure Backup Vault, we need to
install this certificate to register with the Windows Azure Backup
Vault.
The created certificate should have
- Client athentication Enhanced Key Usage(eku)
- Minimum of 2048 bit key length
- Validity period less than 3 years
As a first step in Server1, let’s create a certificate using the
makecert command as given below,
makecert.exe -r -pe -n CN=CertificateName -ss my -sr localmachine -eku
1.3.6.1.5.5.7.3.2 -len 2048 -e 01/01/2016 YourCertificateName.cer
Checkout this
link
on options available in makecert command.
- By default makecert.exe will not be available. MakeCert is available
as part of the Windows SDK, which you can download from this
link - After installing the Windows SDK, to create certificate you need to
open command prompt and navigate to this path “C:Program
FilesMicrosoft SDKsWindowsv7.1Bin” and execute the command
as given below,

- Now the certificate creation is completed.
Export certificate to .PFX format
Now export this certificate to .PFX format and store it in a secure
location different from this server for future use.
NOTE:
A .PFX file is an encrypted security file that stores secure
certificates for authenticating people or devices. In simple words, .PFX
file is a storage format which needs to be stored in a secured location
and in future it can be changed to .CER format for website
authentication.
A .CER file is a security file that is used to verify the authenticity
of a website. In simple words, .CER is a deployable format for the
authentication of a website.
Steps to export the certificate to .PFX format,
- Open MMC and connect to Certificates snap-in as shown in the below
screenshot,
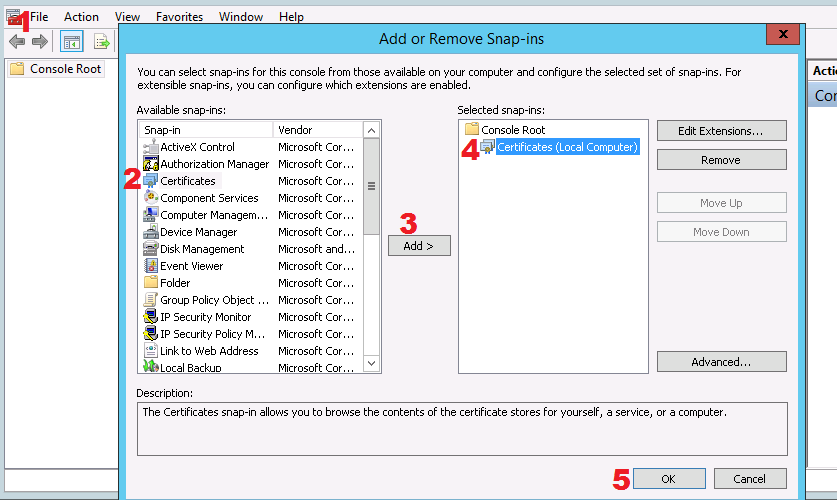
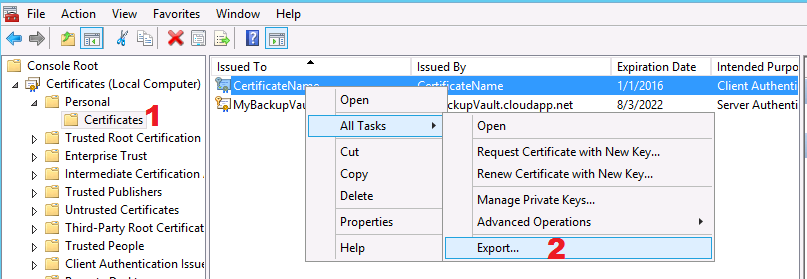
- After connecting to the Certificates snap-in, in the left pane
navigate to Personal Certificates folder and right click on the
certificate created using makecert and export it as shown below,
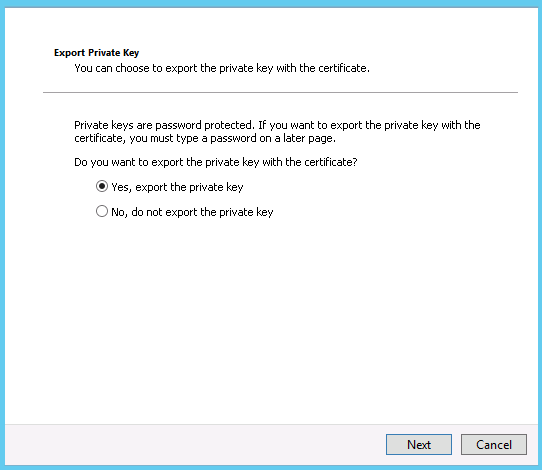
- Now follow the below screenshots for steps to export the certificate
in .PFX format from the Server1,
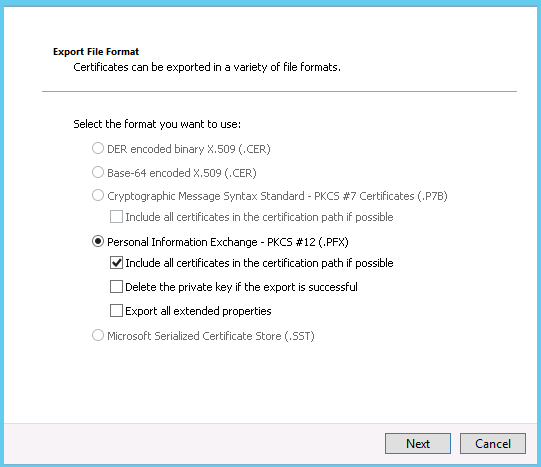
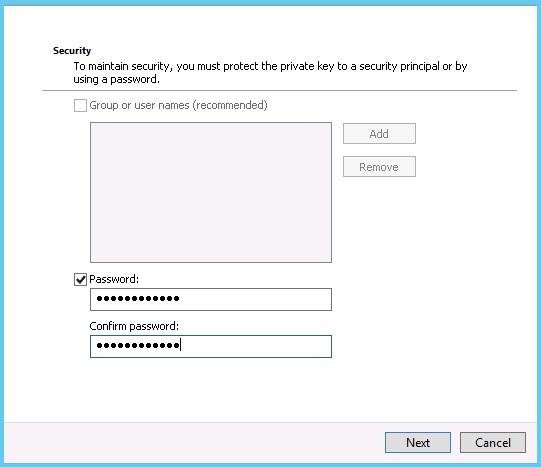
- Finally browse the file path and export the certificate in .PFX
format as given below,
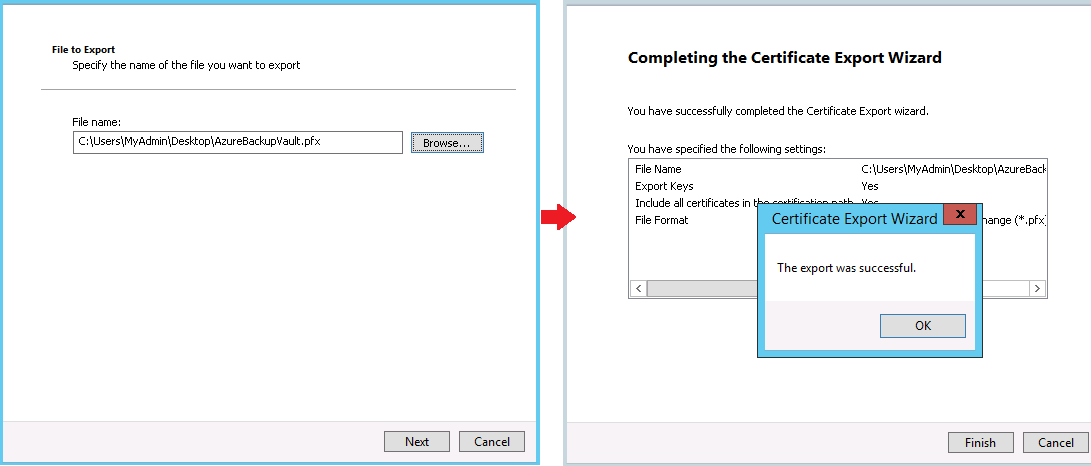
- Now the certificate is exported to .PFX format.
Export certificate to .CER format
In this section we will export the certificate to .CER format for
uploading it to Windows Azure Backup.
Steps to export the certificate to .CER format,
- For opening MMC and connecting the Certificates snap-in, you canrepeat the first two steps as in section “Export certificate to .PFXformat”.
- Now follow the below screenshots for steps to export the certificatein .CER format from the Server1,
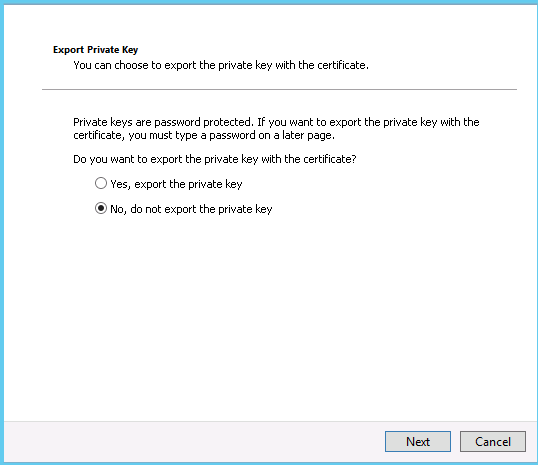
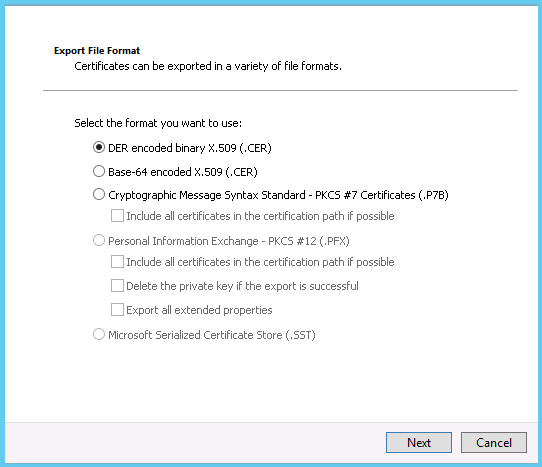
- Finally browse the file path and export the certificate in .CER
format as given below,
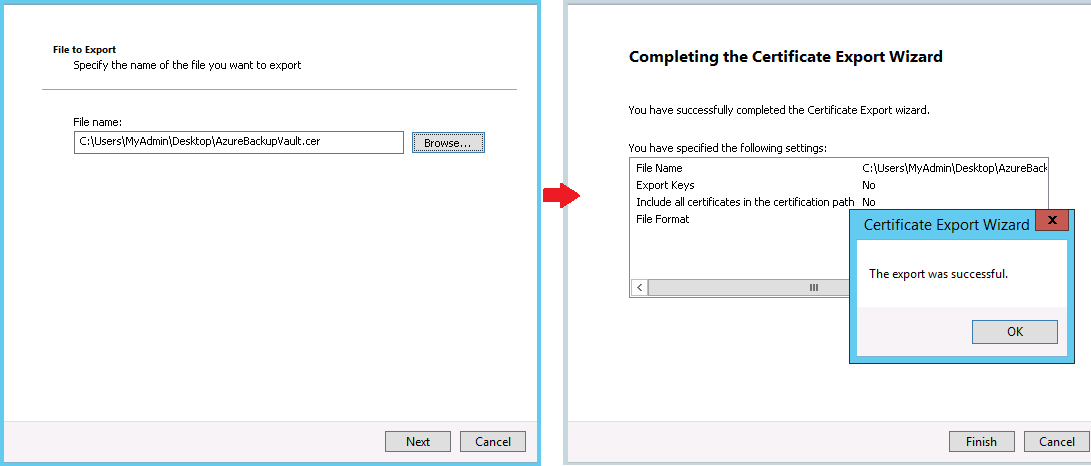
- Now the certificate is exported to .CER format.
Upload .CER certificate to Windows Azure Backup Vault
To create the authentication between the server and the windows azure,
you need to upload the exported certificate in .CER format to Windows
Azure Backup Vault.
Steps to upload .CER certificate to Windows Azure Backup Vault,
Now login to windows azure from the Server1.
- In the windows azure portal, from the left pane, navigate toRecovery Services and select the Backup Vault and click “ManageCertificate” as show below,
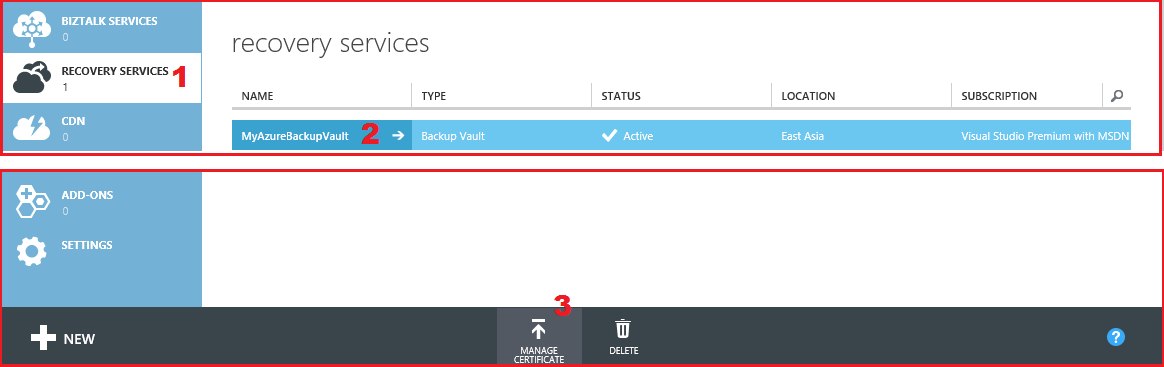
- As a result, a pop-up appears, in which provide the file path of the
certificate for uploading the certificate to the windows azure as
shown below,

- Now the certificate is uploaded to windows azure, this confirms that
the authentication is created between the server and the windows
azure backup vault.
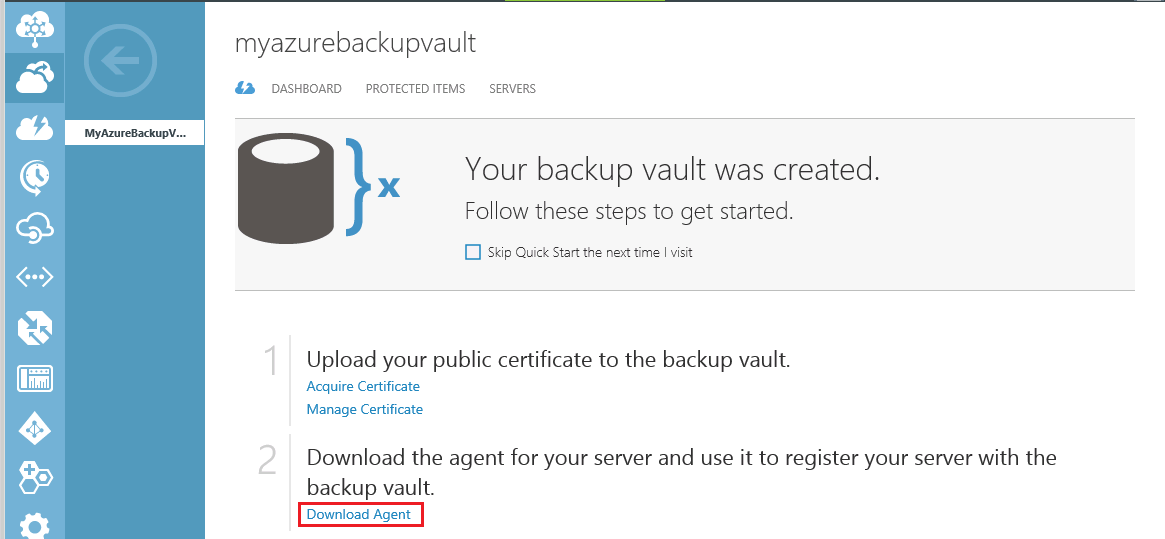
Download and Install Windows Azure Backup Agent
- Now from Server1, login to windows azure and click the Backup Vault,
this in turn opens a page with download link for Windows Azure
Backup Agent as shown below,
- Once the agent is downloaded, you can run the setup. The setup name
of the Windows Azure Backup Agent will be “WABInstaller.exe”. - After the installation, you can access the Windows Azure Backup
Agent using the desktop shortcut as shown below,

- Next step is registering the server to the Windows Azure backup
Vault.
Register Server1 to Windows Azure Backup Vault
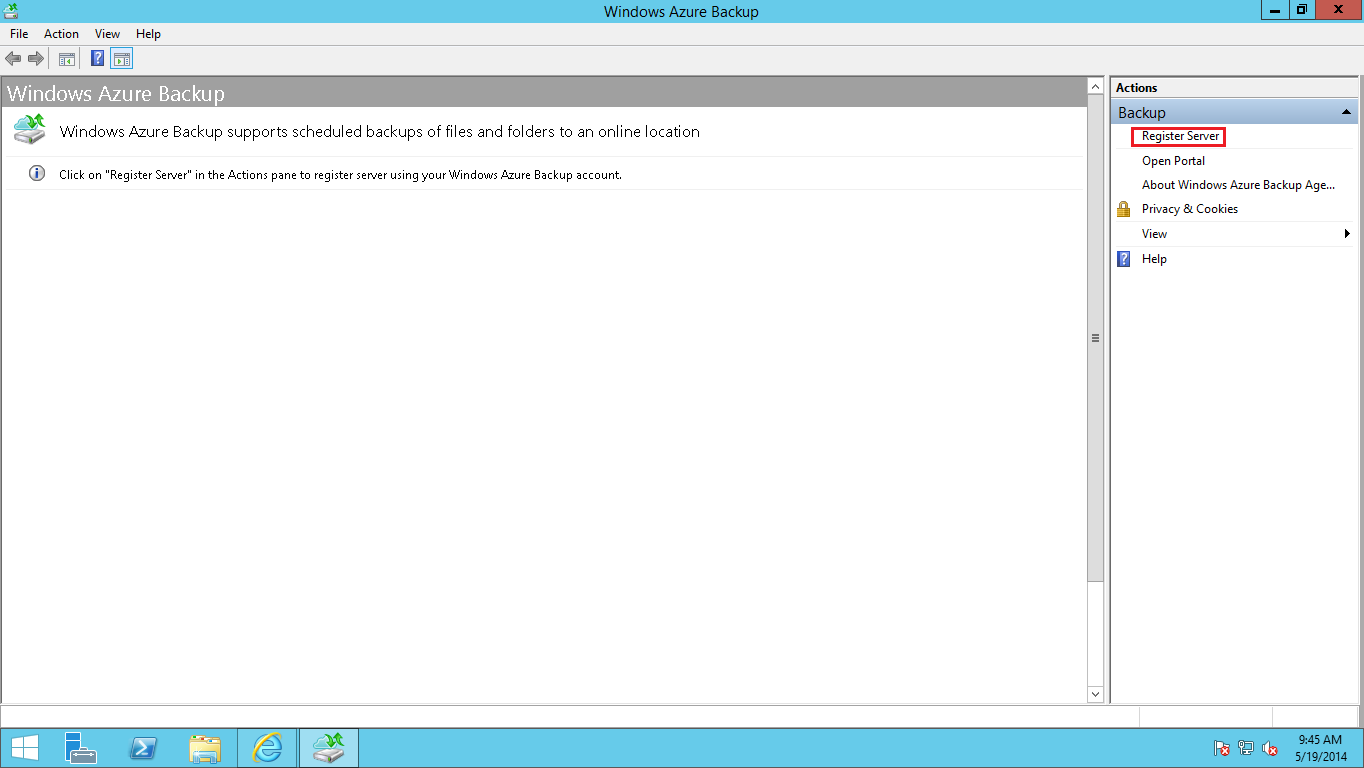
- After opening the Windows Azure Backup agent, you need to register
the server to the Backup vault by clicking “Register Server” option
as shown below,
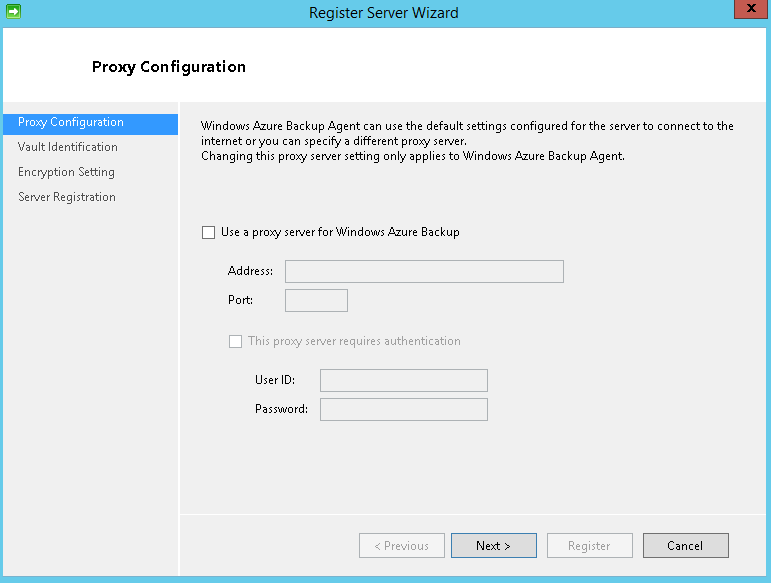
- After clicking “Register Server” option, proxy configuration page
appears; you can either configure or skip it,
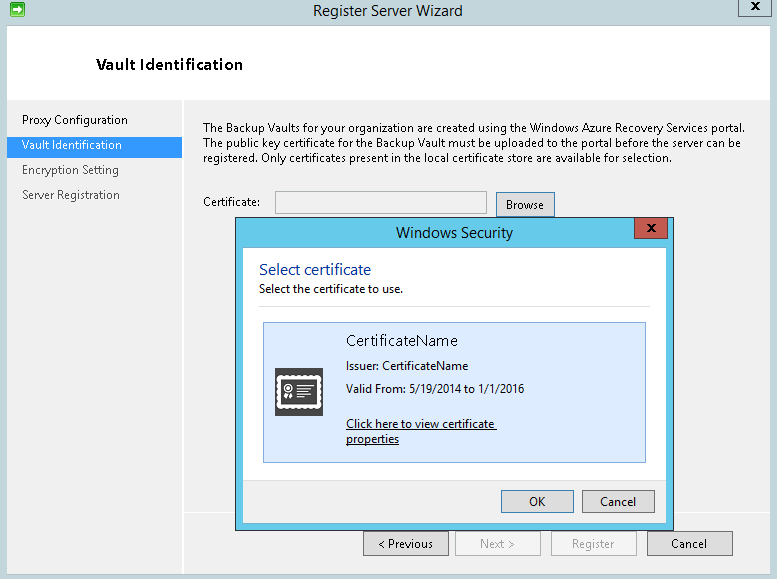
- Browse for certificate to register with Windows Azure Backup Vault.
Once you click browse, it will automatically detect the certificate
as shown below,
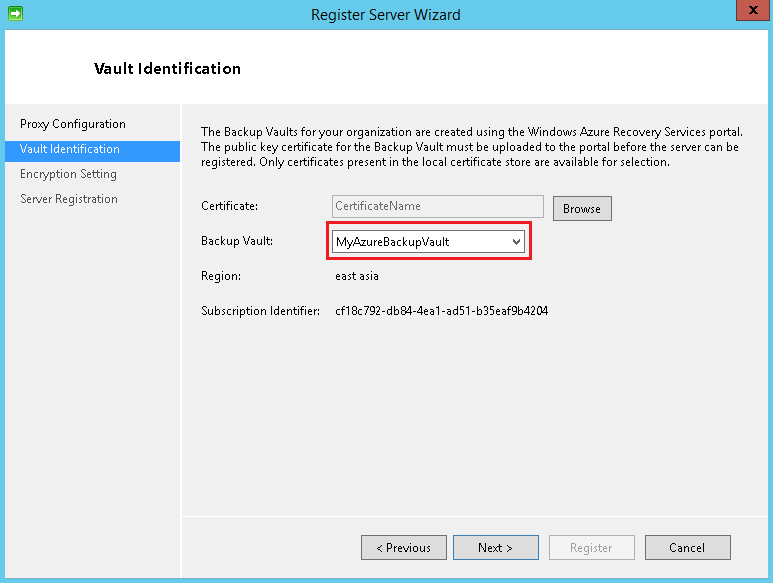
- Once you click OK, certificate confirmation will take place and
fetches the Backup Vault as shown below,
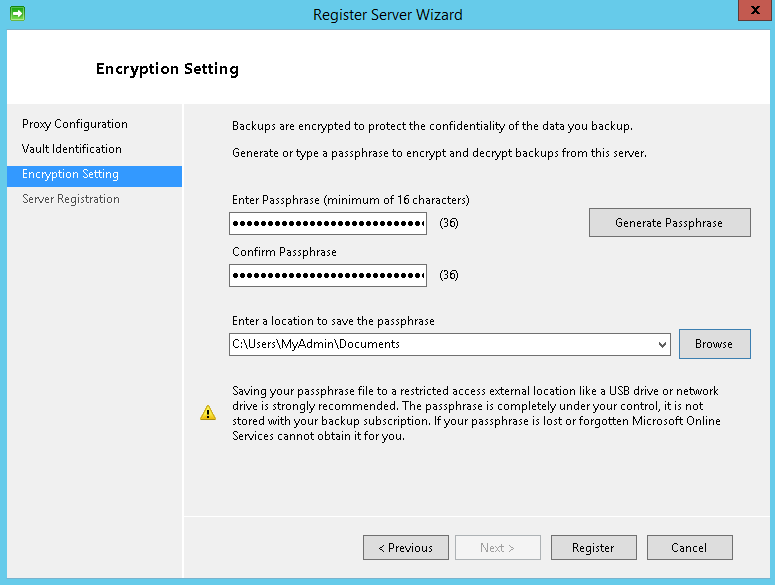
- Finally provide the passphrase by clicking “Generate Passphrase”,
save the passphrase in a secured location and it should be in a
different location from the data to be backed up. Finally click
“Register” to confirm registration.
- After the above step, the server will be registered to Windows Azure
Backup Vault. So that it can backup and recover data from Windows
Azure backup Vault.
Note: The generated passphrase is used to encrypt and decrypt the backup
files. The generated passphrase is needed when you restore the files
from the Windows Azure Backup Vault, so store it in secure location for
future use.
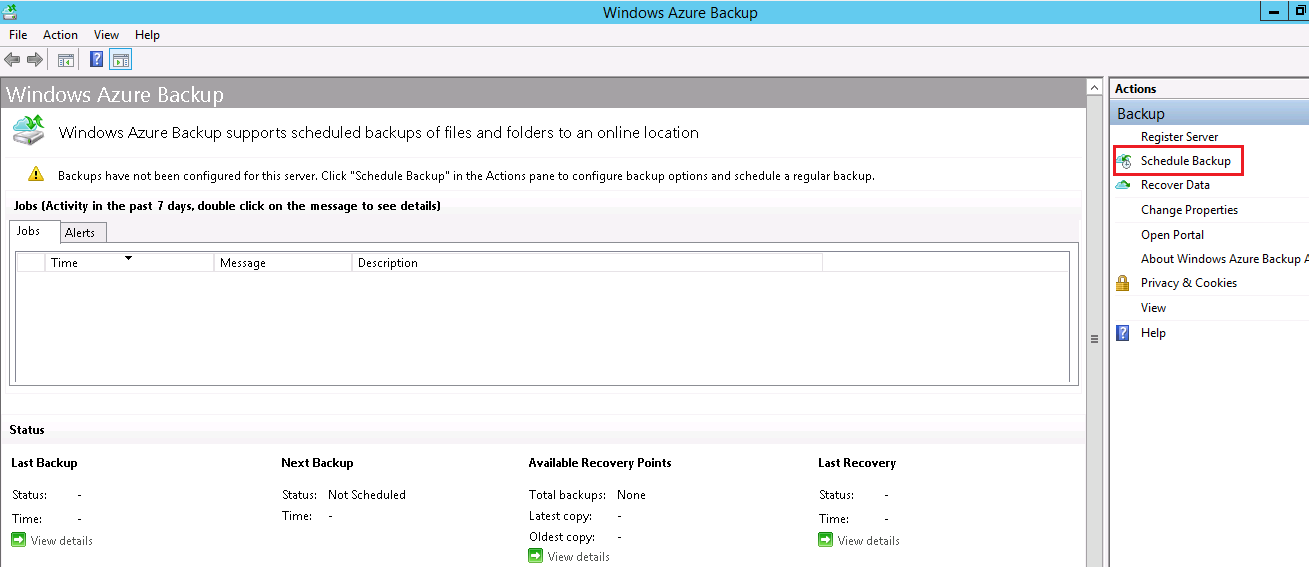
Scheduling Backup from Server1 to Windows Azure Backup Vault
- To schedule the backup from Server1, open the Windows Azure Back
Agent and select the “Schedule Backup” option as shown below,
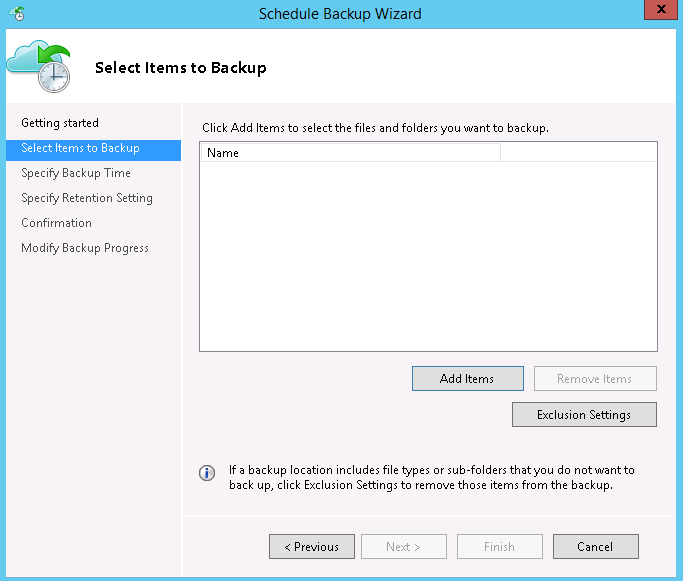
- Here, I skip the “Getting Started Screen”. So let’s start with
selecting the items for backup. Using “Add Items” you can add your
required data for backup, also you exclude specific files or folders
using “Exclusion Settings”.
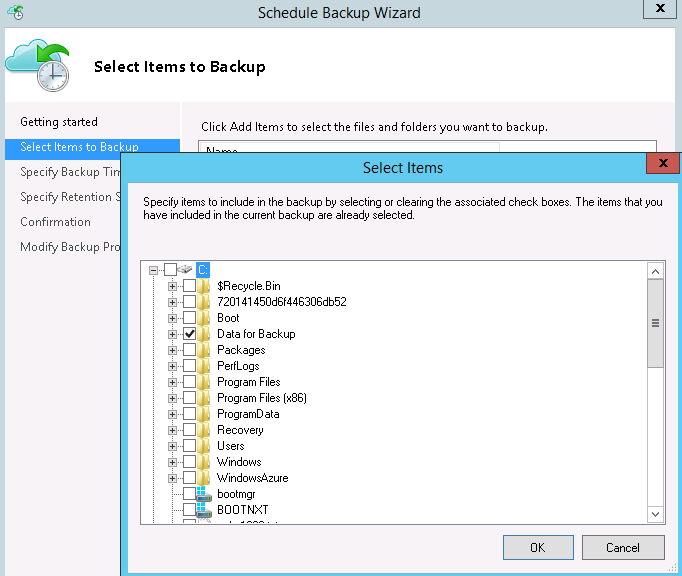
- Now I choose my data to be backed up in Windows Azure Backup Vault
as shown below,
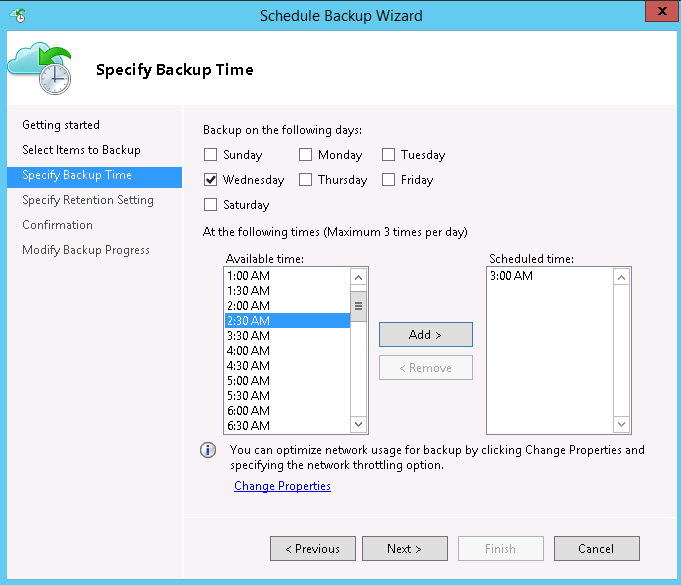
- After the confirmation of data for backup, now specify the day of
the week and time for running the backup schedule as shown below,
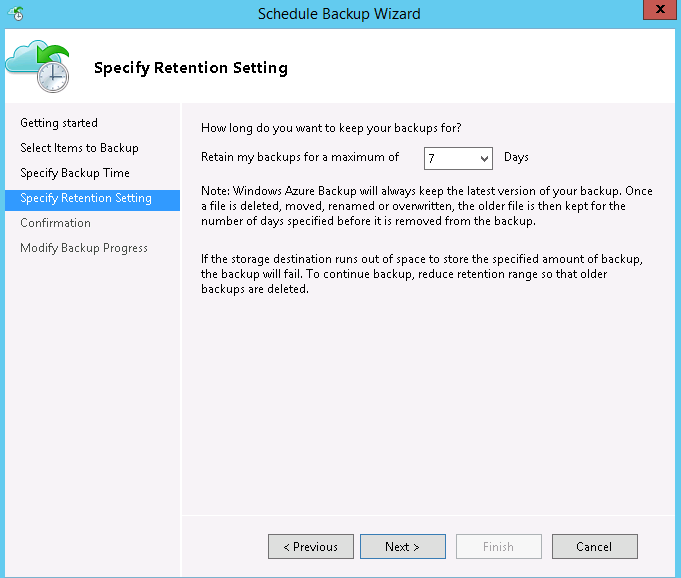
- Now specify the days for backup retention, which indicates the files
deleted, renamed, moved, then the older files will remain for the
number of days as specified in this section.
- Finally the scheduling backup is completed, click Finish to confirm.
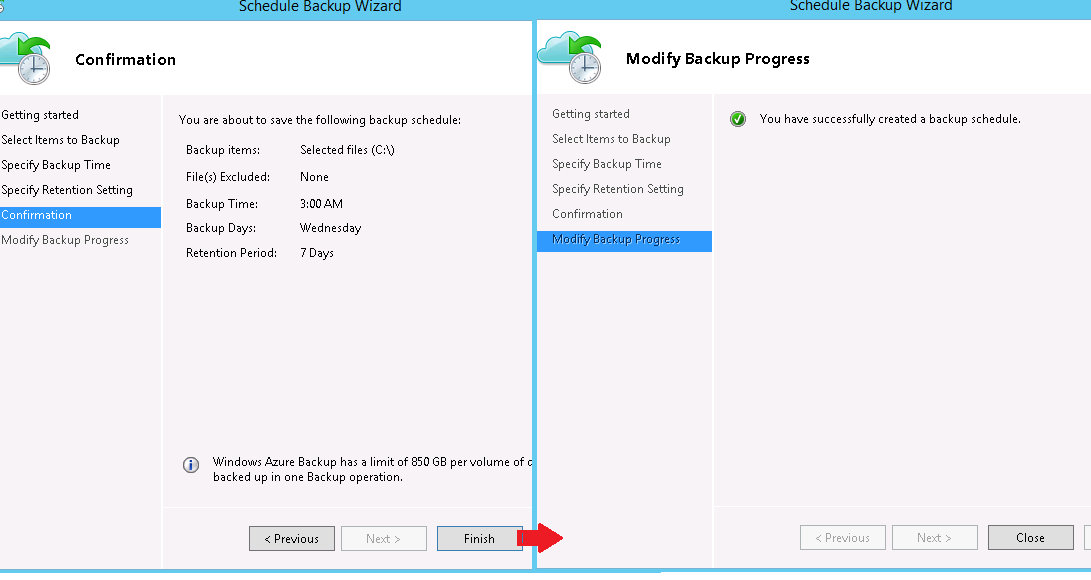
- Now the steps for scheduling backup to Windows Azure are completed.
- For testing purpose, let us force the backup to run using the “Back
Up Now” option as shown below,
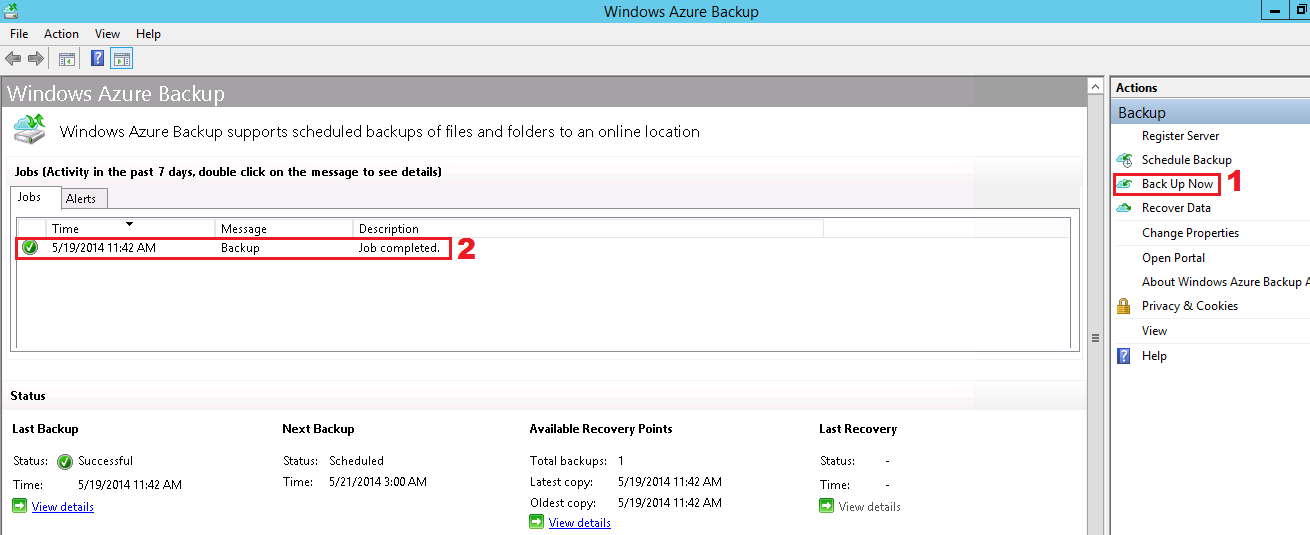
- From the above screenshot, it is confirmed that a backup job has
been successfully completed from Server1 to Windows Azure Backup
Vault.
Server1 crashed
Now let’s consider a situation that due to some reasons Server1 is
crashed, but the data in Server1 are securely backed up to Windows Azure
Backup Vault.
Recovering data from Windows Azure Backup Vault to Server2
Before recovering the backed up data to Server2, we need complete the
following steps
- Import the .PFX certificate exported from Server1 to this server
- Download and Install Windows Azure Backup Agent in Server2
- Register Server2 to Windows Azure Backup Vault
To import the .PFX certificate exported from Server1,
- First copy the exported .PFX certificate from the secured location
to this server. - To import the certificate, right click the certificate and select
“Install PFX” option as shown below,

Regarding the following steps,
- Download and Install Windows Azure Backup Agent in Server2
- Register Server2 to Windows Azure Backup Vault
You can repeat the same steps done for Server1 as specified in the
sections 6. Download and Install Windows Azure Backup Agent and 7.
Register Server1 to Windows Azure Backup Vault respectively.
- After completing the above steps, we can recover the data backed up
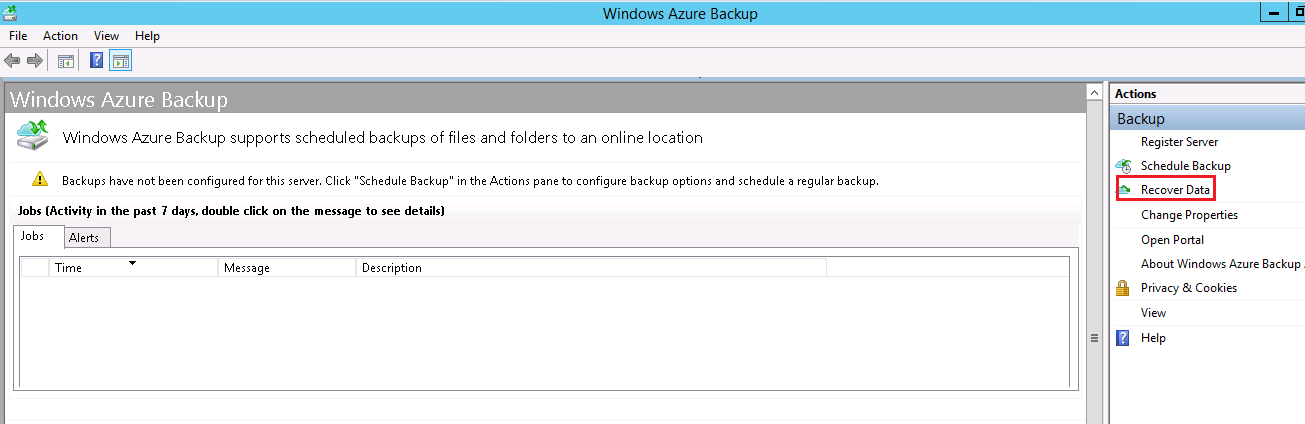
from Windows Azure Backup Vault. - Now from Server2, you need to open the Windows Azure Backup Agent
and select the recover option as shown below,
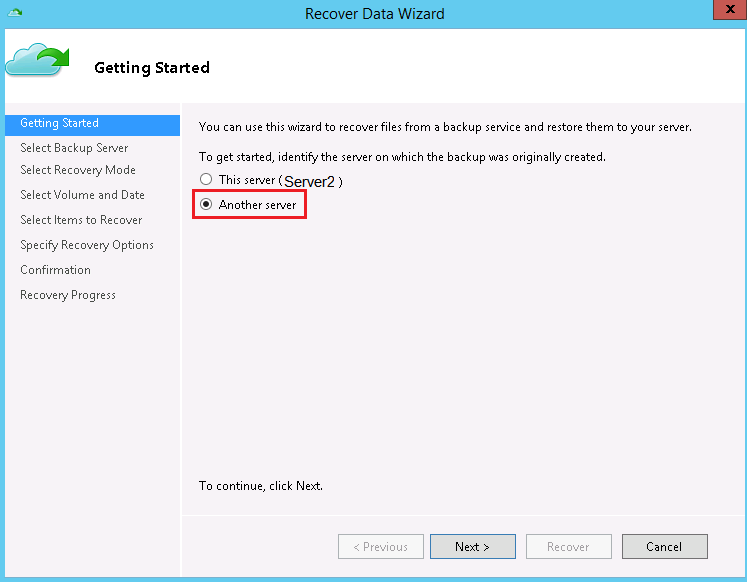
- Now the Recover Data Wizard opens, since we need to recover data
which is backed up from Server1, I select “Another Server” as shown
below,
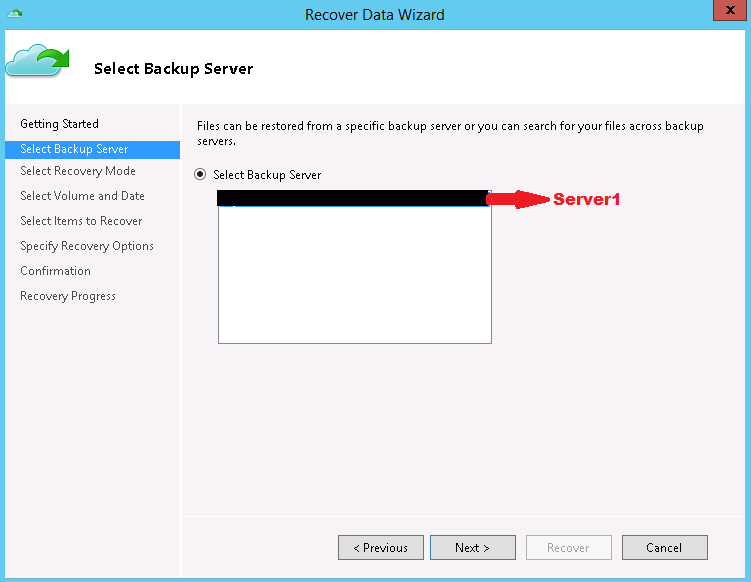
- Now I select the Backup server as Server1.
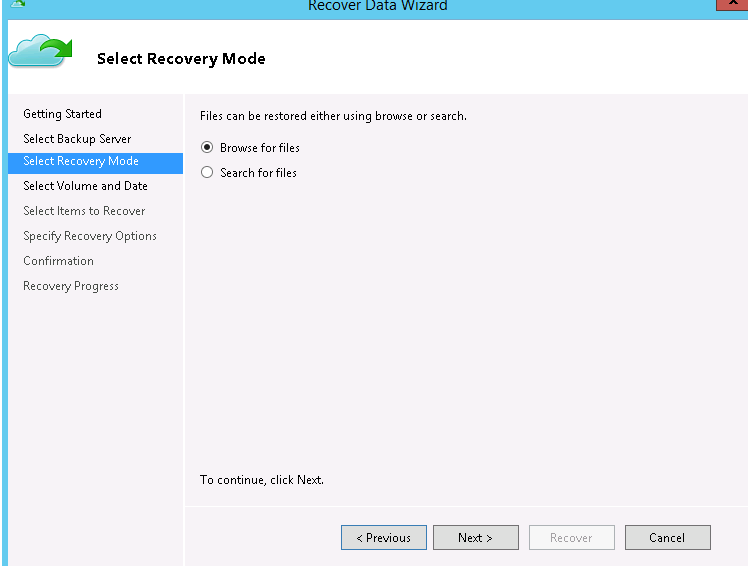
- Now I browse for the files and select the volume to recover the
backup data from Server1 as shown below,
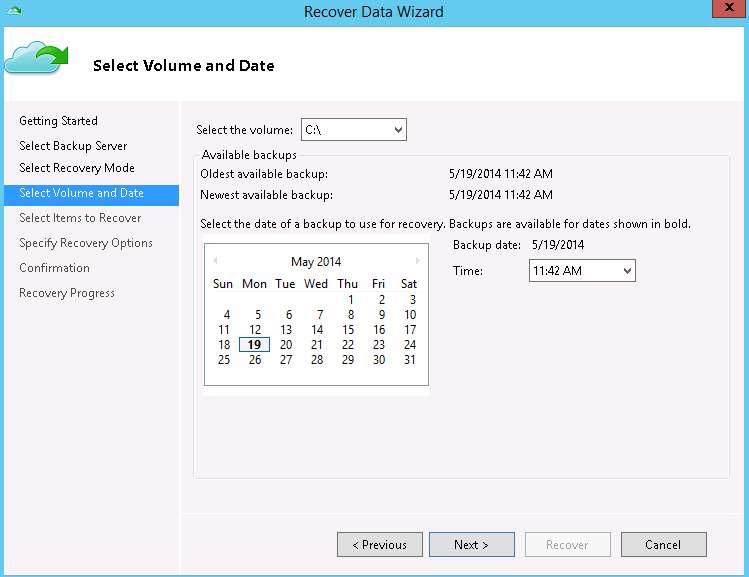
- Now I select the volume and date of backup for recovering the data,
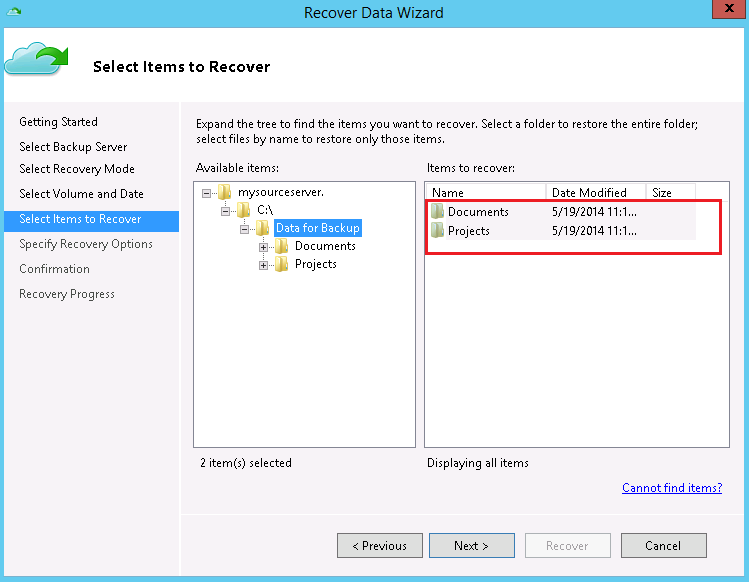
- Now I select the items to recover,
- Now I select the recovery location and additional options,

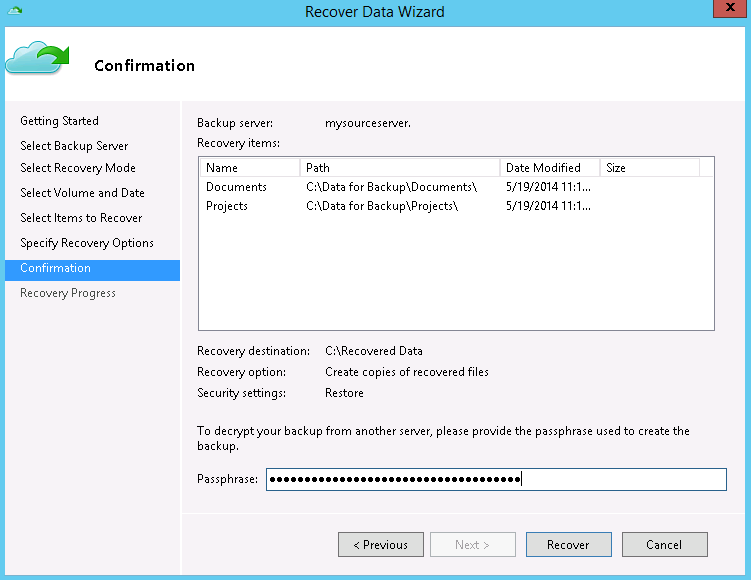
- To confirm the data recovery from Windows Azure Backup Vault for the
data backed up from Server1, copy and paste the passphrase from the
passphrase file generated during Scheduling Backup in Server1,
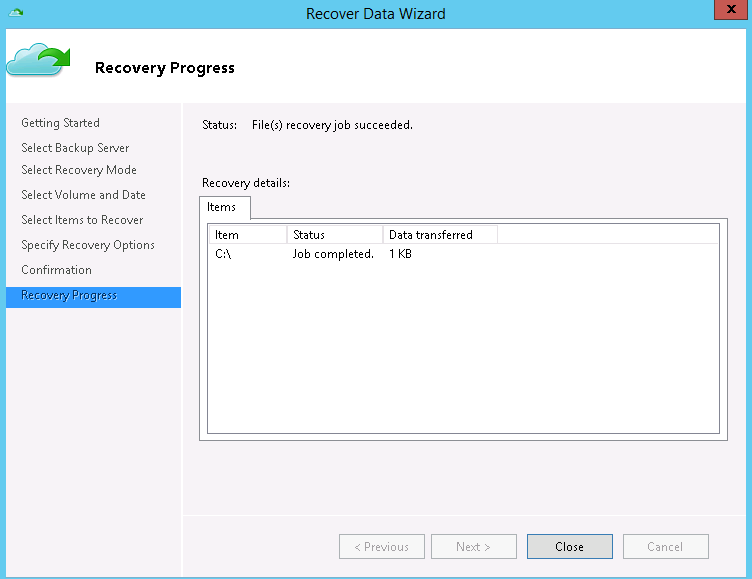
- Finally the backed up data from Server1 is successfully recovered to
the Server2 using Windows Azure Backup Vault.