Microsoft Forms Preview is a new part of Office 365 Education that
allows teachers and students to quickly and easily create custom
quizzes, surveys, questionnaires, registrations and more. Currently
Microsoft Forms Preview is available only to customers with Office 365
Education subscription using a school or organization ID account.
If you are an Office 365 Education customer and are interested in
evaluating Microsoft Forms Preview, you can navigate to Microsoft Forms
Preview site –http://forms.microsoft.com
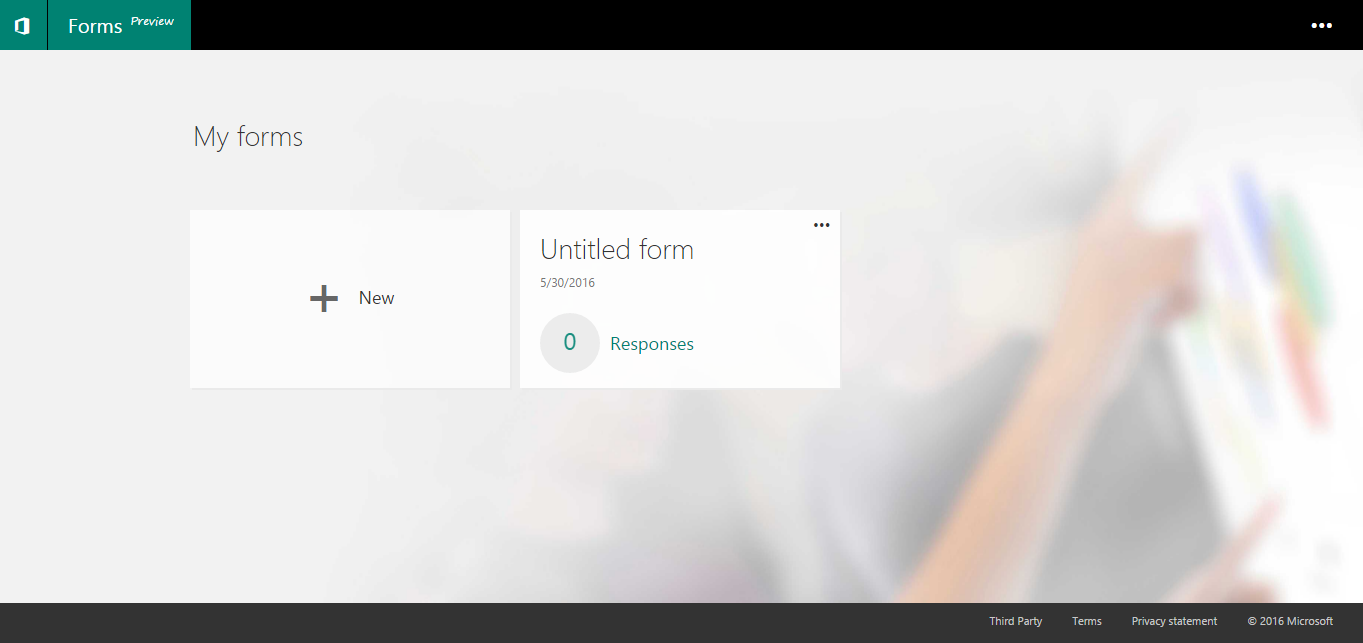
and sign in to Office 365 with your Office 365 Education account, once
you sign in to the portal, you have the option to either create a new
form or use the existing form.
Before proceeding further, first let’s see what we can do with Microsoft
Forms Preview.
What we can do with Microsoft Forms Preview?
- ** Create a new survey form or quiz form
- ** Adjust settings for your form
- ** Share your form with others
- ** Check your form results
Create a new survey form or quiz form
As an educator, you can use Microsoft Forms Preview to quickly assess
student progress and get real-time feedback through the use of quiz
forms that you design and share with your class. Here, my need is to
create a new Math quiz form to entertain and educate the aptitude of the
students, so under My Forms, I click New to begin creating my
quiz form.

Type a name for your quiz and also enter an optional subtitle for your
quiz.
NOTE : Quiz names can contain up to 90 characters and a subtitle can
contain up to 1,000 characters.
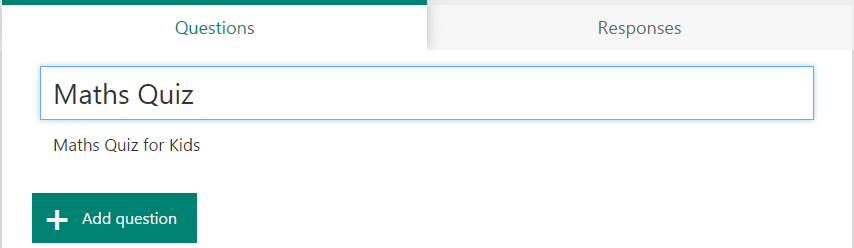
Now click Add Question to add a new question to the quiz form. You
can choose to add Choice, Quiz, Text, Rating, or Date questions. Use
quiz questions when you want to present your students with multiple
choices and use text for essay type of questions.
NOTE : Your form is saved automatically while you create it.
How securely Forms data is stored?
Forms data is stored in CollabDB which follows the standard Office 365
Compliance Framework. CollabDB is built on the OSI platform like most
Office services and will be compliant at Tier C. All data is encrypted
at rest, and is stored within data centers inside the US. There’s work
in progress to add Forms to the O365 datacenter map, clearly calling out
the location of data centers where Forms data will be stored.
You can read about the Compliance framework in this whitepaper from
below link:
https://go.microsoft.com/fwlink/p/?LinkId=615657
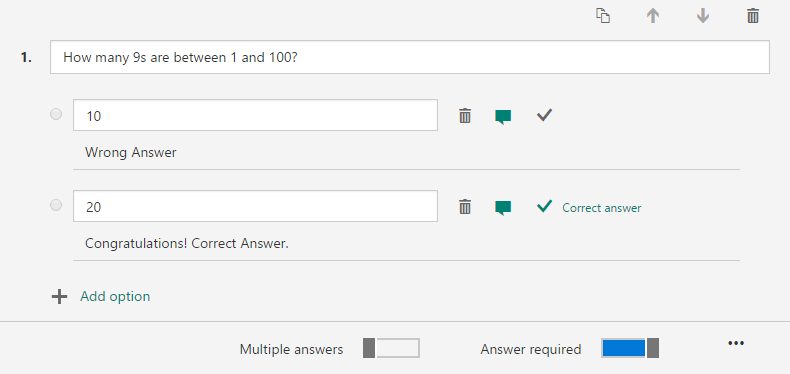
Here, I selectQuiz to add my quiz question.

For quiz questions, enter the text you want to display for the question
and each of the choices. By default two choices will be available, if
you want to add more choices, click Add Option. To remove a choice,
click the trash can button next to it. You can also choose to make a
question for which answer required or allow multiple choices for a
question by changing the settings at the bottom of the question. Click
the tick mark button next to each correct answer. You can click the
Message button next to an option if you want to display a custom message
to your students who select that answer.
TIP : Click the ellipses button (…) and then click Subtitle to add a
subtitle for a question.
To add more questions to your form click Add Question. To change the
order of the questions, click the Up or Down arrows on the right side of
each question. To copy a question, select it and then click the Copy
Question button in the upper right corner.
You can click Preview at the top of the design window to see how
your quiz will look on a computer or mobile device. If you want to test
your quiz, enter answers for the quiz questions in preview mode and
then click Submit.

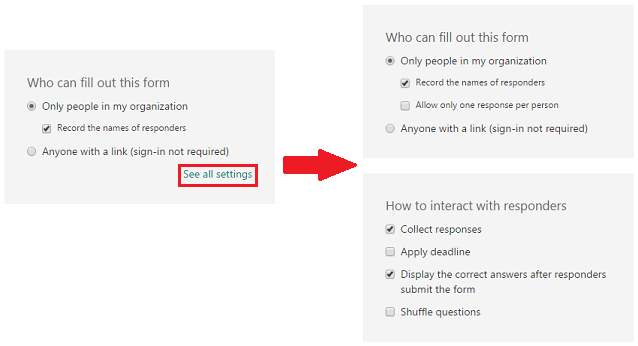
Adjust settings for your form
You can use form settings to specify deadlines, identify form
responders, display correct answers for quizzes, and to set other
preferences for Microsoft Forms Preview. To get to the Settings screen,
click Send form at the top bar.

Then at the bottom of the screen, click See all settingsto view all
options available.
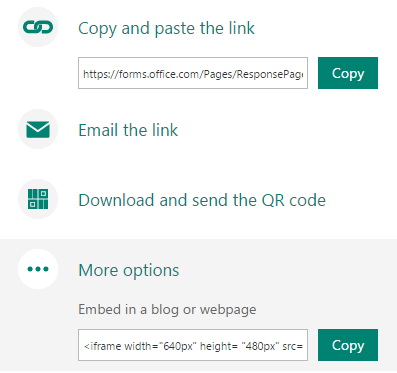
Share your form with others
In Microsoft Forms Preview, you can share your form with students,
parents, and colleagues using form settings in the following ways
depending upon your needs as shown in the below screenshot.
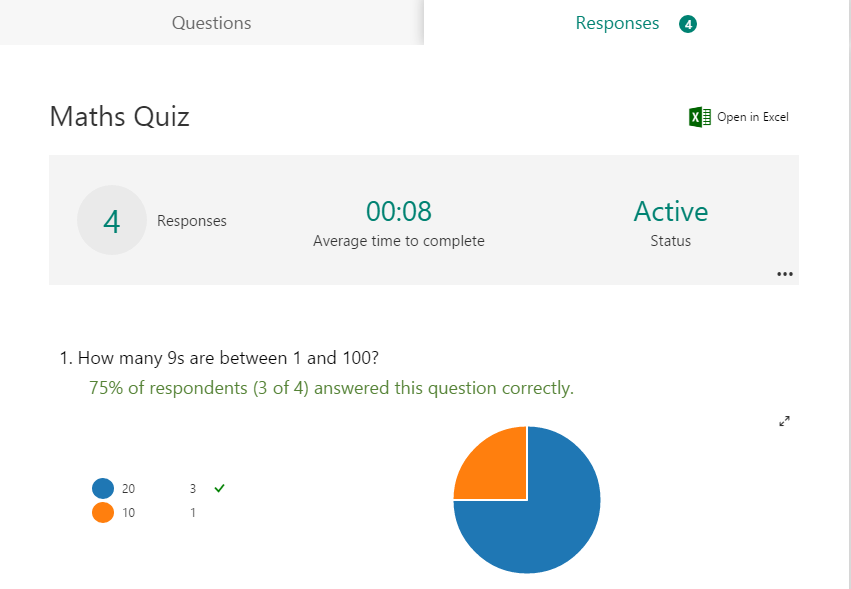
Check your form results
After performing the previous steps, now it’s time to view the results.
To review the results for your required form, open the corresponding
form and then click Responses tab. Next to each question, you can
see the number of responses, percentage of correct answers for quiz
questions, and a colorful chart of the breakdown of responses.
You can click the View Details button
 on the
right side to see more details for each question. On the details view,
you can see the name of each responder and their answers for each
question. Also you can click the column headers to sort the response
results.

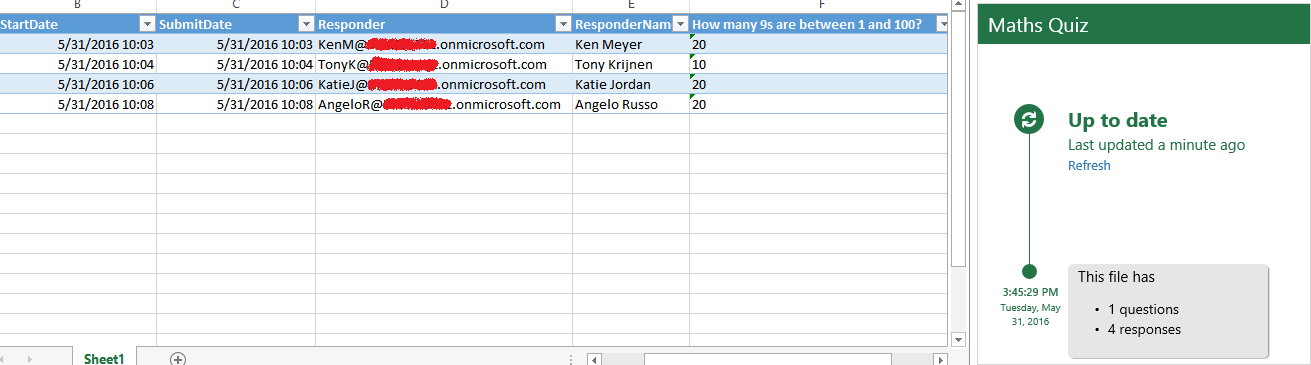
Using theOpen in Excel option at the right-top section of
Responses tab, you can easily view all of the response data for your
quiz or other form in Microsoft Excel.
Each question in your form is a column and each response becomes a row
in the Excel workbook. The first four columns display the start time and
end times for each response and the name and email address for each
responder. At the right side, you’ll see an Excel add-in which retrieves
the latest responses and enters them into the workbook. Excel
automatically refreshes the data every 30 seconds
NOTE:
- Any changes you make to the form data in Excel won’t modify the
content of the response table. - Names and email addresses of anonymous responders won’t be displayed
if you allow your form to accept anonymous responses.
Finally to copy a form, navigate to the Microsoft Forms Preview site –
http://forms.microsoft.com and sign in to
Office 365 with your Office 365 Education account and click the ellipses
button (…) in the upper right corner of the form you want to copy, and
then click Copy.
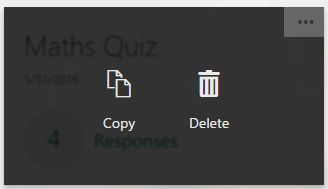
Similarly, if you wish to delete the form, click Delete.
Frequently Asked Questions:
Reference: