With the rise of the diversified work culture, wired collaboration becomes inevitable. So, Microsoft keeps focusing on enhancing the collaboration experience in Teams Meetings to bring people together.
One such enhancement is the Collaborative Meeting Notes – which eliminates relying on a single person for capturing the agenda and minutes. It also makes the notes visible to everyone, improving accuracy and inclusion at every stage of a Teams Meeting.
| Collaborative Notes are Loop Components that stays in sync across all the places they have been shared like – Outlook, Teams chat, the Loop app, Word for the web and Whiteboard. |  |
 | We can leverage the benefits of Loop component, of collaborating with others and keeping everyone updated as notes are synchronized across all devices. |
How to use Collaborative Notes ?
Let us walk over on how to use Collaborative Notes before, during and after the Teams Meeting.
Schedule a Meeting & Enable Collaborative Notes
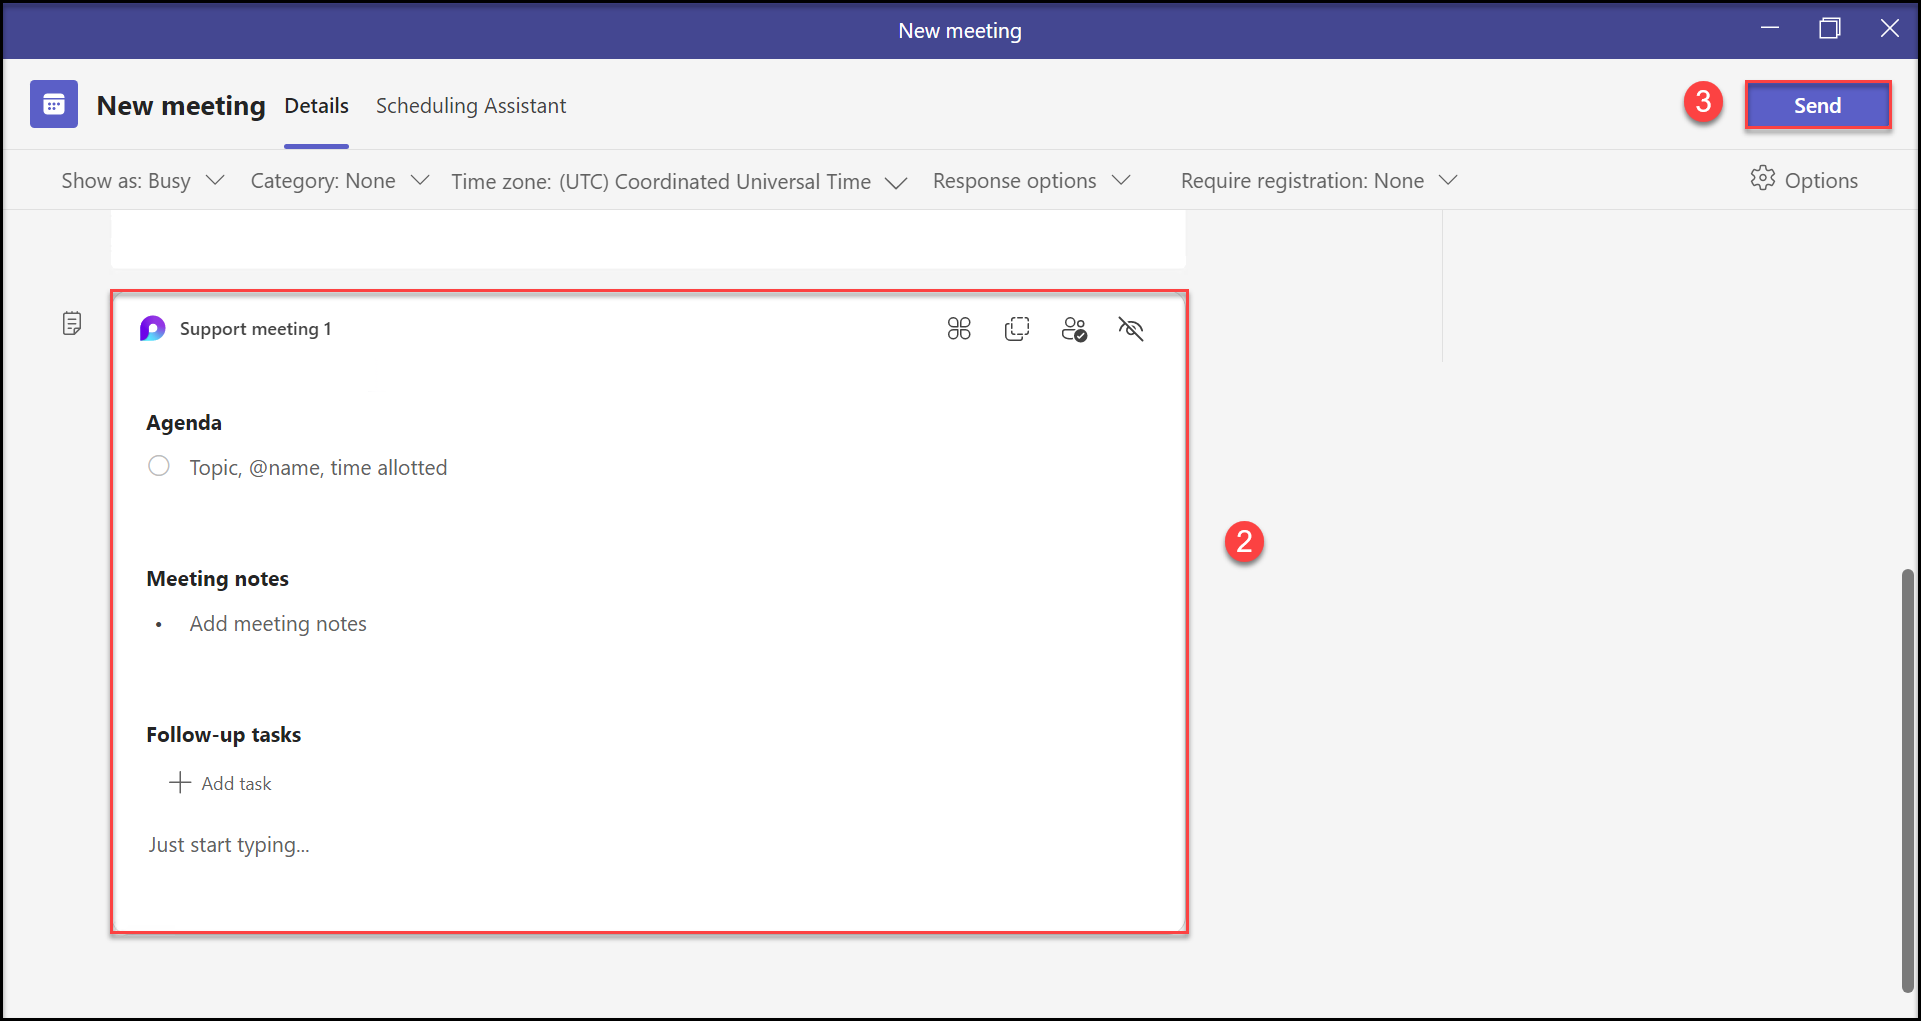
To begin with – to include collaborative notes in a meeting, click on the option – “Add an agenda everyone can edit”.
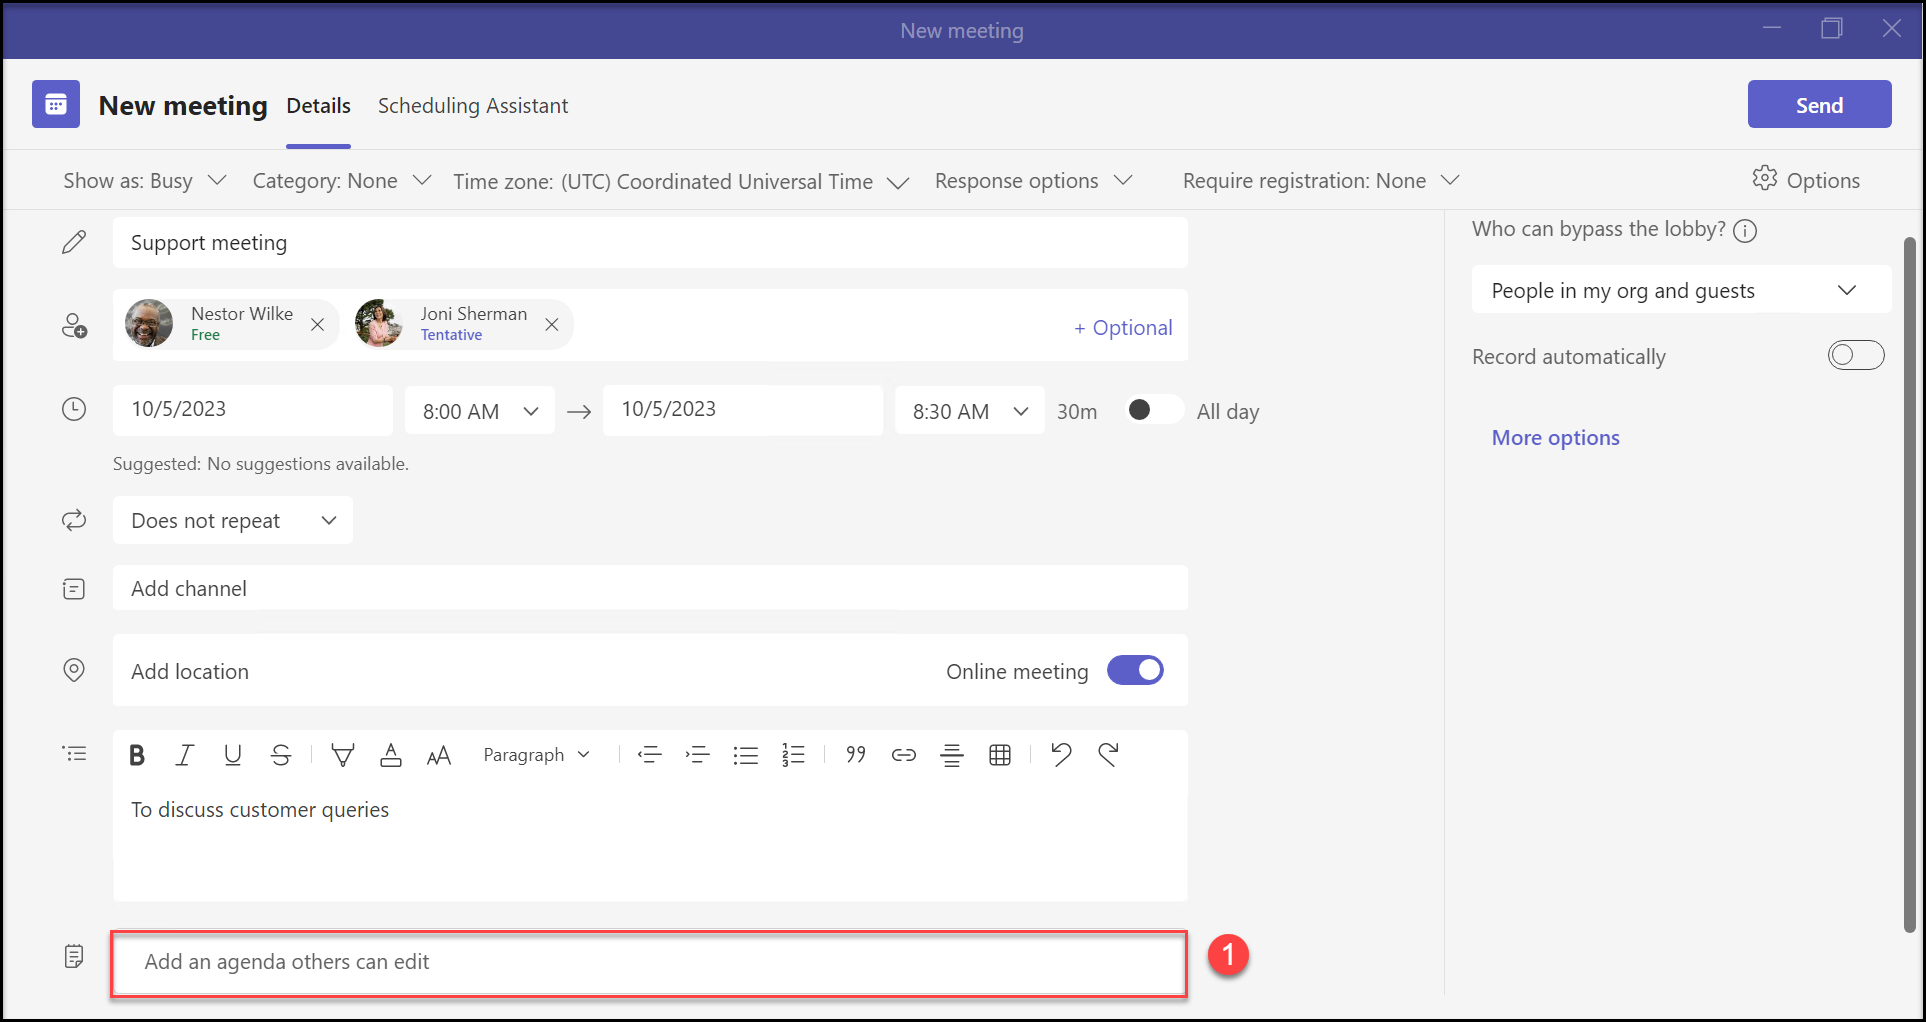
 | Once you enable this option, participants of the meeting get access to the Meeting Notes. Anyone can contribute to the Agenda, Meeting notes or the Follow-up tasks that has to be discussed during the meeting which is visualized as in the below picture. |
Collaborate using the Meeting Notes
Post joining the meeting with Collaborative Meeting Notes Enabled, one can explore all the features of it. Let’s walk over them one by one.
1. Controls over the Meeting Notes
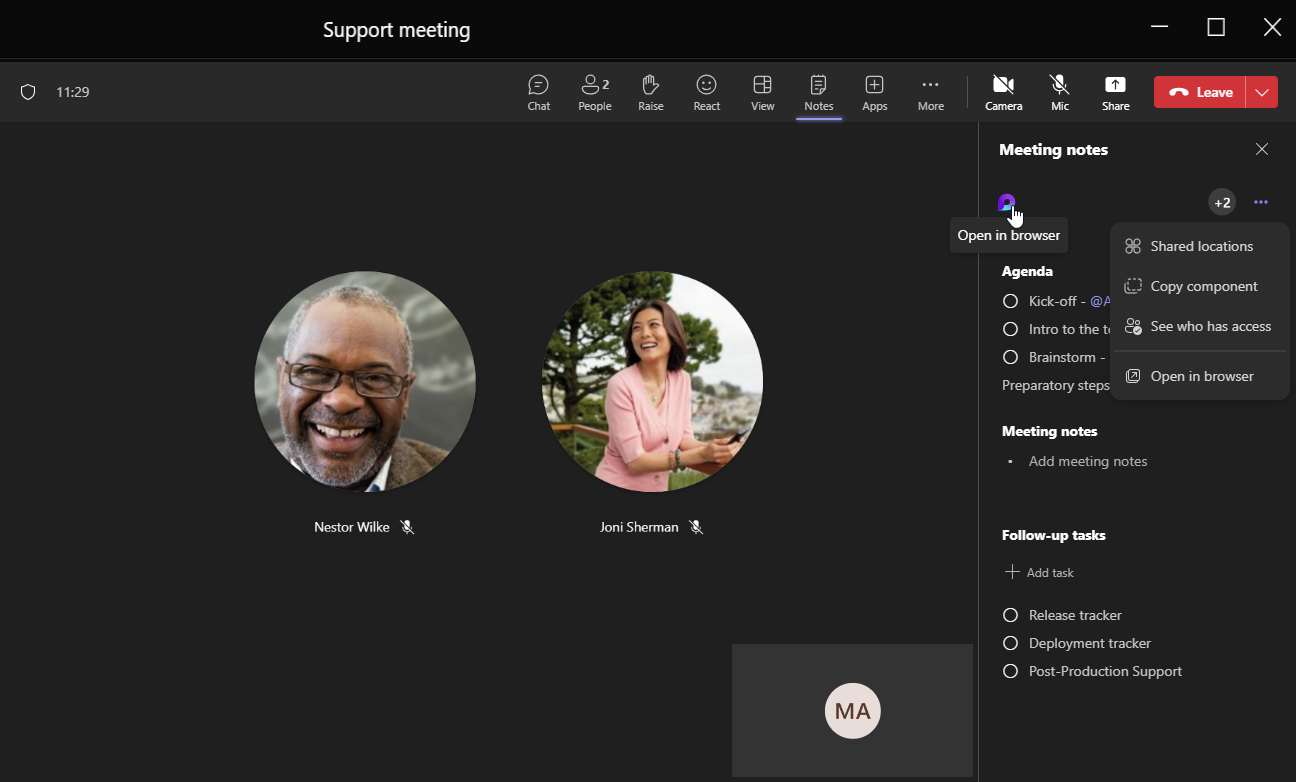
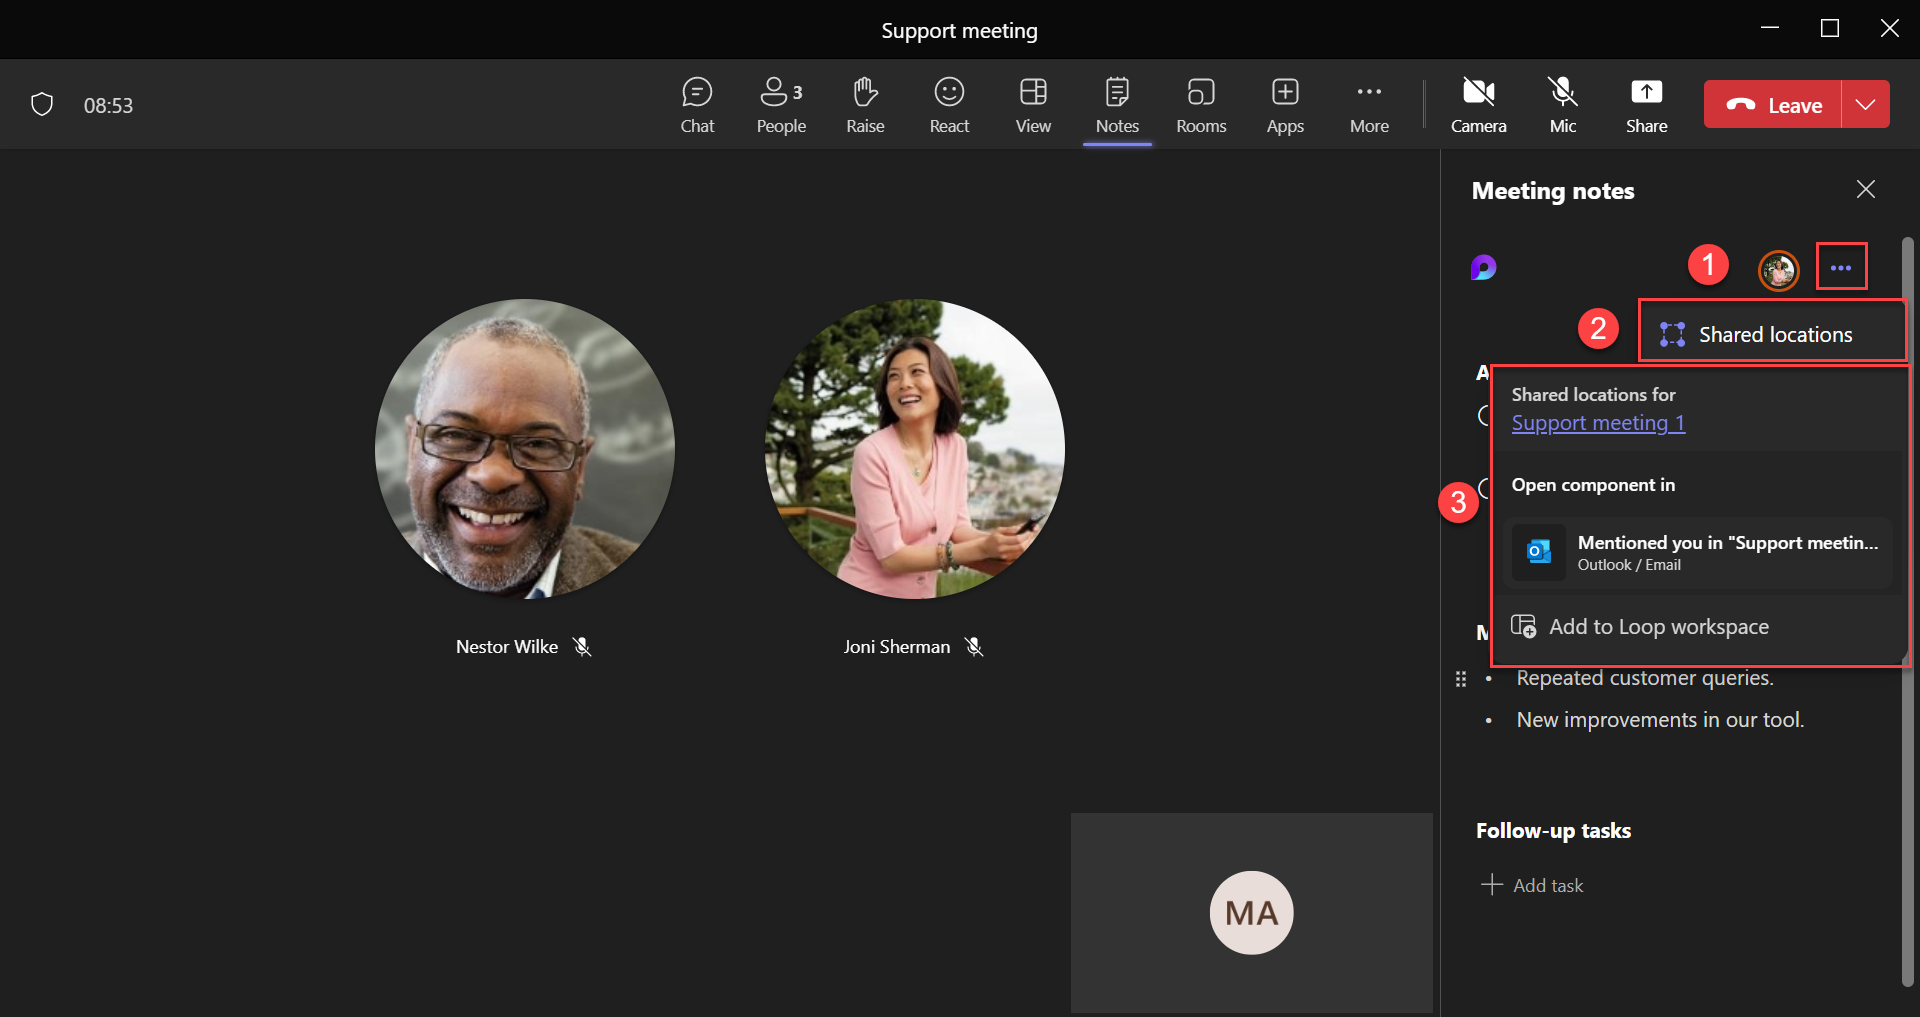
a. Check Shared Locations : Get to know about the locations where this Component has been shared as depicted below.
b. Copy component : You get to copy the Meeting Notes as a Loop Component. You can then share this in a Teams conversation or Mail to share it with other intended colleagues. This is as-simple-as duplicating a text through Copy-Paste.
c. See who has access : A quick check on the people who have access to this Meeting Notes Loop Component.
d. Open in browser : Opens the loop component in a Browser window against ‘loop.microsoft.com’.
2. Catch-up on who has access
You get to check at any time,
- Persons who are currently editing the Notes &
- Place where the editing is done with the help of the collaborative cursors portraying the person’s name.

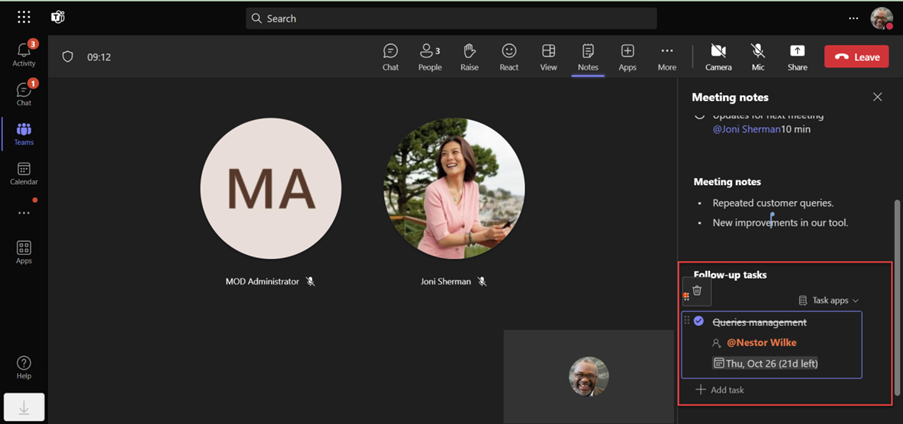
3. Define Follow-up tasks
If any follow-up action derived out of the Meeting, you can very well add as Tasks in the section – “Follow-up tasks”.
 | You can achieve the below actions out of these tasks as shown in the below picture.
|
4. Add additional Content
You can also add additional content from a new line in any of the section – Agenda, Meeting notes, Follow-up tasks. Click “insert“ to start inserting additional content such as – Task list, Code, Voting table, Progress tracker, Checklist and so on …
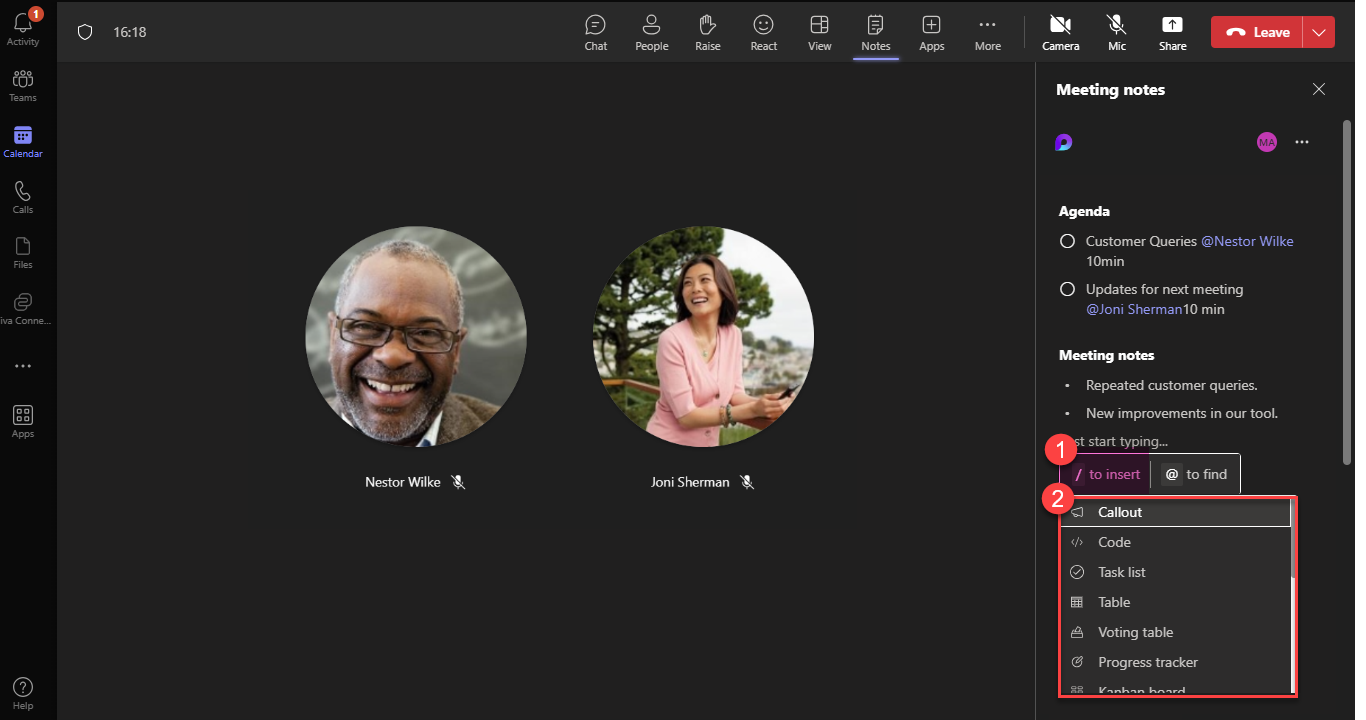
Let’s see few such additional content, how it reflects when added to Notes – Task list, Progress tracker & Voting table.
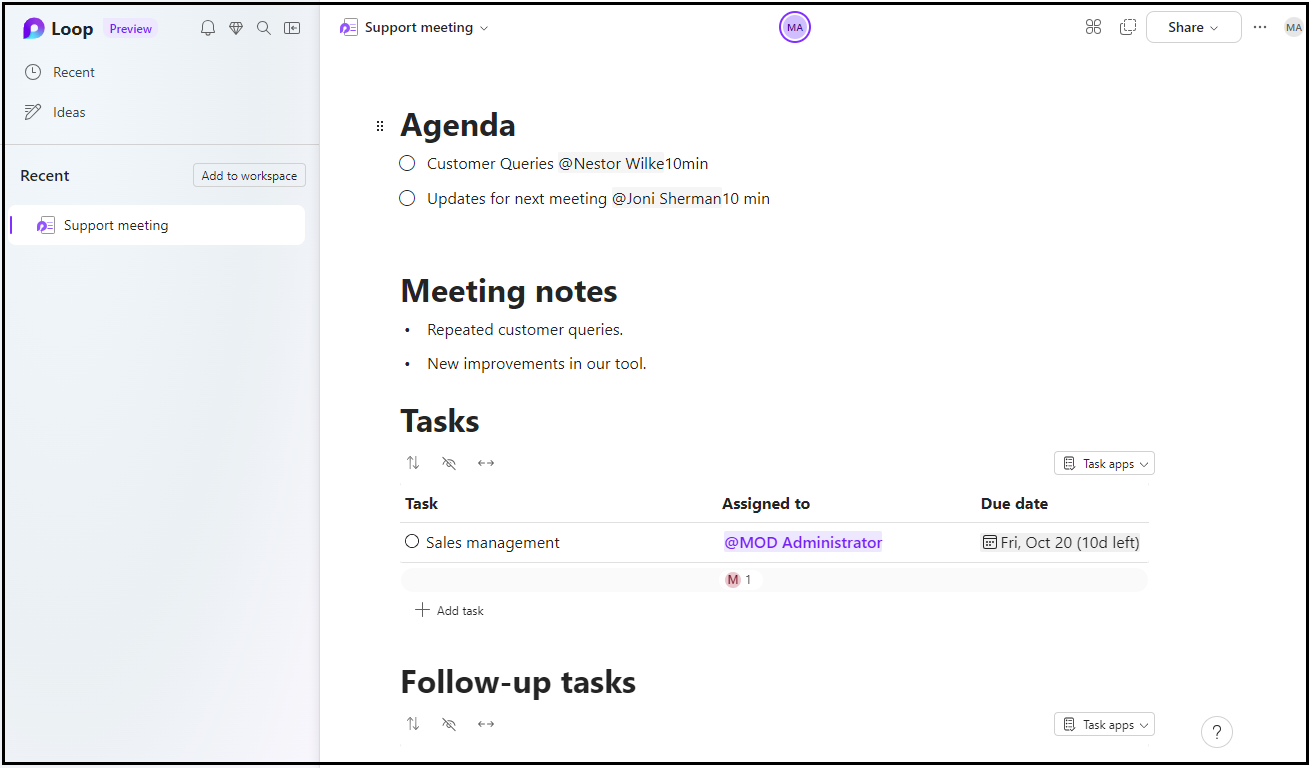
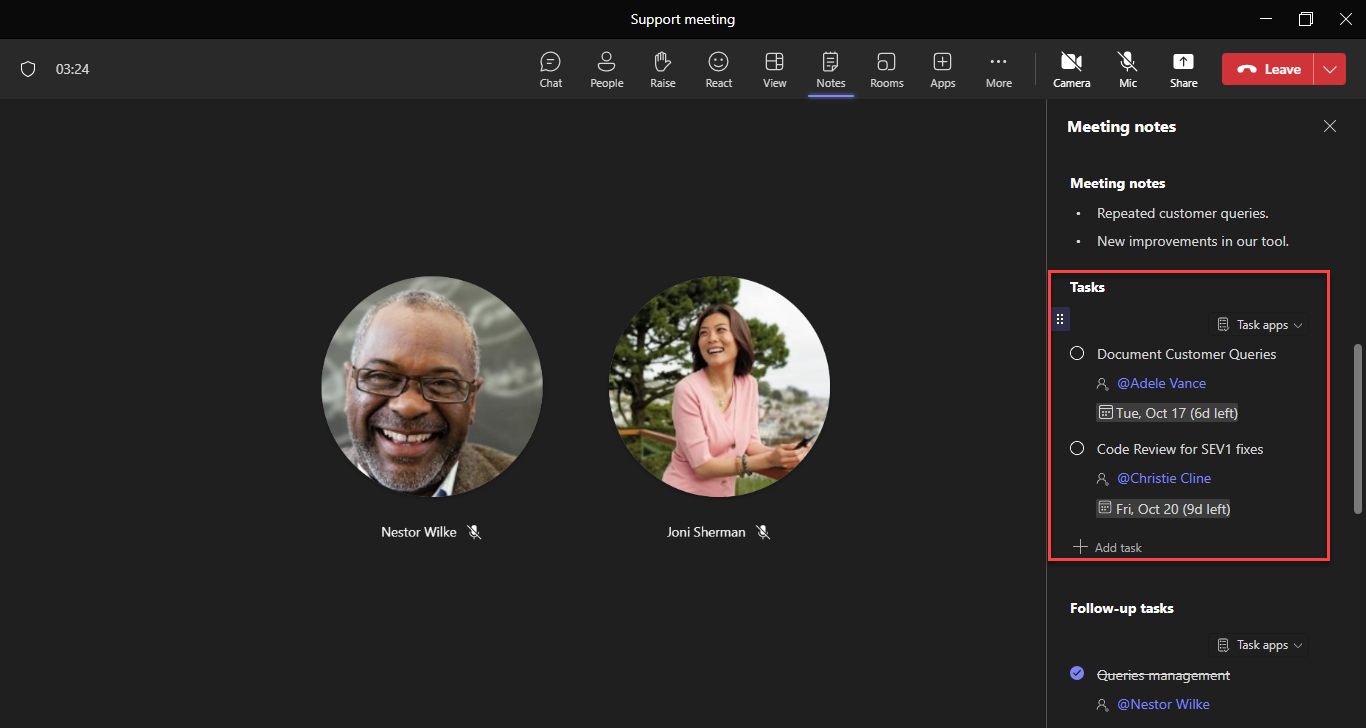
Task list
In addition to the Follow-up tasks, we can also add a Task List with Tasks defined for various actionables derived from the Meeting. Please refer the below screenshot.
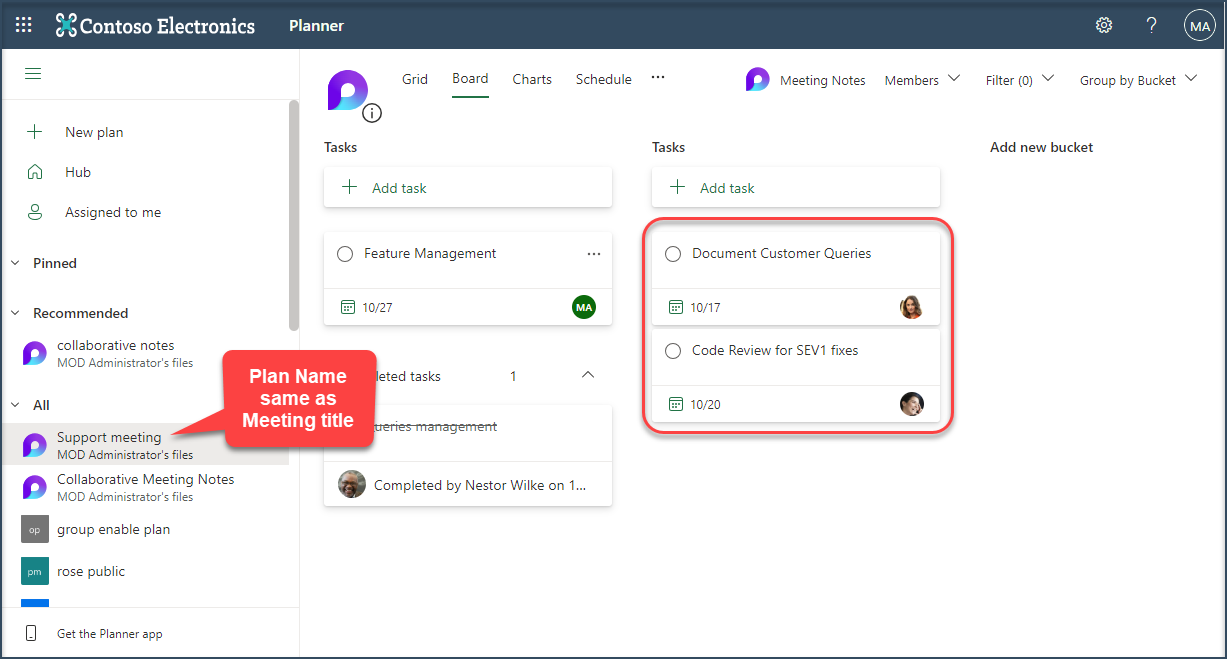
The tasks part of Follow-up tasks / Tasks can be opened in Planner & To Do app as indicated below.
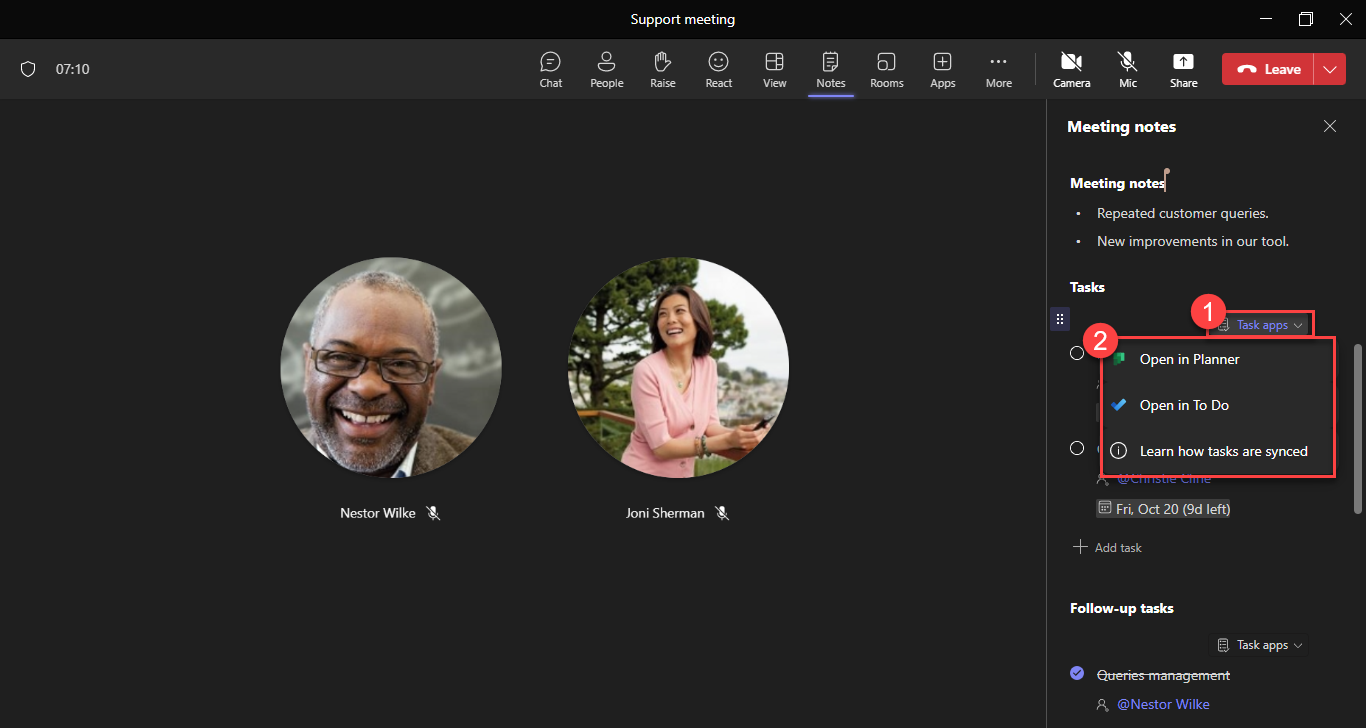
Open in Planner
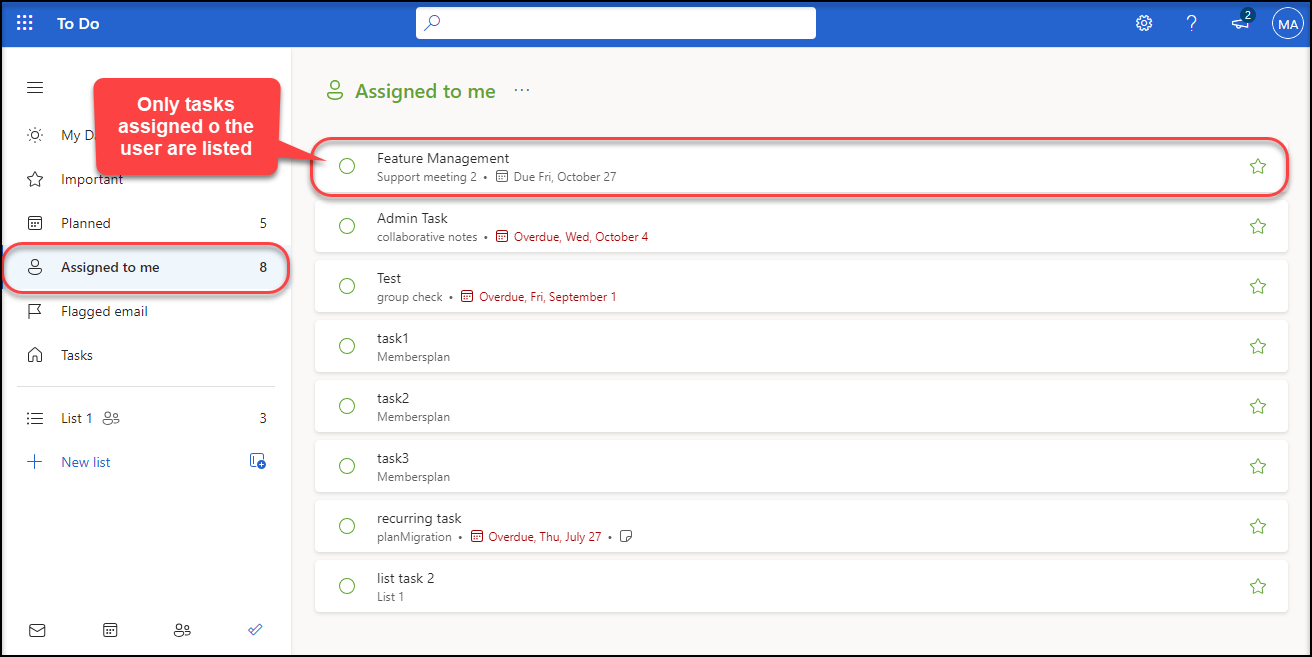
Open in To Do
Unlike Planner, here only the tasks assigned to the user are listed under the section “Assigned to me”.
Progress tracker
In Meeting Notes
In Browser
To get a big picture, let’s have a view in the Browser.
Voting table
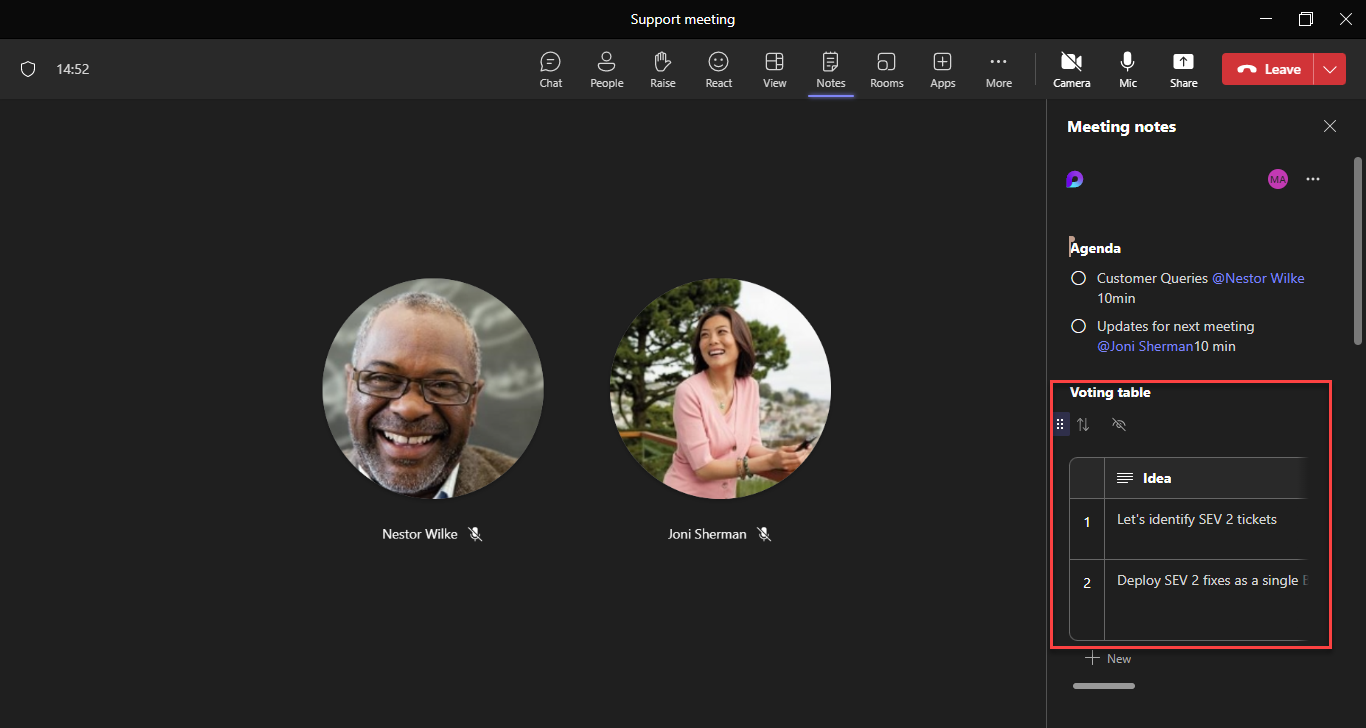
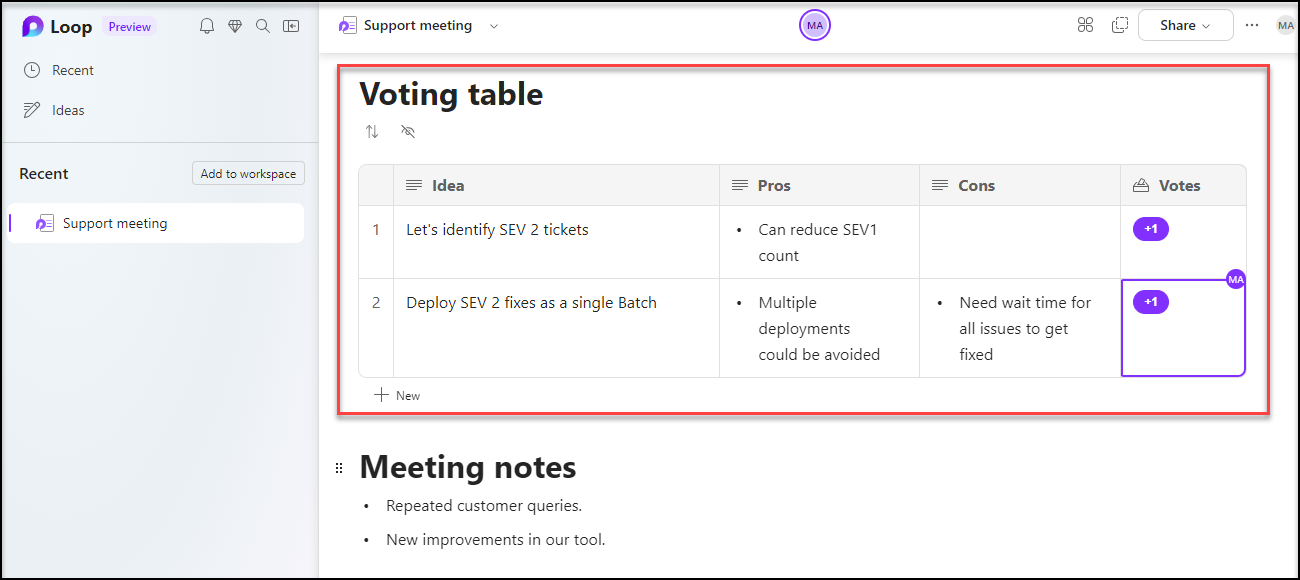
In Browser
To get a big picture, let’s have a view in the Browser.
Points to Remember
Θ External and guest participants can’t access meeting notes before or during the meeting.
Θ Not supported for channel meetings, Meet Now meetings, and 1:1 calls.
Θ If the meeting owner is using a mailbox stored on an on-premises Exchange server, Collaborative notes can’t be added to the meeting at the time of scheduling.