
Collaborative annotation (or social annotation) tools are available to support community learning and collaboration on digital content. These tools make it possible for multiple collaborators to comment or annotate in the same document and share those annotations.
Microsoft is bringing in this capability to Teams Meetings so that the attendees can collaborate in a more effective way equivalent to an in-person meeting experience.
Pre-requisites
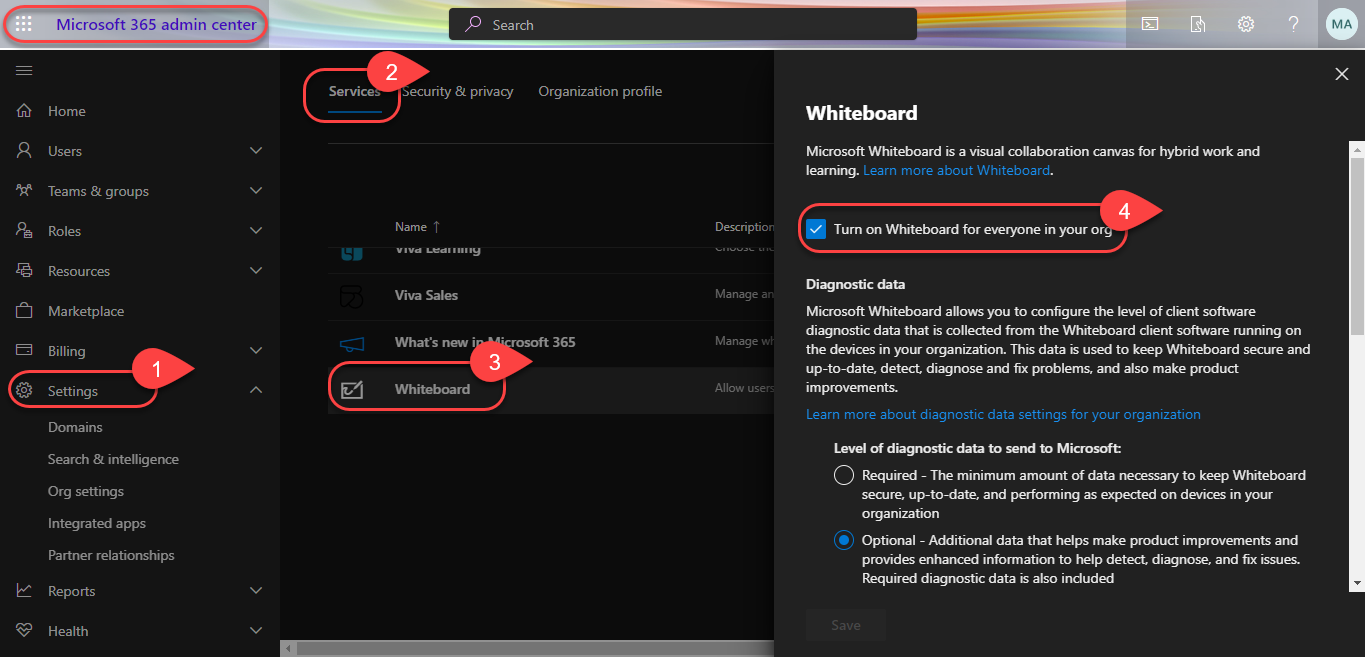
1. Enable Whiteboard
As this feature utilizes the Whiteboard functionality, WhiteBoard app has to enabled for your organization. Please refer the below screenshot to enable the same.
2. Disable setting ‘Disable GPU Hardware Acceleration’
As a limitation, this feature works only when ‘Disable GPU hardware acceleration’ setting is disabled. Microsoft is planning to remove this limitation in the upcoming releases.
Please refer the below screenshot to disable the setting.
Navigate to Teams -> Settings -> Application
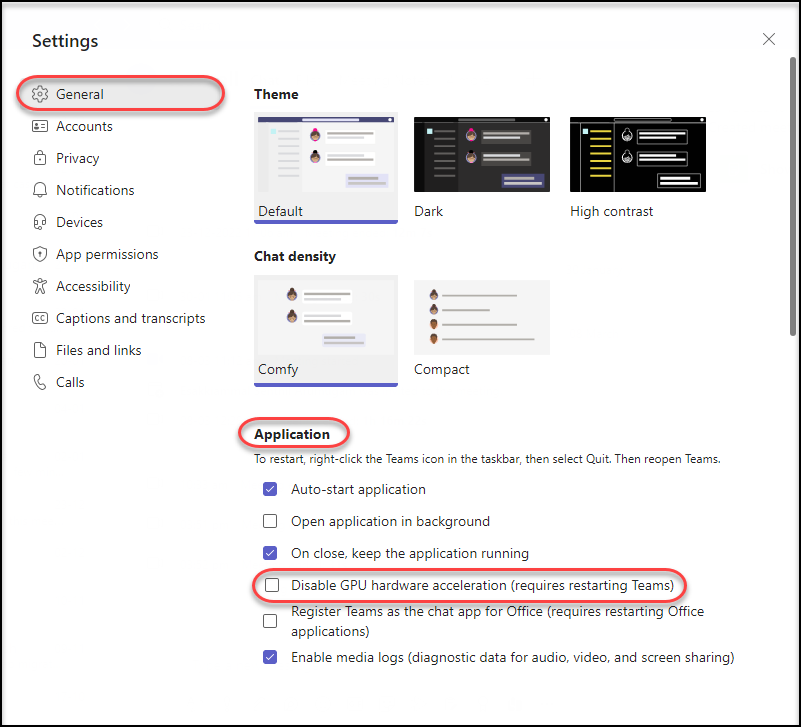
Note : Team needs a restart post updating this setting.
How does this work ?
You would be able to use Collaborative Annotation during a Team meeting, when you share your screen .Please note that annotation could not be leveraged, if you are sharing a specific window.
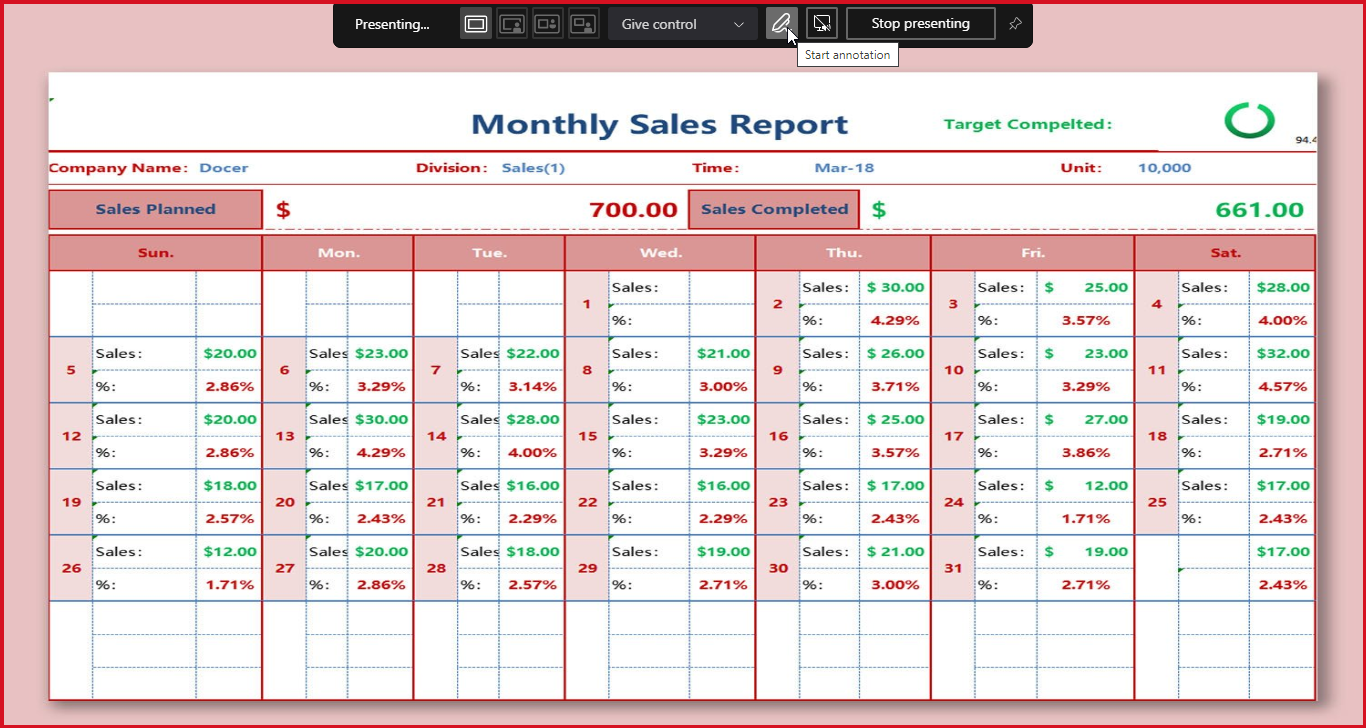
Step 1 : Start Annotation
If the pre-requisites mentioned above are met, you could see a Pen icon enabled in meeting controls at the top-center of your screen as shown below. Click on the Pen icon to start annotation.
Note : You must be a Presenter role in a meeting to turn on Collaborative Annotation.
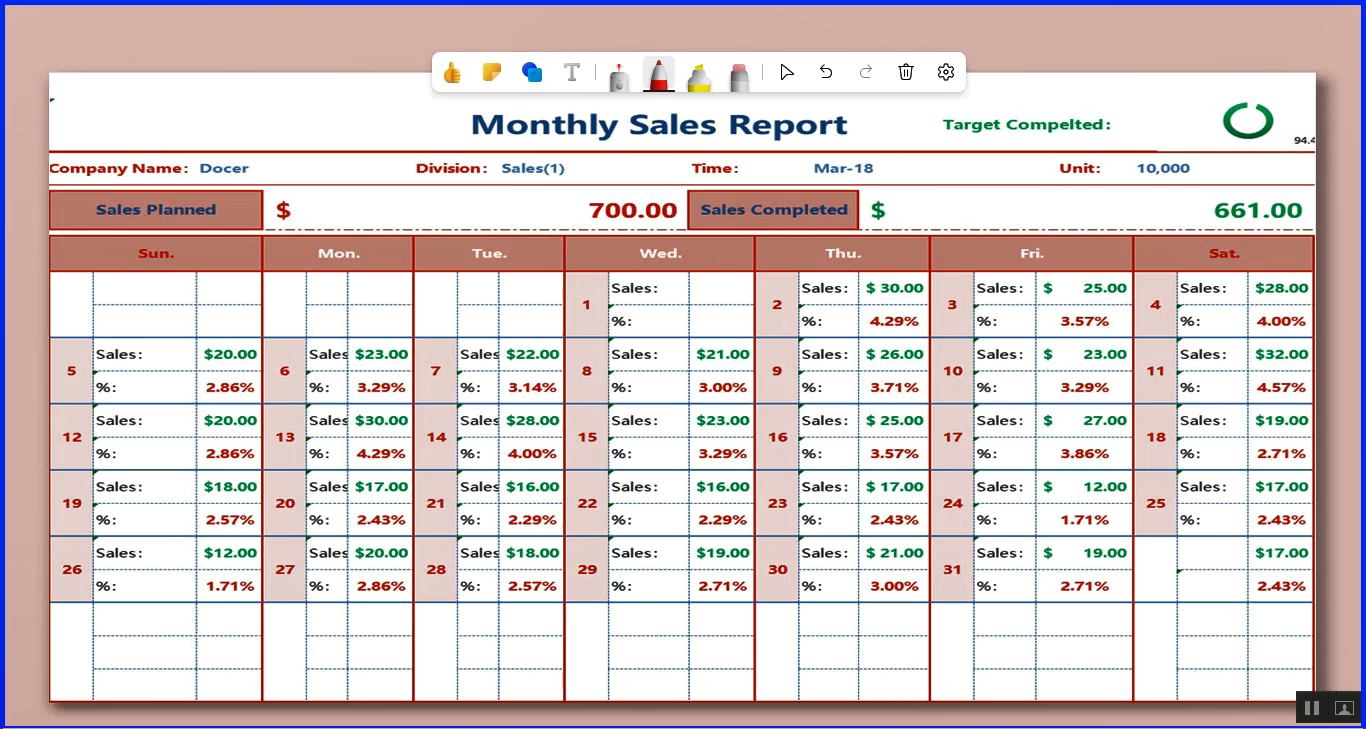
Post this, all attendees will witness a Whiteboard toolset with text, Sticky notes, Reaction tags, or digital ink on top of their screen to begin typing or drawing.
Also the red outline around the screenshare will turn blue, indicating Collaborative Annotation mode is on as shown below.
Step 2 : Tweak the settings
Setting 1 : Control who can annotate
To control who can annotate, there are two options from the Settings menu in the Collaborative Annotation toolbar – Everyone can annotate(enabled by default), Only I can annotate. To refrain others from annotating, the main Presenter can select “Only I can annotate”. Post which, only the main Presenter can annotate.
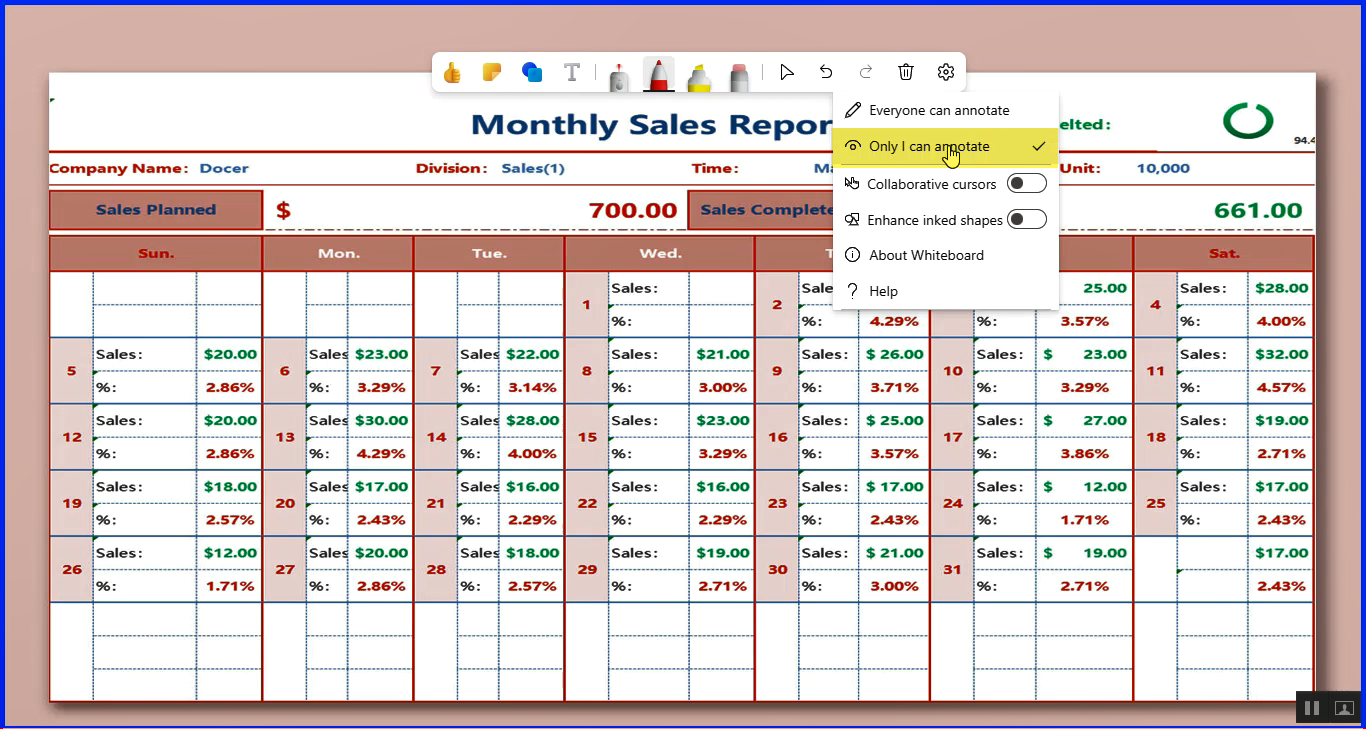
Setting 2 : Collaborative cursors
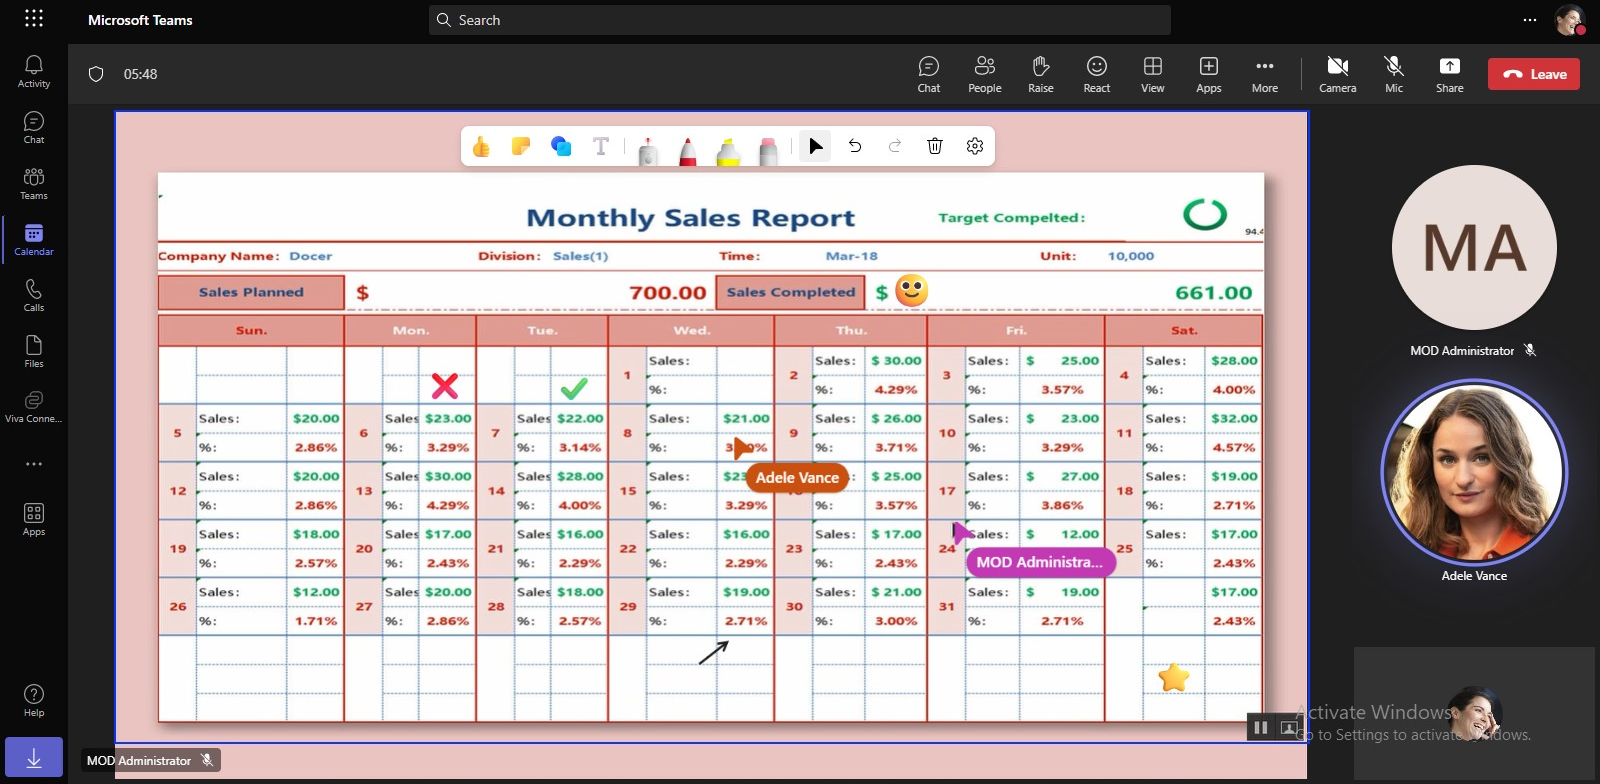
By enabling the option “Collaborative cursors”, the presenter could witness the cursors with the name of every attendee as they annotate, as shown below. This option is turned on by default.
Note : Only the Presenter could witness Collaborative cursors currently.
Setting 3 : Enhance inked shapes
If you want your hand-drawn shapes to change to precise shapes, you can use the optional Enhance inked shapes automatically feature by enabling it in Settings. When this is active, drawing a shape — such as a circle or square — will automatically change the hand-drawn ink strokes to a precise shape on your whiteboard.
Step 3 : Collaborate with annotations
Attendees can use the Whiteboard tools (reactions, sticky notes, laser pointer, text boxes and pens) to illustrate the presenter’s screen as depicted below.
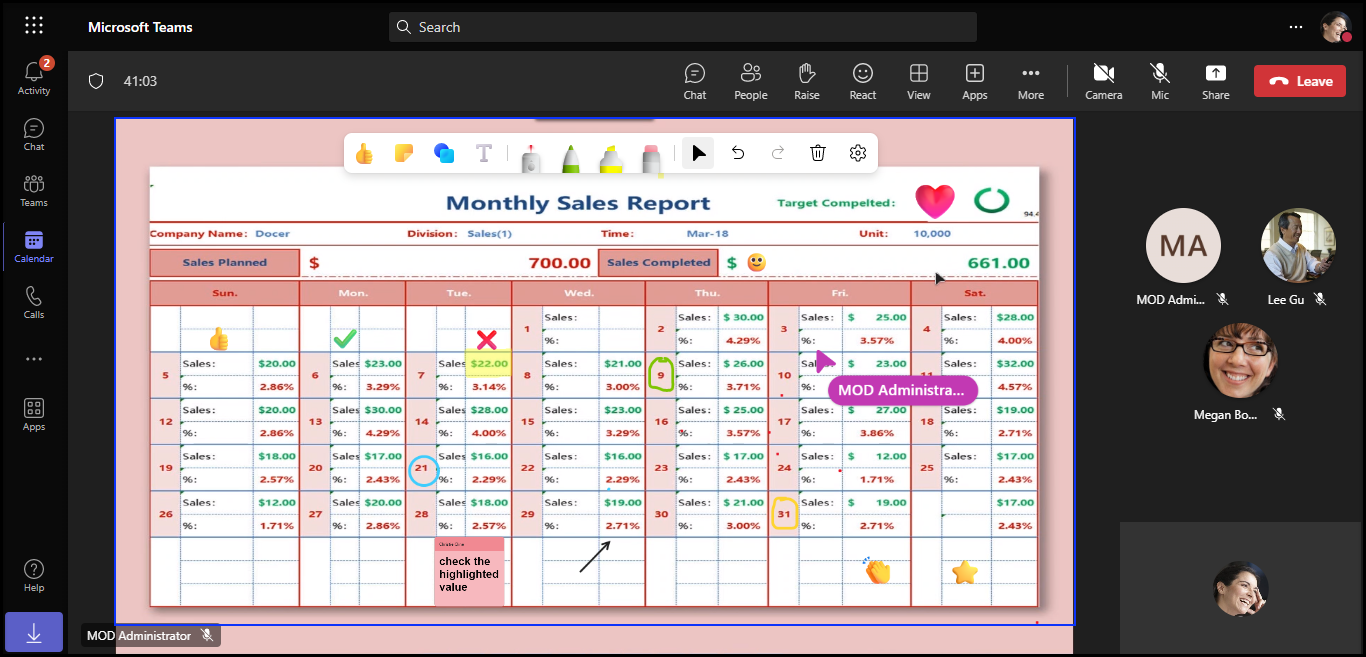
Tip : Exporting annotations is not possible but you can take screenshots during the meeting if you’d like to reference the annotated content later.
Points To Ponder
- Collaborative Annotation is available only when the entire screen is shared, not when you a specific window is shared.
- Mobile users cannot initiate Collaborative Annotation when sharing a content. Instead, if a desktop user shares the screen and enables Collaborative Annotation, they will able to annotate as well.
- Annotations for Teams web is not supported at this time.
- Exporting annotations is not currently supported, but you can take screenshots during the meeting to save annotated content for later if necessary.
- Meeting rooms using Android-based devices are not supported.
- The ability to start annotation and screenshot annotated content while you’re presenting on a Mac is coming soon.
Reference : https://support.microsoft.com/en-au/office/use-annotation-while-sharing-your-screen-in-teams