1 min to read
Schedule Send in Teams

In today’s world, it has become vital working with remote teams in various time zones. So, Microsoft has introduced a new feature to schedule the messages to be delivered in a later point of time during our peer’s work hours. Users also has got the luxury to edit and delete your messages before they get delivered.
One has to keep in mind that the Inline messages & attachments can be accessed by the recipient, only post the message is delivered.
Scheduling can be done both on desktop & mobile applications.
Pre-requisites
Prepare your Teams for Public Preview to witness this feature, by following the below steps.
✓ IT admins need to set an update policy that turns on Show preview features. Learn how at : Enable Public preview Policy in Microsoft Teams.
✓ Users then choose to join the public preview individually. Refer to - Enable Public Preview in Microsoft Teams for instructions.
How to use this new feature
In Teams Desktop / Web Application
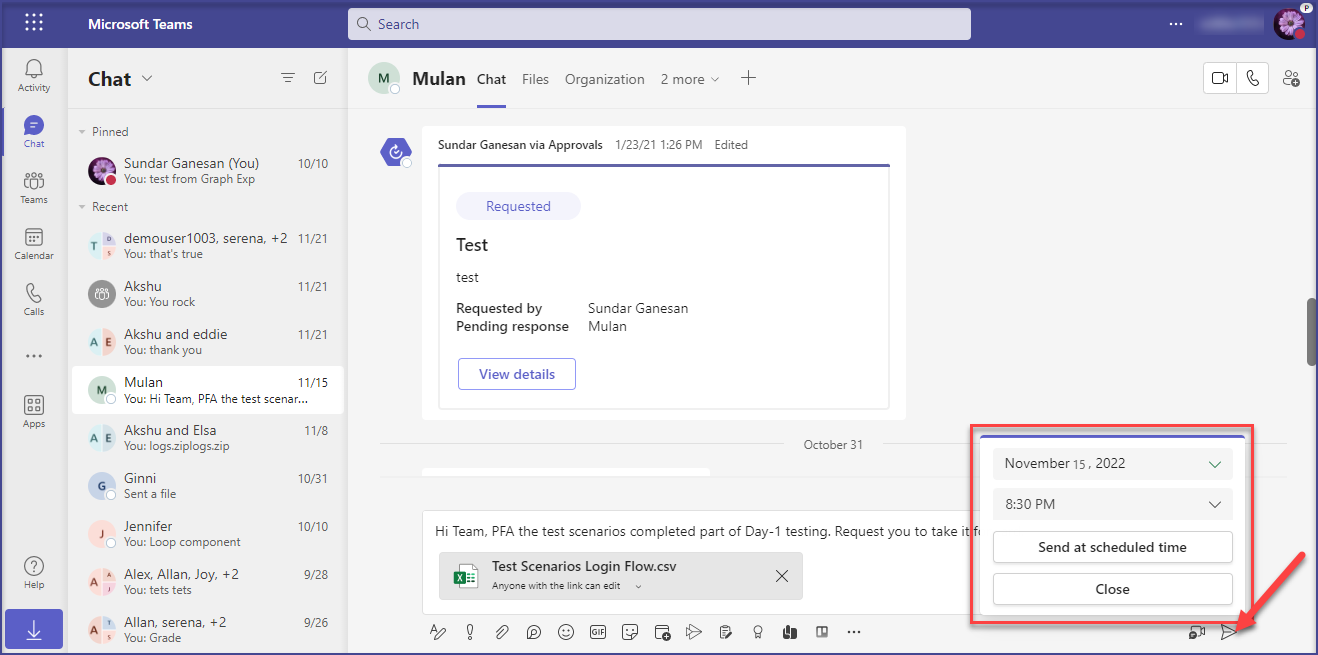
- Right click on send button - A Pop-up appears to choose the scheduled time slot.
- Pickup the date & time.

- Once the date & time are selected, this is how it portrays in the compose window.

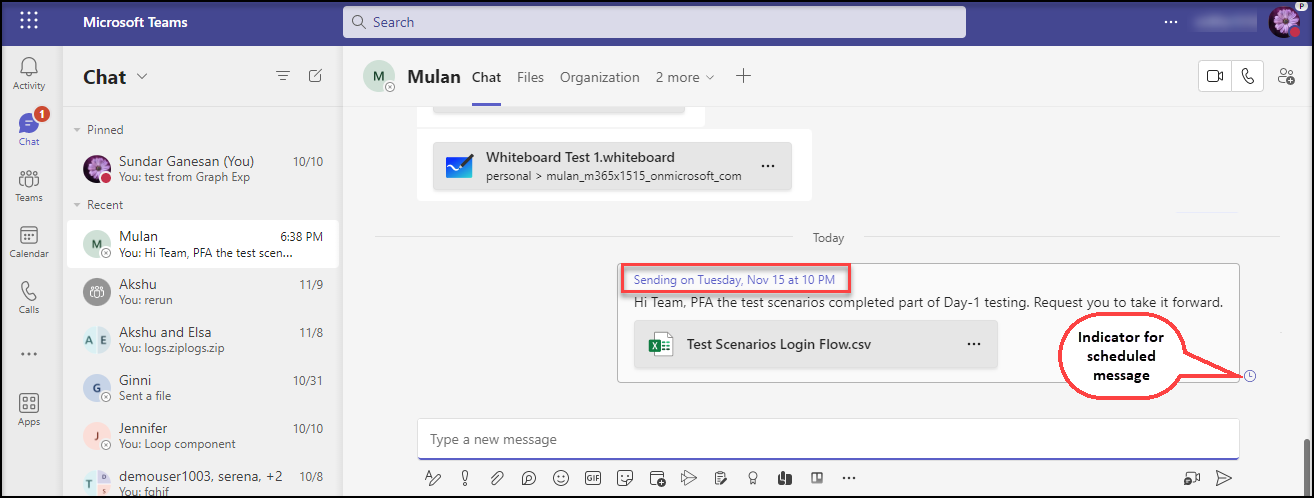
- Press Send button to initiate the schedule send.
- It appears with the scheduled time at the top as below.

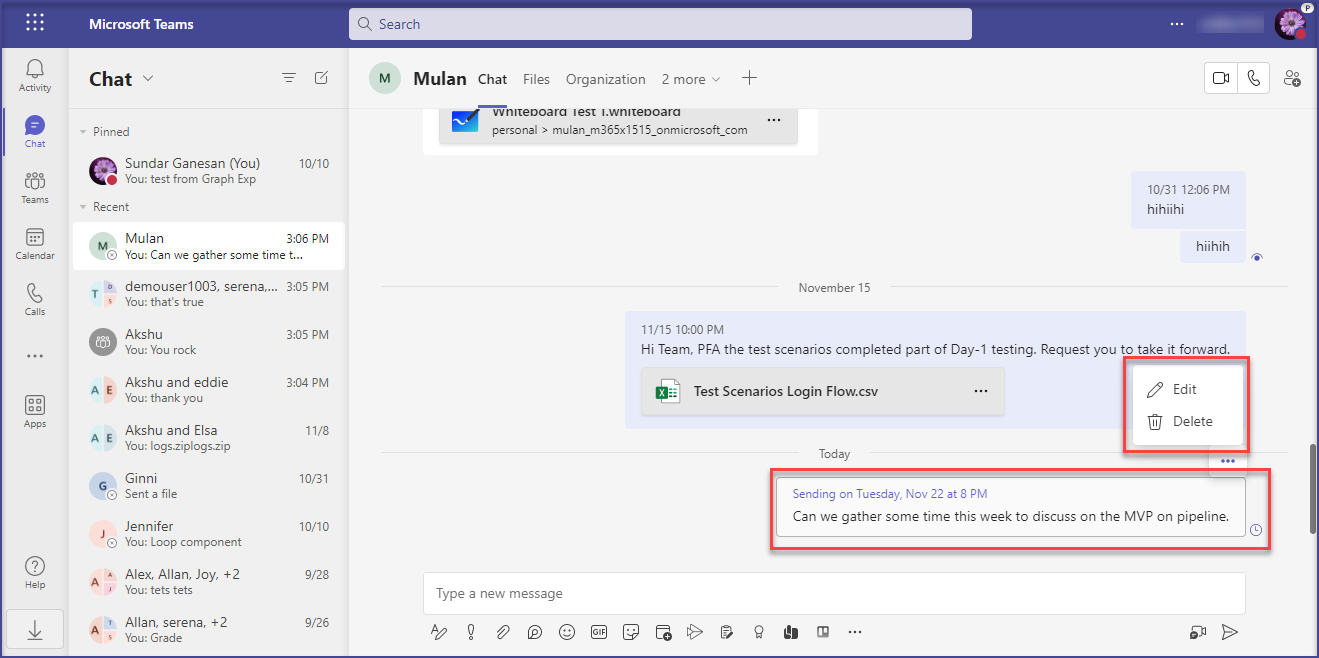
- Once scheduled, user has the options to either edit / delete the message before it is delivered.

- The message is delivered in the scheduled date & time.
In Teams Mobile
In Mobile, users will need to type the message and long press the send button to open the scheduling menu. Select the date and time and tap the “Send” to deliver it at a later time.
Note : This feature is currently not enabled in Teams Mobile Preview mode.
Limitations of this feature
🠊 The scheduled time is limited to be maximum 7 days.
🠊 The scheduled messages cannot be marked as important or urgent.
🠊 Channel conversations are not supported for Schedule Send.
