
Microsoft Teams keeps enhancing itself with the diligent new features day to day to enrich the user experience. Let’s walk over few such features introduced recently in Microsoft Teams.
The NEW Features listed below are Generally available.
- Pronouns on Profile Cards in Microsoft Teams and Outlook Web
- Busy-on-busy End User Setting
- Teams Help App Pops Out by Default
- Extend sensitivity labels to Team Meetings
1. Pronouns on Profile Cards in Microsoft Teams and Outlook Web
When colloborating with your colleagues, the simple act of using the right pronouns for one another can help build trust and improve communication. Now users can define their pronouns on how they wish others to address them.
As a preparatory action, admins have to enable Pronouns at the organizational level. Please refer the below steps to enable the same.
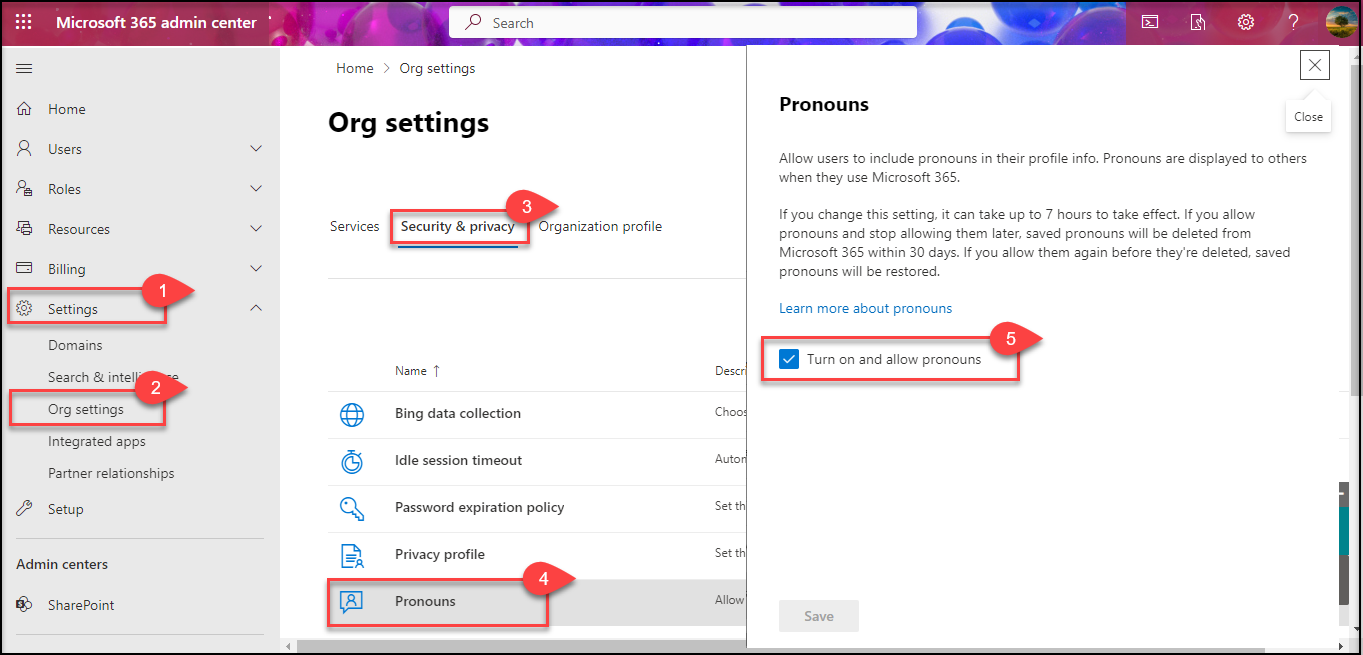
In the Microsoft admin center,
- Navigate to Settings -> Org Settings
- Move to ‘Security & privacy’ tab
- Click ‘Pronouns’ from the list
- Enable the option ‘Turn on and allow pronouns’
Note : Post this option is turned on, it takes upto 7 hours for end users to witness them in their Teams.
Now, lets see how to define and use them across Teams and Outlook.
In Microsoft Teams
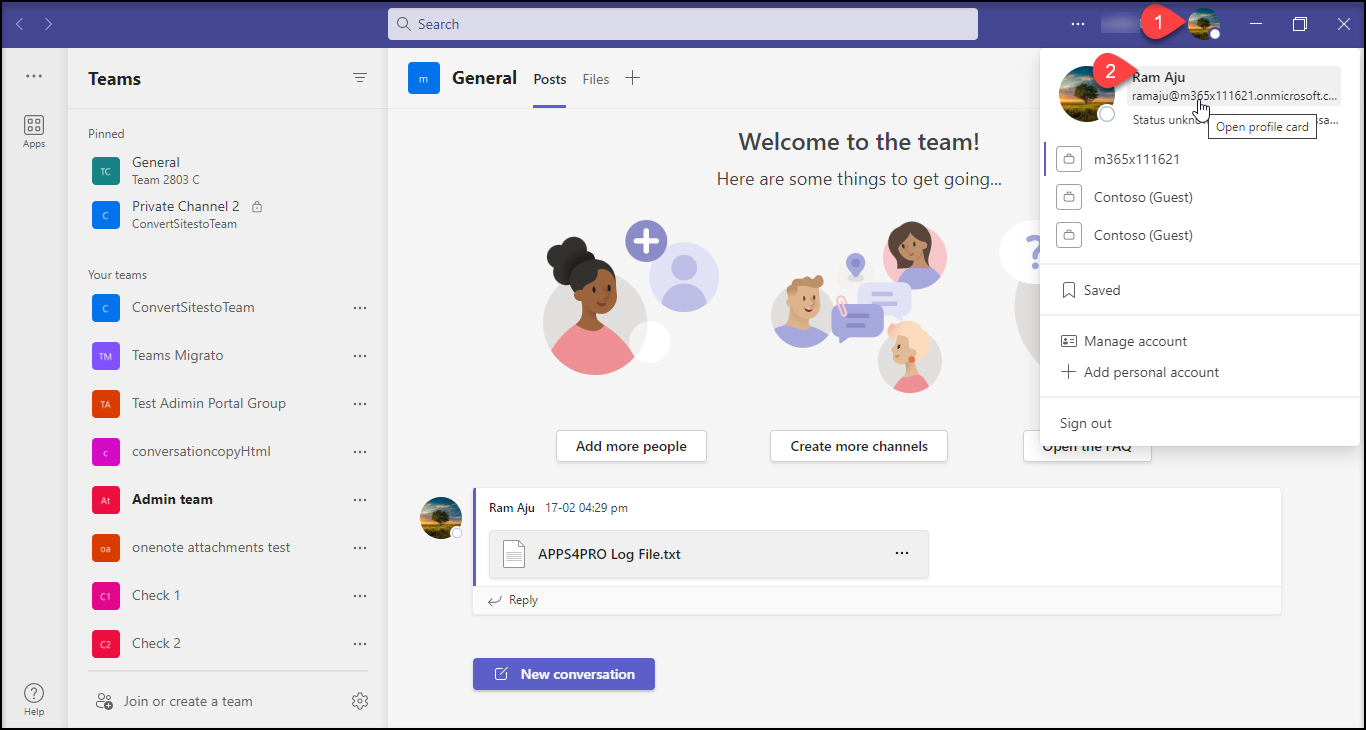
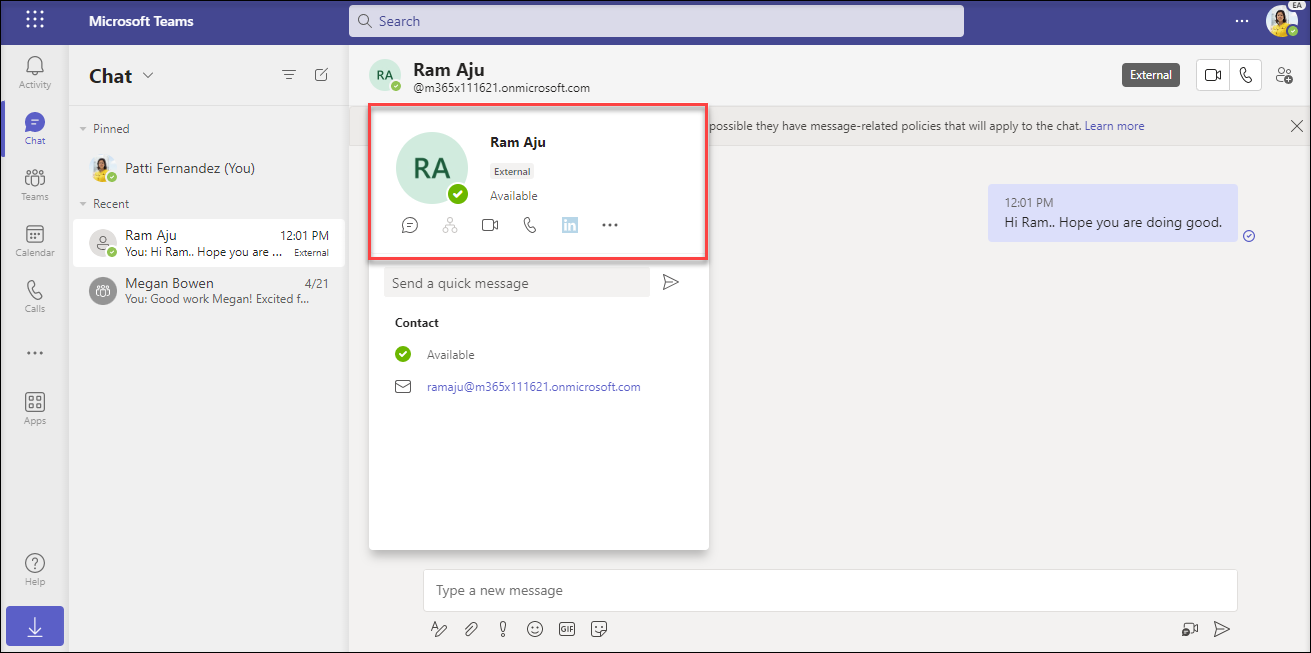
In Teams, click on your profile picture on the top right & click on your name to open your ‘Profile card’. You will find a new option ‘Pronouns’ next to your name in the Profile card as indicated below.

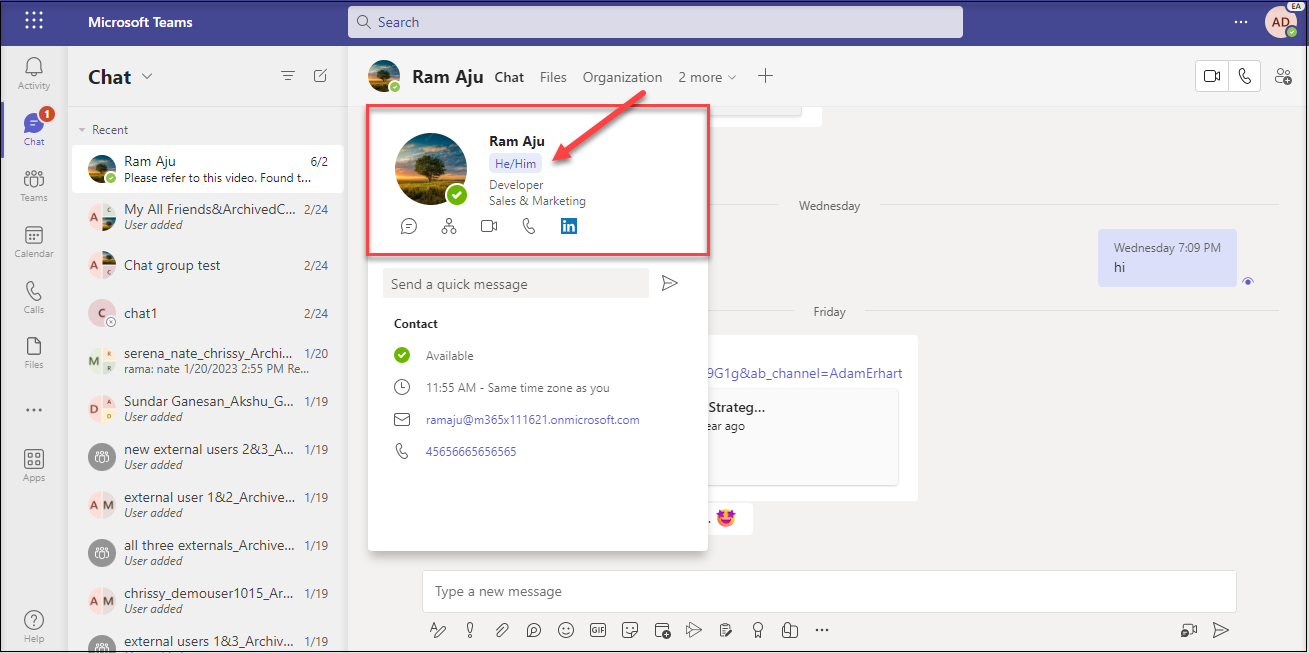
It is portrayed as below post setting the value
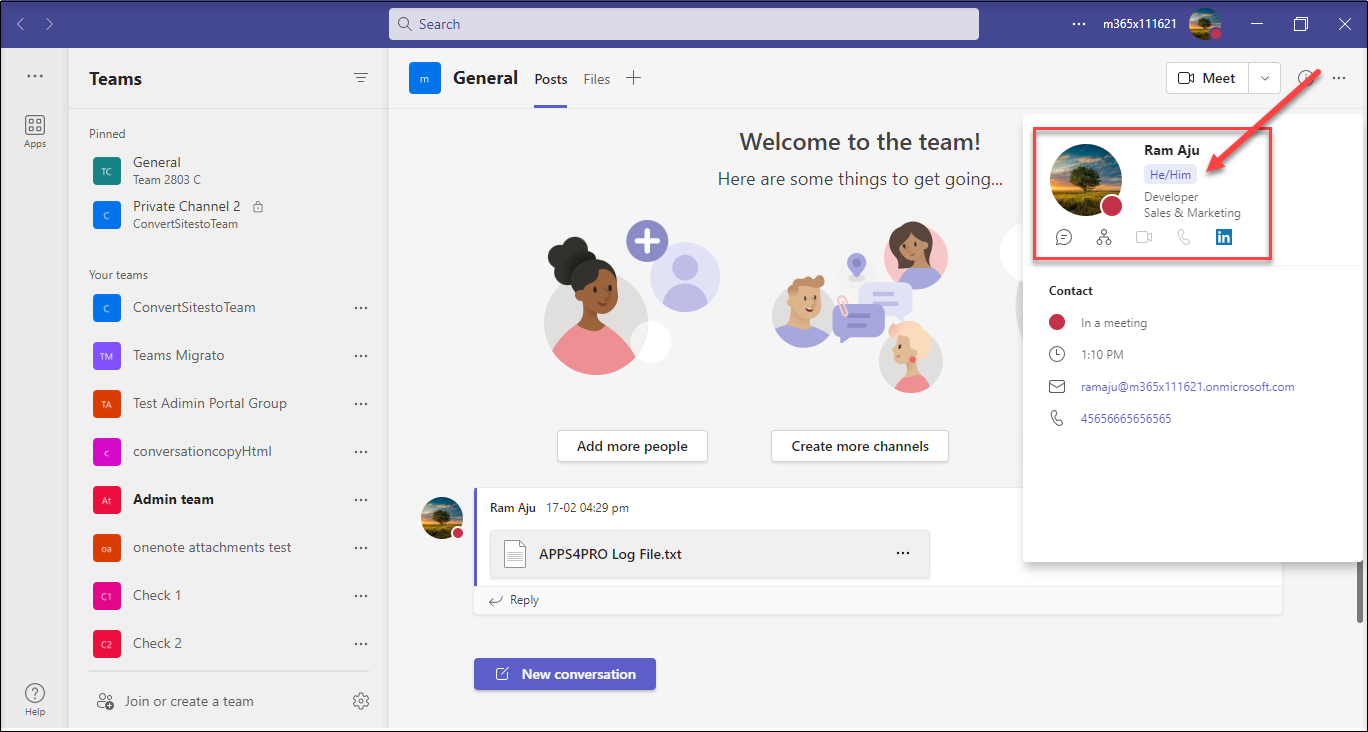
How other internal users see it
How external users see it
They do not see it, as Pronouns are visible only to the internal users of an organization.
In Outlook
In Outlook, reach out to one of the mails from your Inbox, then click on your name. The profile card then pops up as below. You could view and edit the pronoun from here.

Reference : https://support.microsoft.com/en-us/office/pronouns-on-your-profile-in-microsoft-365
2. Busy-on-busy End User Setting
This new setting introduced, help you manage how incoming calls are routed when you are busy in an existing call or meeting directly. You can configure this from your Calls settings in the Teams app or on the web.
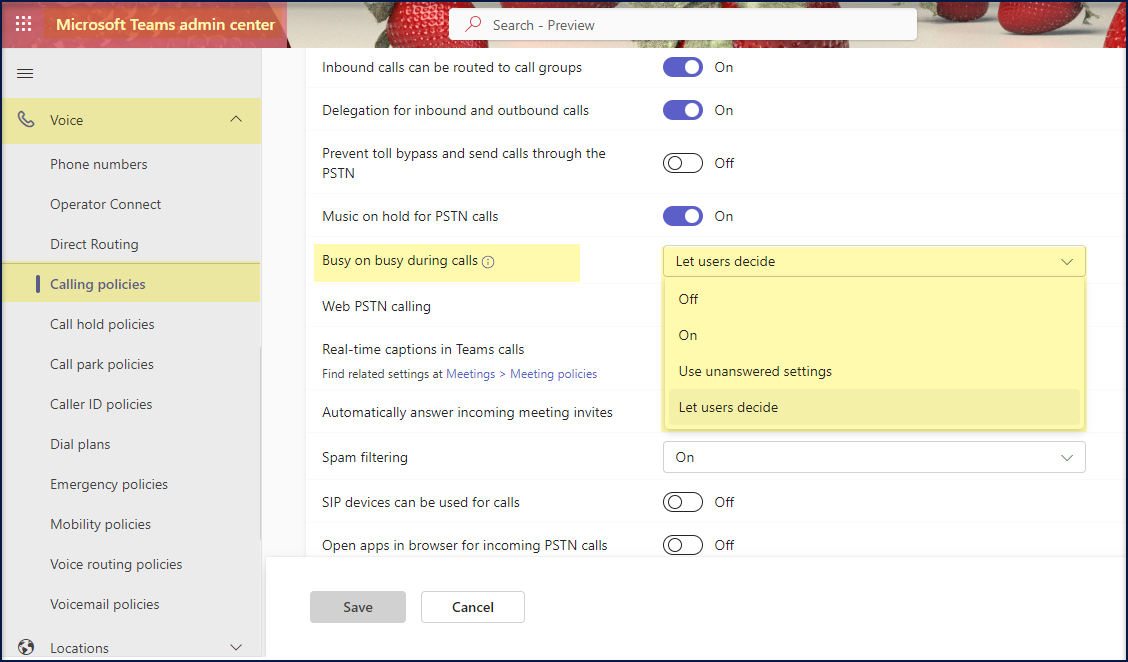
Step 1 : In the Teams admin center, enable the calling policy – “Busy on busy during calls” to be ‘Let users decide’ to use this feature.
You could also opt to choose ‘Use unanswered settings’ wherein the unanswered settings added by the user will be applied.
This setting is set to Off by default.
Let’s see the Busy on Busy Policy Settings, it’s behaviour and its equivalent Team Setting.
| Busy on busy policy setting | How it behaves | Equivalent Team Setting |
|---|---|---|
| Off | Incoming calls still ring even if the user is already in a call | Let new calls ring me |
| On | Incoming calls will be rejected with a busy signal | Play a busy signal |
| Use unanswered settings | Decided based on users’ unanswered settings | Redirect as if call is unanswered |
| Let users decide | Decided by the users | Decided by the users |
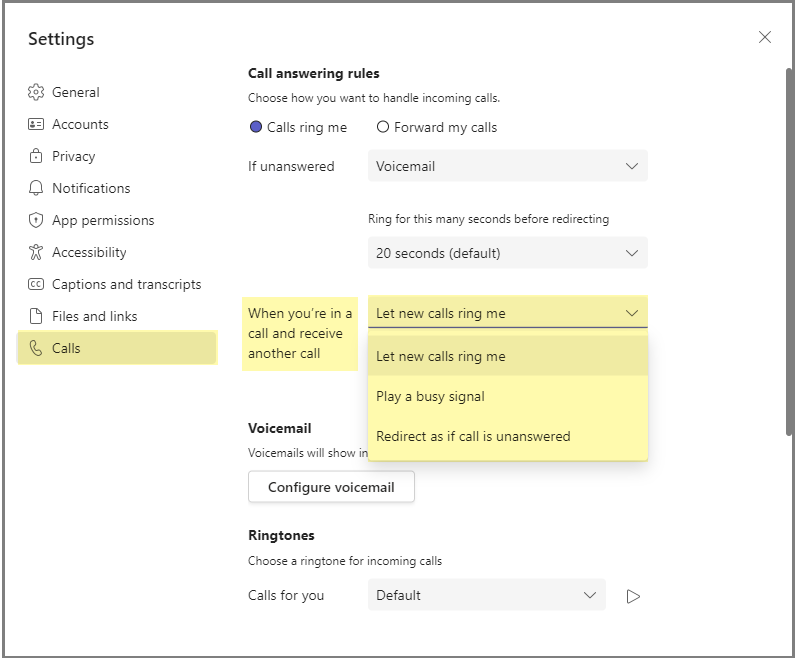
Step 2 : In Teams Settings -> Call -> “When you’re in a call and receive another call”, choose from the below options
- Let new calls ring me
- Incoming calls will be forwarded to your device, regardless of whether you are already in a call or meeting.
- Play a busy signal
- Intimates the caller that you are not available at the present moment.
- Redirect as if call is unanswered
- Uses the unanswered settings to decide whether to route to Voicemail or Do Nothing.
Reference : https://learn.microsoft.com/en-us/microsoftteams/teams-calling-policy#busy-on-busy-during-calls
3. Teams Help App Pops Out by Default
Microsoft is bringing in popping-out features in Teams to encourage the effective way of multi-tasking while conversing with your colleagues.
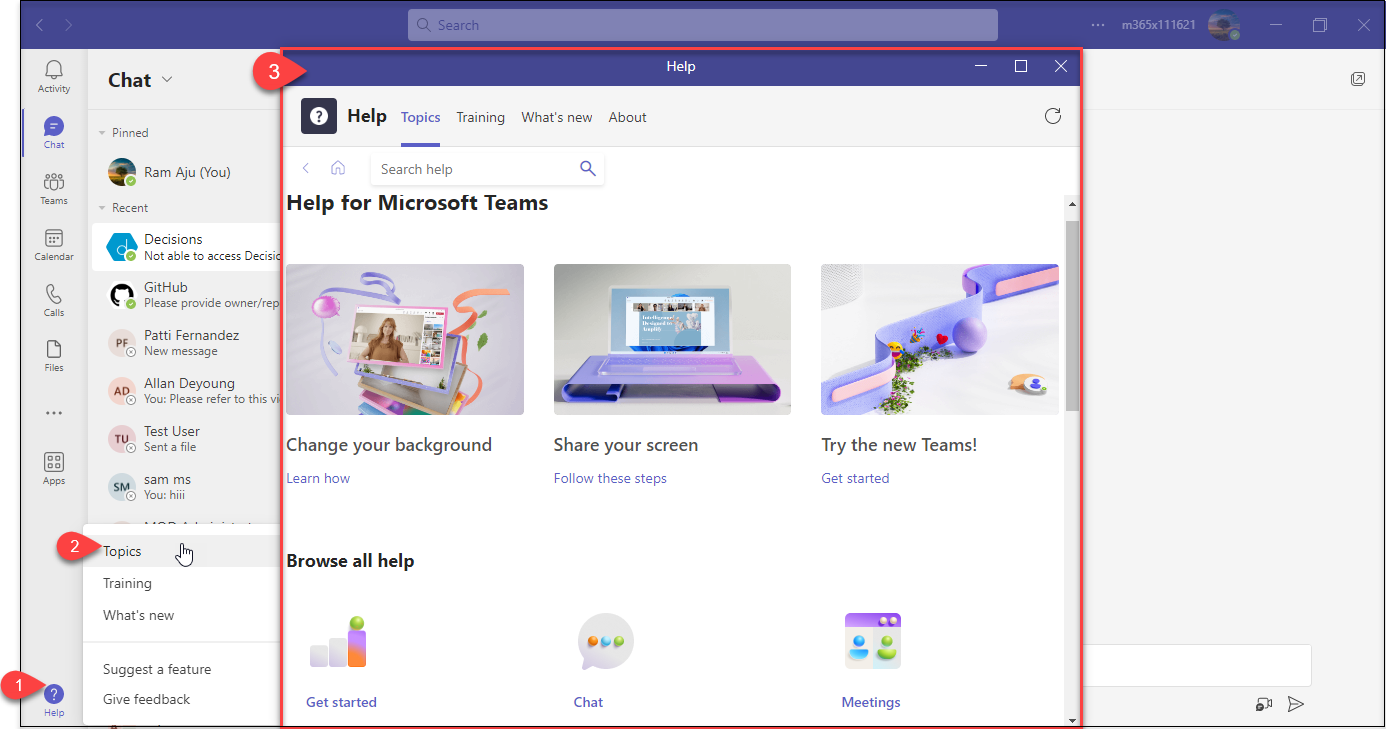
Previously, the Help app opened within the same Teams window . With a recent update, the Help app will now open as a pop-out as a separate window. This change will allow users to view Help app content separately along with their current Teams content.
All the child topics under Help, pop-out in a separate window that include :
- Topics
- Training
- What’s new
- Suggest a feature
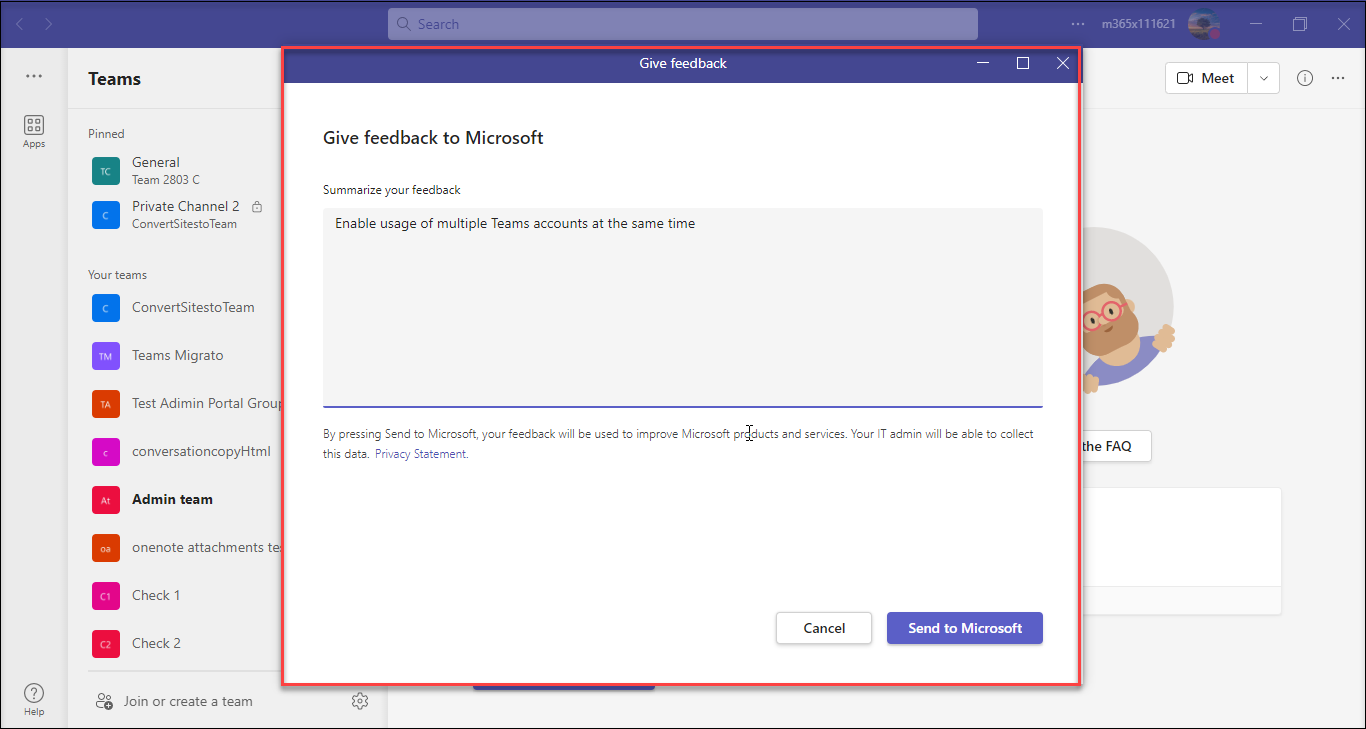
- Give feedback
Note : What’s new, Topics previously part of the Search content has now been moved to ‘Help’.
Topics popping-out in a separate window
Feedback popping-out in a separate window
This is how it looks once you post a message to Everyone.
4. Extend Sensitivity Labels to Team Meetings
Now, users have the luxury to assign sensitivity labels to Team Meetings. Once the IT admins create sensitivity labels for different levels of confidentiality, they can use them in the Teams Meetings.
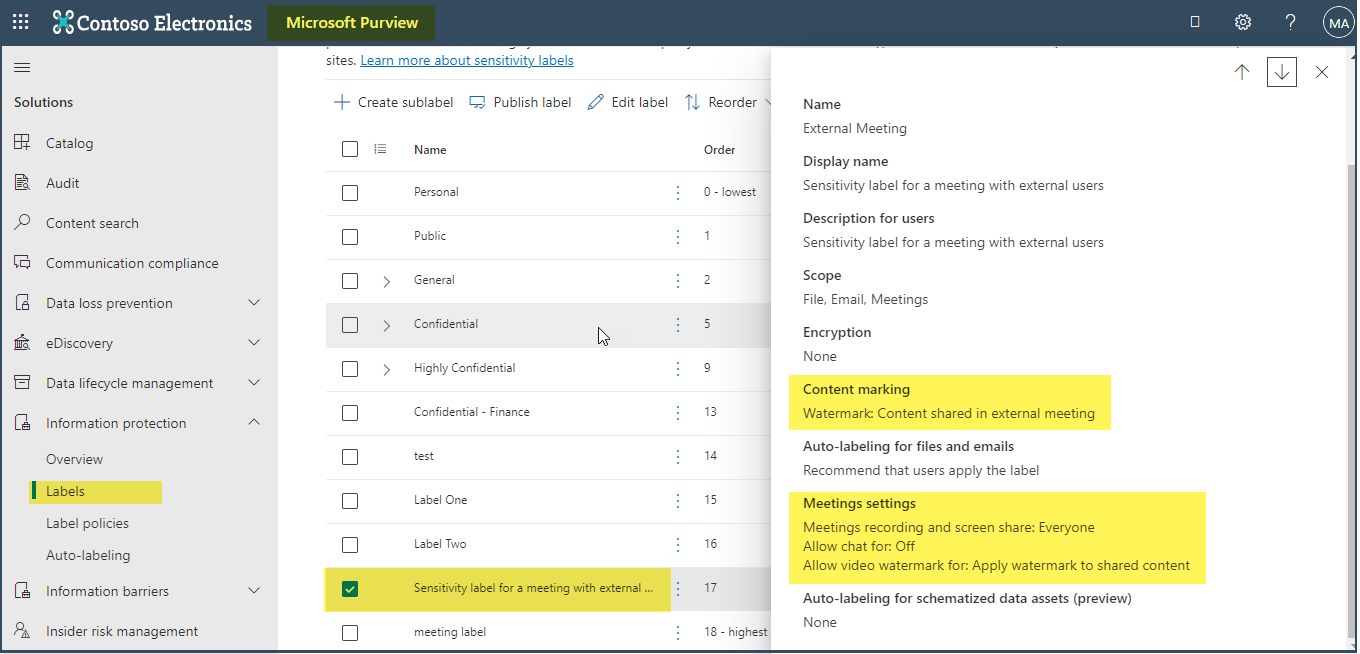
Glimpse of the sensitivity label created for Teams Meeting with external users
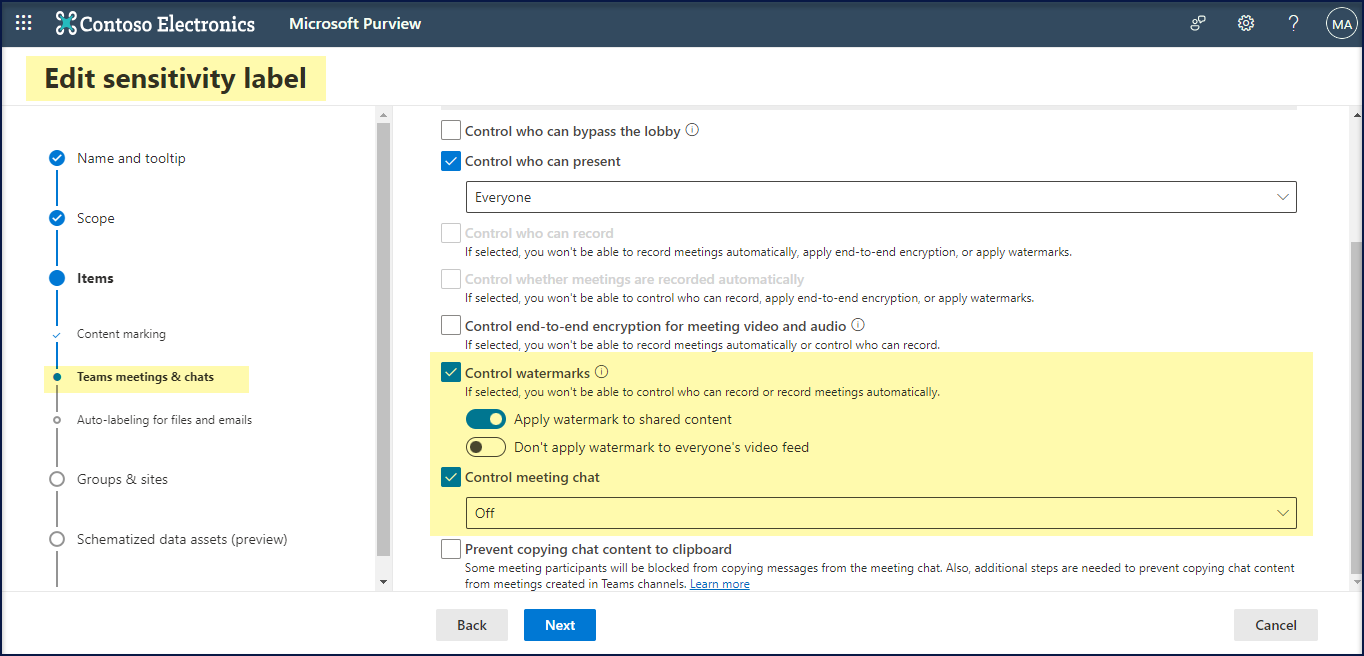
Sensitivity Label during In Creation Mode
In this Label, we have restricted the meeting chat and applied watermark to shared content to see how it behaves during the meeting.
Sensitivity Label – Overview
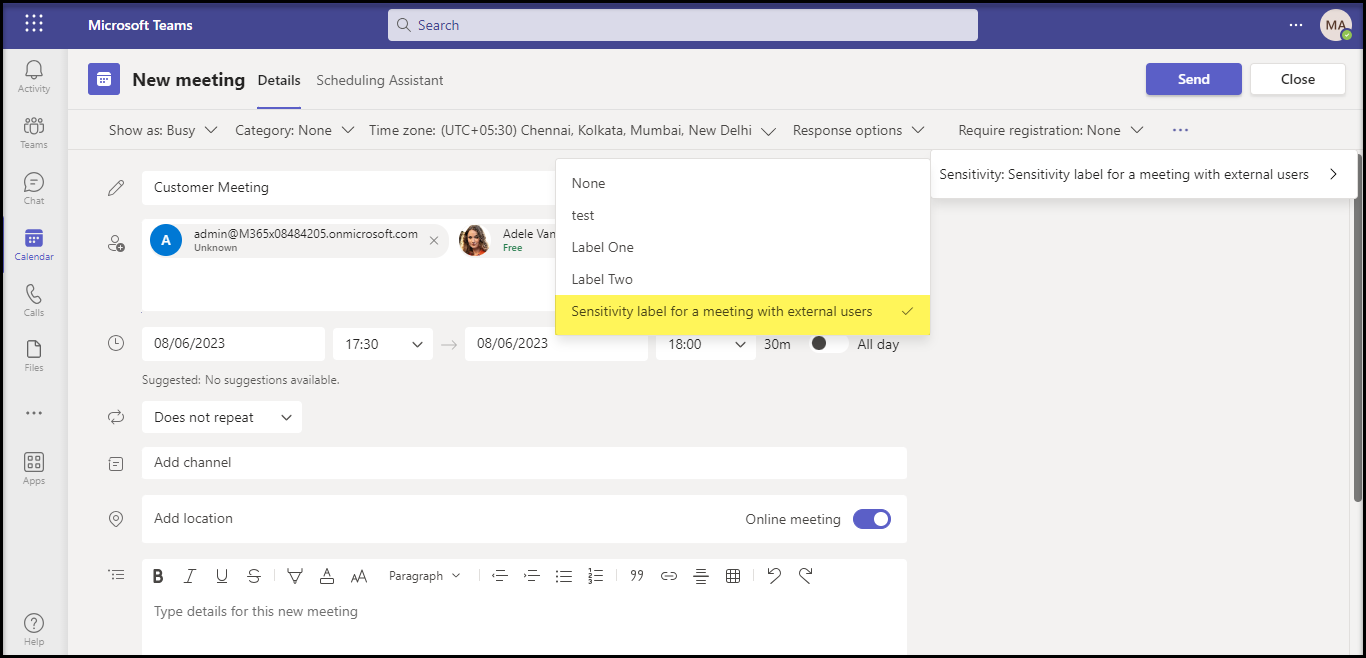
Apply Sensitivity Label
When you create a new meeting, expand Sensitivity from the Meeting Details. This will list down the Sensitivity Labels available. You can choose the label that best suits your meeting’s level of confidentiality requirement.
You can also change the label during the meeting by following the below simple steps.
- Join the Teams Meeting
- Choose More -> Settings -> Meeting Options
- Expand the Sensitivity labels & you can choose the label that best suits your meeting
Sensitivity Label Applied during Meeting
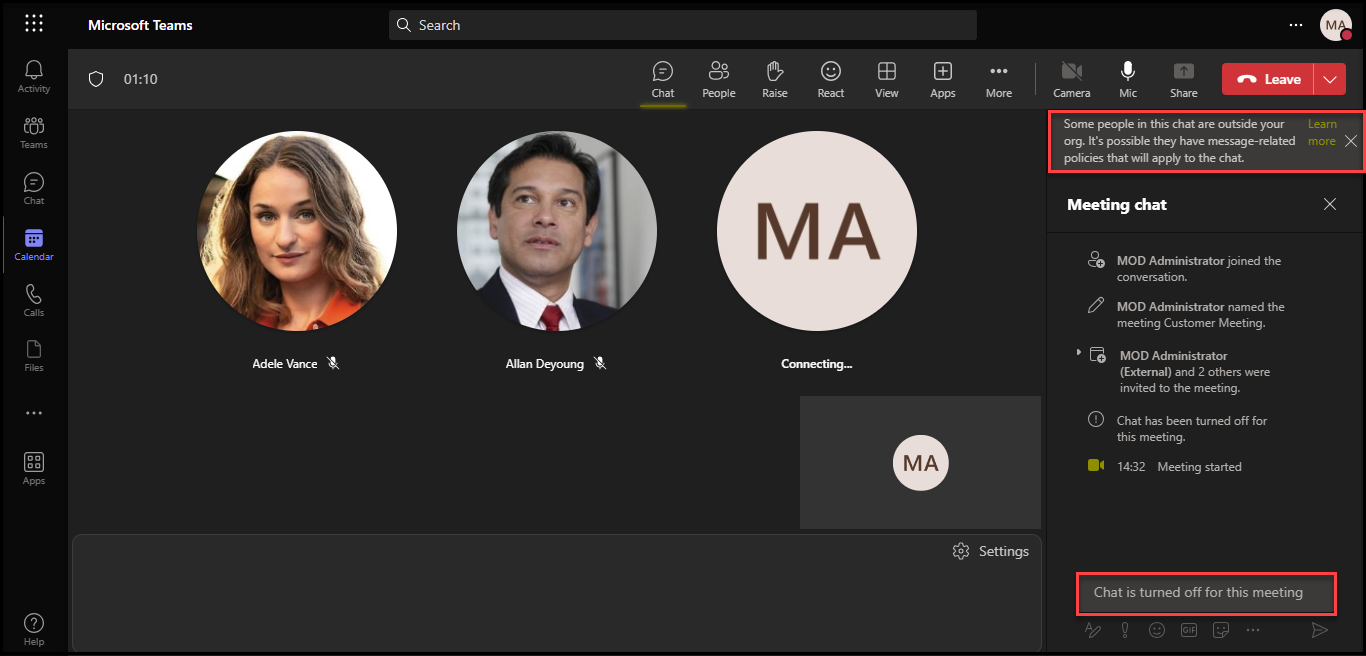
Chat Disabled
This is how it works : Since ‘Allow Chat’ is off, users will not be able use the chat window during the meeting. Users see informational messages as indicated below.
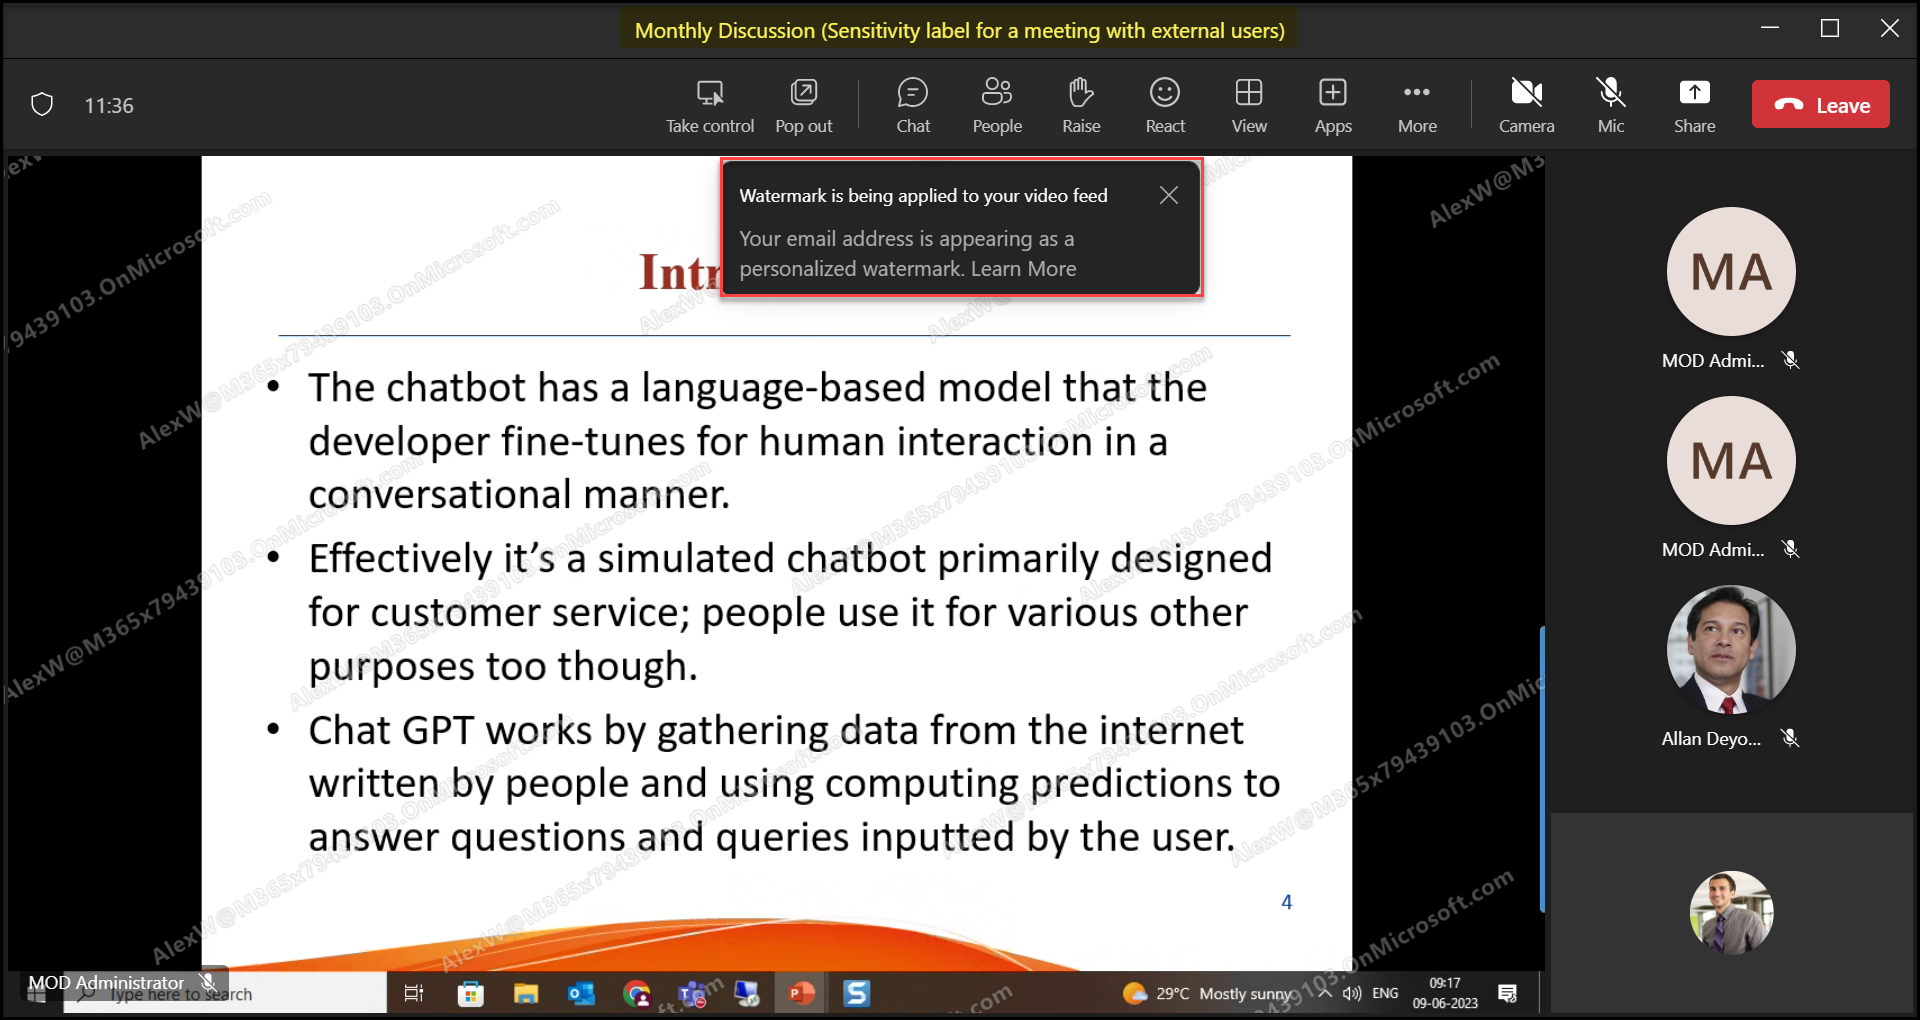
Watermark Applied
Internal Users
This is how the internal users perceive watermarking in the video feed during the meeting. They find the name of the Sensitivity Label applied to the Meeting along with the Meeting Title at the top.
External Users
This is how the external users perceive watermarking in the video feed during the meeting. They find that the Meeting is protected.

Points to ponder
- Sensitivity labels require Teams Premium License
- Sensitivity labels can only be applied to channel meetings for teams that have already configured sensitivity settings.
- Scheduling meetings with sensitivity labels is currently supported only on Teams Desktop
Reference : https://support.microsoft.com/en-au/office/sensitivity-labels-for-teams-meetings