After deploying on-premises data
gateway, now
it’s time to connect on premise data to Office 365 applications. In this
blog we will walk you through the steps involved in connecting on
premise SharePoint 2016 and SQL 2016 to Office 365 using On-premises
data gateway and accessing the on premise data via PowerApps.
Steps Involved,
- Connecting SharePoint 2016 to Office 365
- Connecting SQL 2016 to Office 365
- Accessing SharePoint List – Items via PowerApps
- Accessing SQL Table – Records via PowerApps
Connecting SharePoint 2016 to Office 365
You can connect on premise applications to Office 365 by signing in as
account used to deploy gateway to any one of the Office 365 applications
like PowerApps or Microsoft Flow and add your required connections.
Note : Connection added in any one Office 365 application will be
available for access to all other applications. For example, if you
added on premise SQL connection by signing in to PowerApps, then you can
also use that SQL connection for Microsoft Flow.
Here, I sign in to PowerApps and add connection for SharePoint 2016 as
follows,
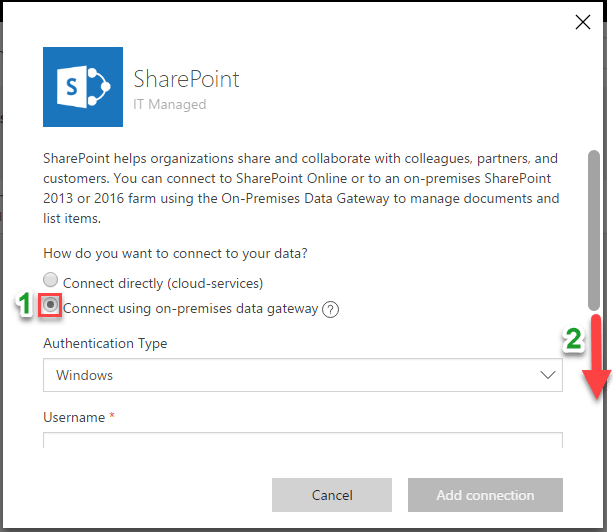
- In the SharePoint connection, select the optionConnect using
on-premises data gateway and scroll down.
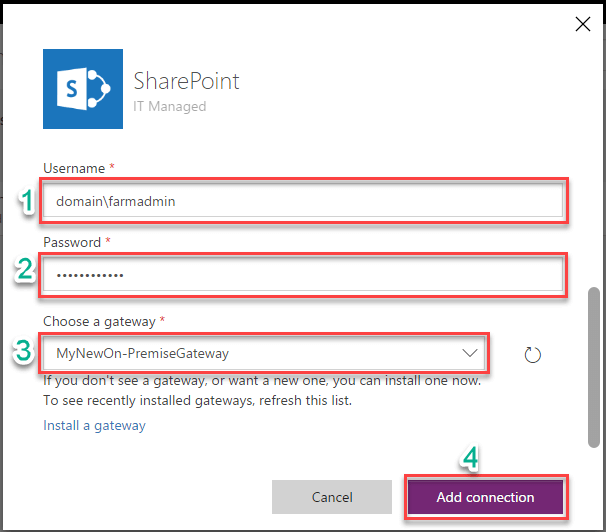
- After scroll down, provide SharePoint farm admin credentials and
select your relevant on-premises data gateway and click Add
connection.
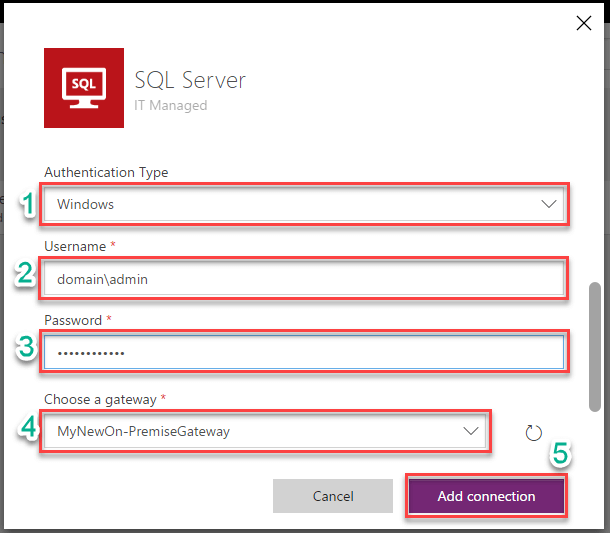
Connecting SQL 2016 to Office 365
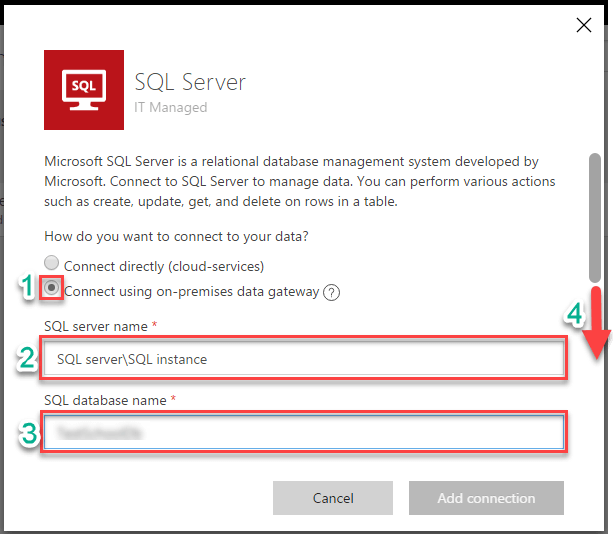
- In the SQL connection, select the option Connect using on-premises
data gateway, provide SQL server name, SQL database name and
scroll down.
- After scroll down, select authentication type, provide user
credentials to connect SQL and select your relevant on-premises data
gateway and click Add connection.
Note: Using single on-premises data gateway you can create multiple
connections to connect multiple on premise applications to Office 365
applications.
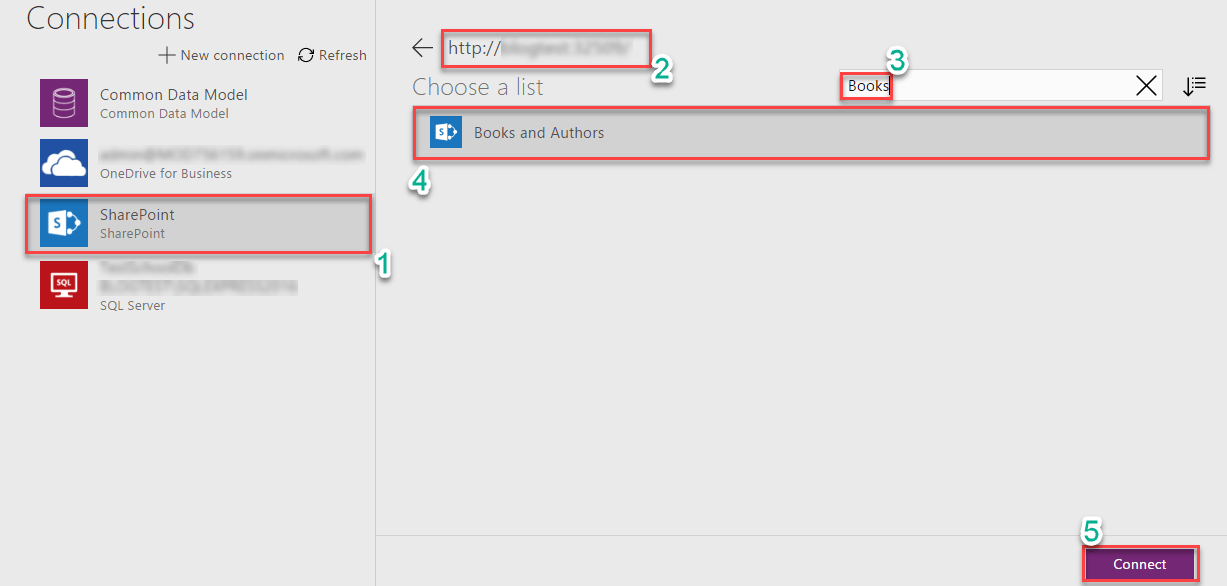
Accessing SharePoint List – Items via PowerApps
- For example, for creating of a new app for listing the items of
SharePoint List in PowerApps, you need to select the relevant
SharePoint connection, then provide the Url for corresponding
SharePoint site and connect to your required SharePoint List, as
shown in the below screenshot.
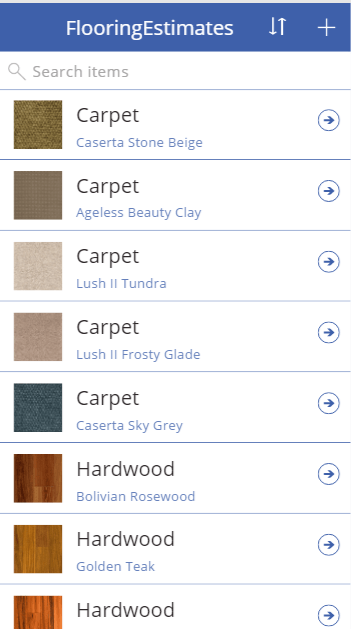
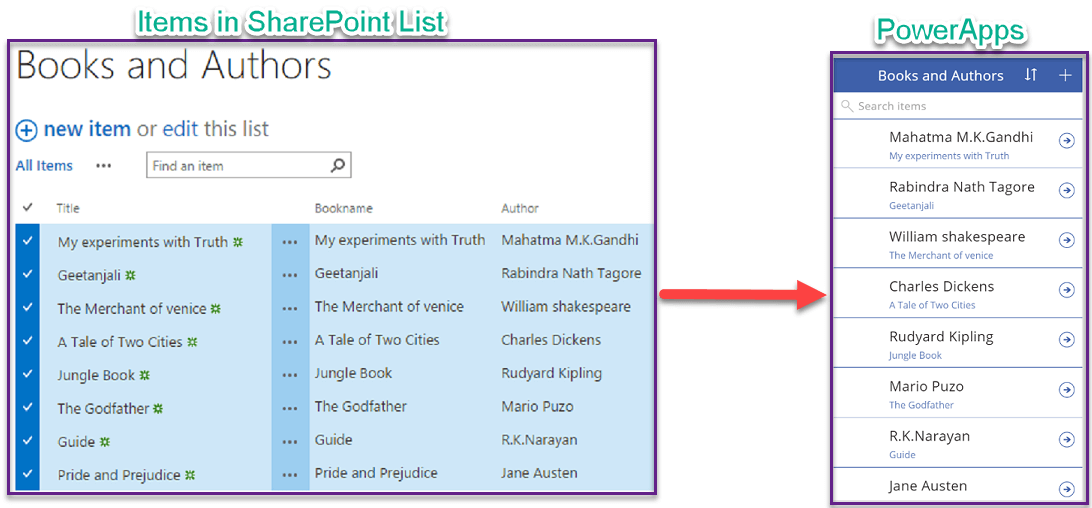
- Finally, you can access the items in your SharePoint List in
PowerApps as shown in the below screenshot.
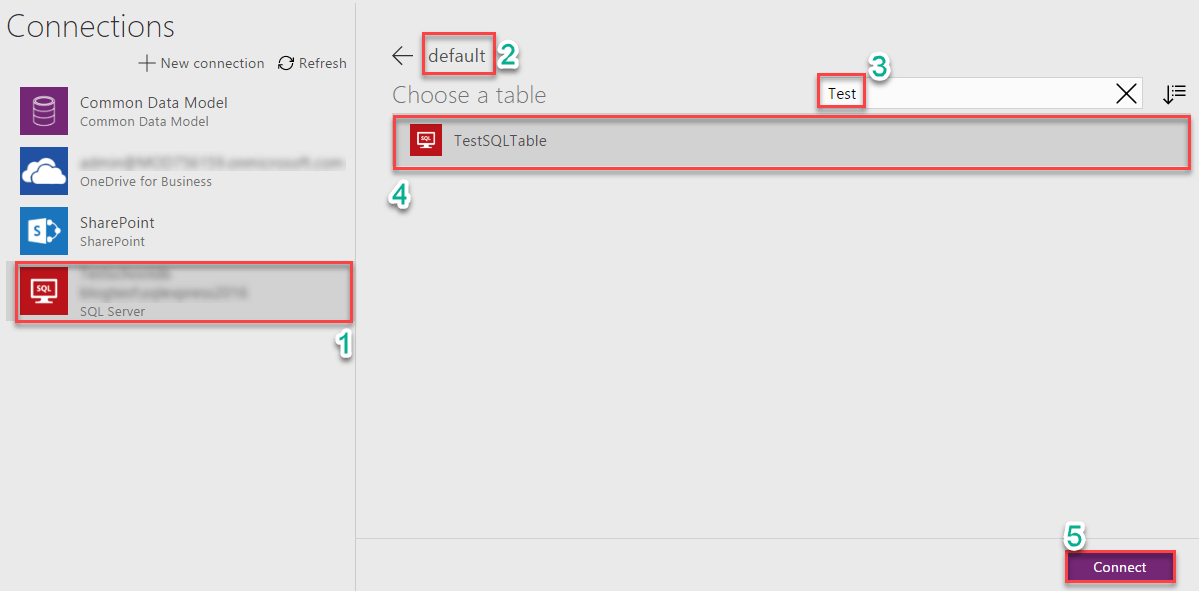
Accessing SQL Table – Records via PowerApps
- Similarly, for creating of a new app for listing the rows of SQL
table in PowerApps, you need to select the relevant SQL connection,
then select the dataset for corresponding SQL database and connect
to your required SQL Table, as shown in the below screenshot.
- Finally, you can access the rows in your SQL Table in PowerApps as
shown in the below screenshot.